Best Loaded Nachos Recipe for Game Night Parties
By Chef John | Easy Recipes & Smart Cooking Hacks
Here Is What Keeps Going Wrong
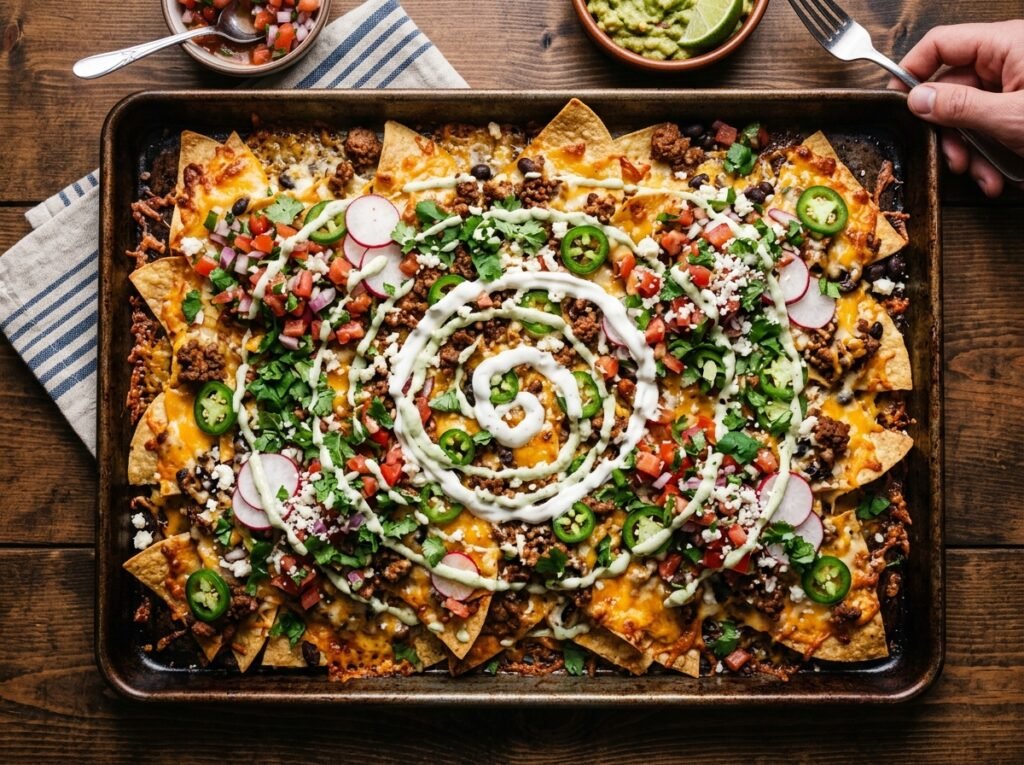
Here is what keeps going wrong with loaded nachos at every party you have ever hosted: the top chips are perfectly cheesy and golden, the middle layer is completely naked, and the bottom is a structural disaster — a wet, collapsing swamp of chips that absorbed every drop of moisture from the salsa, the beans, and the meat juices above them. By the end of the second quarter, nobody is reaching for the bottom of the platter.
This best loaded nachos recipe solves the layering problem permanently — and it does it with a structural approach that most home cooks have never considered.
I have tested this structural layering matrix across dozens of game night football crowds, isolating the exact lipid barrier trick that keeps chips crunchy for hours under hot toppings. The difference between a nacho platter that holds together through overtime and one that collapses at halftime comes down to three decisions: chip selection, cheese sequencing, and moisture management. Get those three right and everything else takes care of itself.
Let me show you exactly how it works.
The Science of Crunch That Lasts
The enemy of great nachos is moisture migration, and understanding it changes everything about how you build the platter.
A corn tortilla chip is essentially a porous starch grid — a dehydrated matrix of gelatinized corn starch with thousands of microscopic channels running through it. The moment that starch grid makes contact with any water-based topping — salsa, beans, meat juices, or sour cream — capillary action pulls the liquid deep into the chip structure. The starch re-hydrates almost instantly, the chip loses its rigidity, and you get the soggy collapse everyone has experienced.
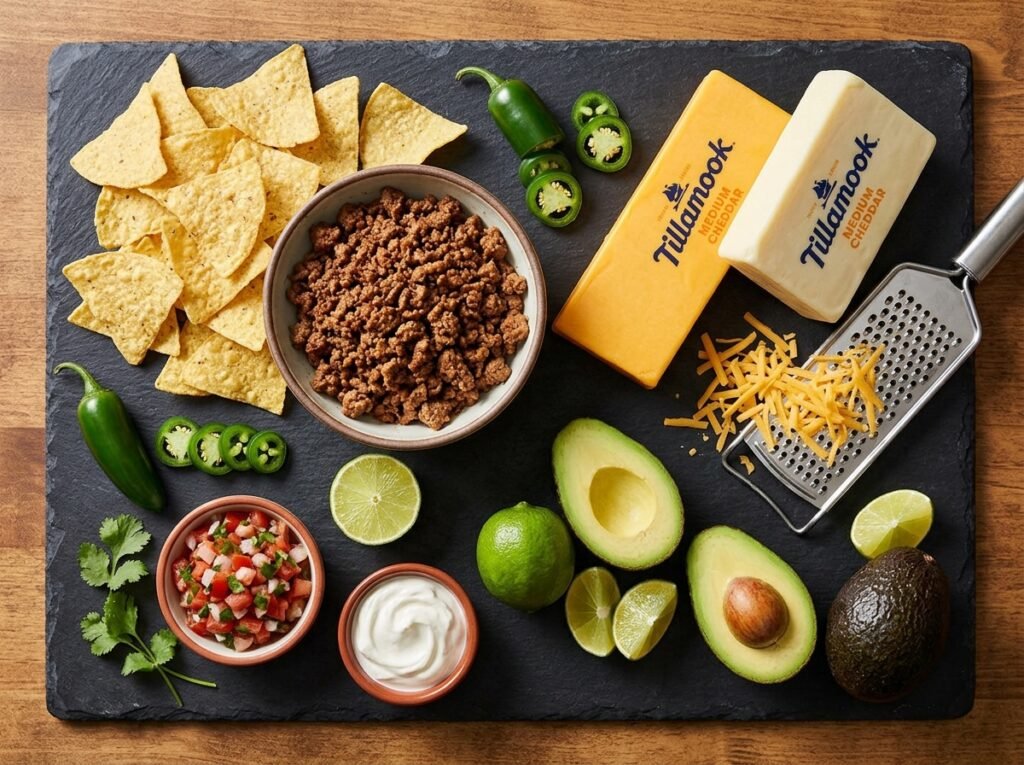
The solution is a protective lipid barrier. Fat molecules are hydrophobic — they physically repel water. When you lay a thin, deliberate layer of freshly shredded melted cheese directly on the first chip layer before any wet toppings go on, the rendered dairy fat coats the exposed starch surfaces and creates a water-resistant membrane. Moisture from the meat and salsa above cannot penetrate as easily because it has to work against that fat layer first.
In simple terms: cheese is not just a topping here. It is a structural waterproofing agent.
The second problem is the cheese itself. Pre-shredded bagged cheese is coated in cellulose powder — a food-grade anti-caking agent that prevents clumping in the bag. Under oven heat, that cellulose coating interferes with the protein-to-protein binding that makes melted cheese stretch and flow. Instead of a smooth, cohesive melt, you get a greasy oil separation as the fat renders out faster than the proteins can hold the emulsion together.
Tortilla Corn Starch+Protective Lipid Layer×Controlled Heat→Zero Soggy Chips
In simple terms: buy a block, shred it yourself, and your cheese will melt the way it is supposed to — smooth, cohesive, and cling-worthy.
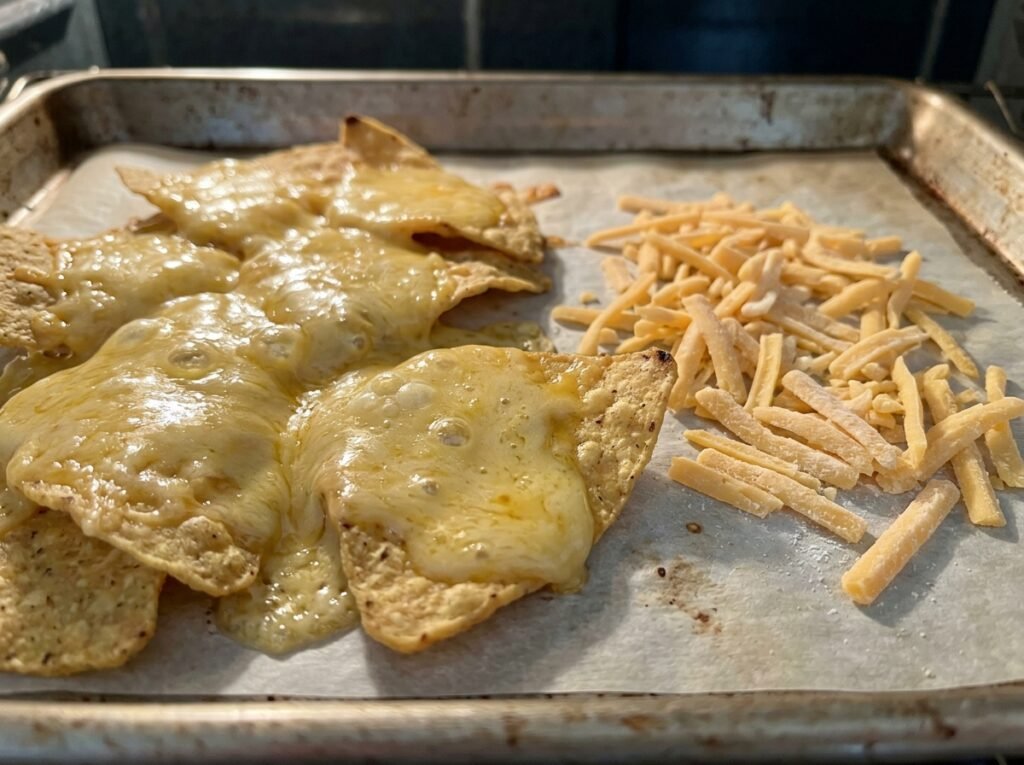
Pro Buying Guide — Building the Ultimate Game Night Nacho Stack
Every component of this platter has a right and a wrong version. Here is exactly what to buy and where to find it across the USA.
The Chips: This is the structural foundation of everything, and it deserves real attention. You need a thick, restaurant-style chip that can support the weight of meat, beans, and cheese without flexing and snapping. Calidad Restaurant Style Tortilla Chips — available at Walmart and many regional grocery chains — are among the best value thick chips in the country. Tostitos Scoops are the other standout option: their cup shape physically holds toppings in place and dramatically increases the cheese-to-chip contact surface area per piece. Avoid thin, deli-style chips entirely — they buckle under heat.
The Cheese: Walk past the bagged shredded section and go straight to the deli block. Tillamook Sharp Cheddar and Tillamook Monterey Jack — available at Costco, Kroger, Target, and Whole Foods — are the gold standard for melt quality and flavor in this dish. Their fat content and natural aging profile produce a cheese pull that no cellulose-coated bag product can replicate. If Tillamook is unavailable, Kerrygold Aged Cheddar from Whole Foods is an excellent alternative with a slightly more complex, buttery finish.
The Ground Beef: Look for 80/20 ground beef from your local Kroger butcher counter or Whole Foods beef section. The 20% fat content renders down beautifully during the sear and carries the taco seasoning through the meat evenly. Leaner blends like 93/7 produce a drier crumble that absorbs into the nachos less effectively.
The Jalapeños: Mt. Olive Pickled Jalapeño Slices from Walmart or the Trader Joe’s store-brand pickled jalapeños give you consistent heat, acidity, and color without the texture variability of fresh jalapeños. Fresh jalapeños can release additional moisture as they soften under the broiler — pickled ones are already stable.
Fresh Avocados: Trader Joe’s consistently offers the best price-to-ripeness ratio for Hass avocados in the USA, particularly their pre-ripened Ready-to-Eat bags. For a party-scale batch, pick up four to six avocados the day before and let them finish ripening overnight at room temperature.
Ingredients Table
The Structural Base
| Ingredient | US Customary | Metric |
|---|---|---|
| Restaurant-style thick tortilla chips | 12 oz | 340g |
| Olive oil or avocado oil spray | Light coat | Light coat |
The Protein Layer
| Ingredient | US Customary | Metric |
|---|---|---|
| Ground beef (80/20) | 1 lb | 454g |
| Taco seasoning (homemade or packet) | 2 tbsp | 18g |
| Water (for seasoning bloom) | 1/4 cup | 60ml |
| Black beans, drained and rinsed | 1 can (15 oz) | 425g |
| Kosher salt | 1/2 tsp | 3g |
The Cheese Matrix
| Ingredient | US Customary | Metric |
|---|---|---|
| Tillamook sharp cheddar, block-shredded | 1.5 cups | 170g |
| Tillamook Monterey Jack, block-shredded | 1.5 cups | 170g |
| Pickled jalapeño slices | 1/3 cup | 50g |
The Fresh Toppings (Post-Bake)
| Ingredient | US Customary | Metric |
|---|---|---|
| Fresh pico de gallo | 1 cup | 240ml |
| Ripe Hass avocado, diced | 2 medium | 2 medium |
| Sour cream | 1/2 cup | 120ml |
| Fresh cilantro, roughly torn | 1/4 cup | 10g |
| Lime wedges (for serving) | 2 limes | 2 limes |
| Hot sauce (Frank’s RedHot or Cholula) | To taste | To taste |
Common Mistakes Table
| The Mistake | What Actually Happens | The Fix |
|---|---|---|
| Piling all chips into one massive mountain | The middle and bottom chips never receive direct heat or cheese coverage — you get a soggy, topping-free core with a crispy outer shell only | Build in two distinct flat layers on a full-size sheet pan, spreading chips in a single overlapping layer each time |
| Pouring undrained canned beans directly onto chips | Bean liquid is roughly 80% water — it seeps immediately into the porous chip starch grid and begins softening from the first contact | Drain and rinse canned beans thoroughly, then blot with a paper towel before placing on the nachos |
| Using pre-shredded bagged cheese | Cellulose anti-caking coating prevents proper protein-to-protein binding under heat — the cheese separates into grease and dry solids instead of melting smoothly | Buy a block of sharp cheddar and Monterey Jack, shred it yourself with a box grater immediately before building |
| Adding sour cream before baking | Sour cream is 70%+ water — under oven heat it liquefies and runs directly into the chip layer, destroying structural integrity from above | Always add sour cream, guacamole, and pico de gallo after the nachos come out of the oven |
| Skipping the mid-layer cheese insurance | The second chip layer has no lipid barrier protecting it from wet toppings — it softens rapidly and contributes nothing structurally | Apply a deliberate cheese layer between every tier of chips and toppings, not just on top |
| Broiling nachos at maximum heat from the start | The top chips scorch and the cheese browns before the interior layers have had time to warm through and melt properly | Bake at 400°F / 204°C first for 8 minutes, then switch to broil for 90 seconds only at the very end for finishing color |
Step-by-Step Method
Searing and Seasoning the Protein
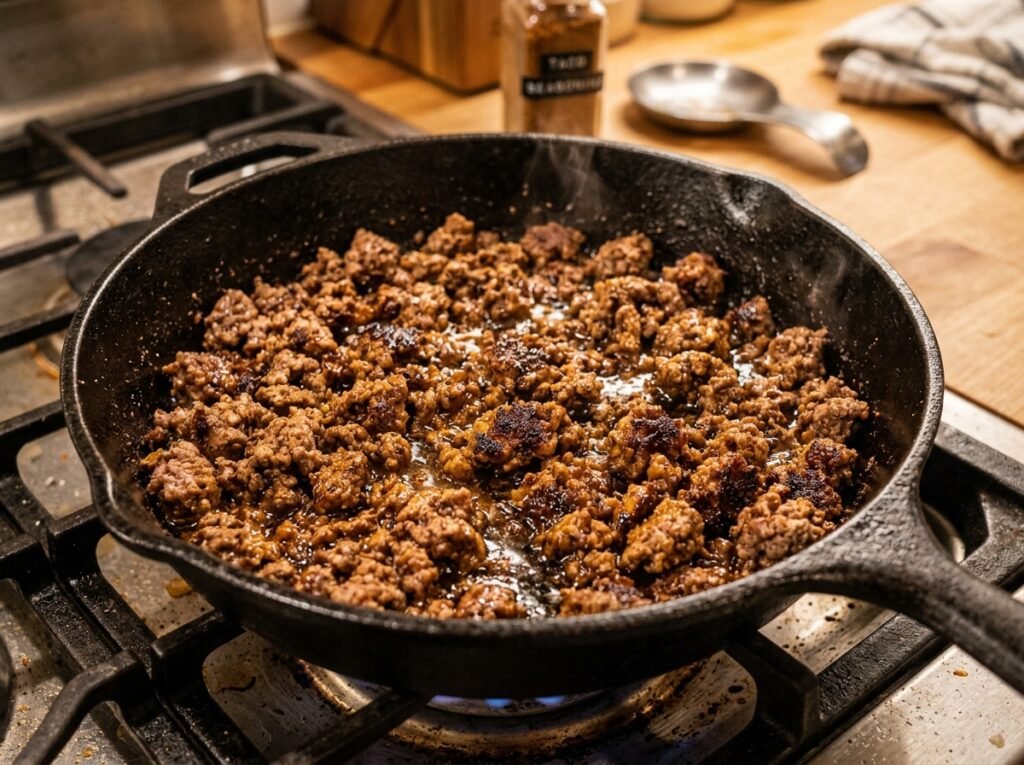
Set a heavy skillet — cast iron or stainless — over medium-high heat until it is fully preheated, about two minutes. Add the ground beef in a single mass and press it flat against the pan surface. Let it sear undisturbed for two minutes before breaking it apart — this builds a caramelized crust on the meat that adds a layer of savory depth no amount of seasoning alone can replicate.
Break the beef into small, irregular crumbles using a wooden spoon and continue cooking until no pink remains. Drain off all excess rendered fat — leaving it behind will add unnecessary moisture to your chip layer during baking. Return the drained meat to the pan, add the taco seasoning and water, and stir over medium heat for 90 seconds until the spice mixture blooms and coats every piece of beef evenly. Set aside off the heat.
While the beef rests, drain your canned black beans into a colander, rinse under cold water for 30 seconds, and spread them on a clean kitchen towel to blot out as much surface moisture as possible. Every drop of water you remove here is a drop that will not reach your chips during baking.
The First Structural Layer
Preheat your oven to 400°F / 204°C with the rack set in the upper-middle position. Line a full-size rimmed baking sheet (18×13 inches) with aluminum foil and give it a light spray of avocado oil to prevent sticking.
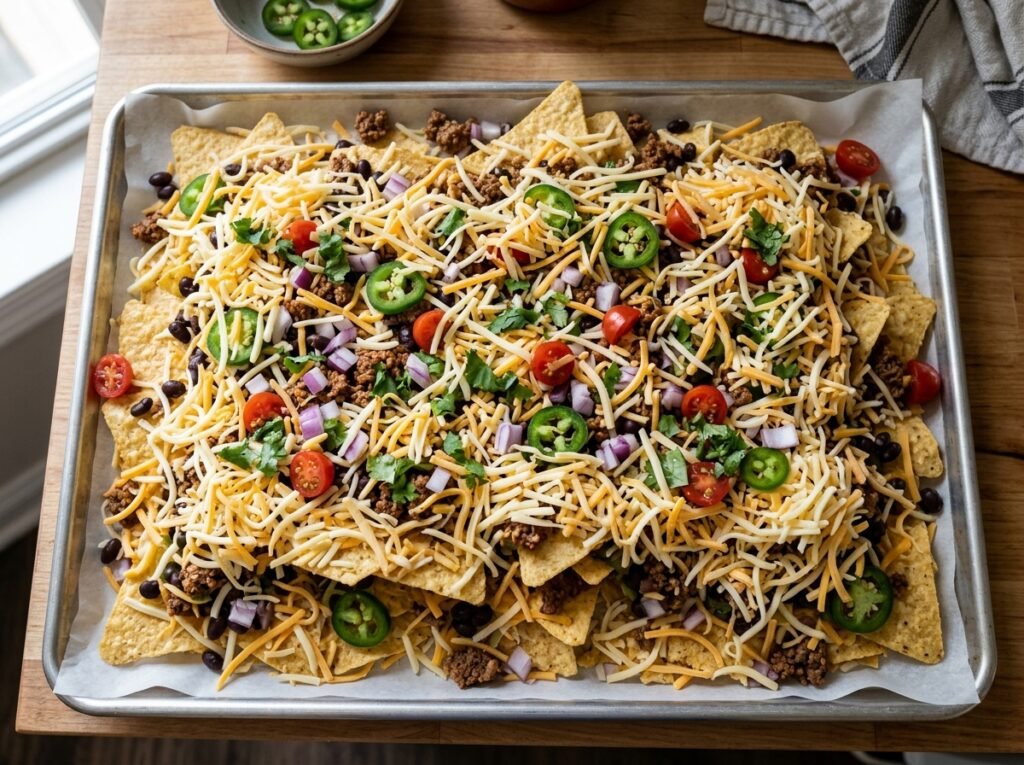
Spread the first layer of thick tortilla chips across the entire sheet pan in a single, slightly overlapping layer — like shingles on a roof rather than a random pile. Overlapping is intentional: it creates structural support between adjacent chips while still exposing enough surface area for direct heat. Scatter approximately half the shredded cheese blend directly and evenly over this first chip layer. This is your lipid barrier layer — it is not optional, and more coverage is always better than less.
Add half the seasoned ground beef crumbles and half the drained black beans over the cheese. The sequence matters here: cheese goes directly on chips to create the moisture shield first, then protein and legumes sit on top of that protected surface.
The Middle Layer Insurance
Now build the second chip layer directly on top of the first, using the same single-overlap shingle approach. This second tier sits on a foundation that has been partially protected by the cheese and meat below, but it still needs its own dedicated cheese application to lock it from above.
Scatter the remaining shredded cheese blend generously over this second chip tier, covering as much surface area as possible including the edges where chips are thinnest. Distribute the remaining beef crumbles and beans across this layer, followed by the pickled jalapeño slices pressed gently into the cheese so they bond to the surface during melting rather than sliding off when someone reaches in.
The High-Heat Melt
Slide the sheet pan into the preheated oven on the upper-middle rack and bake at 400°F / 204°C for 8 minutes. This initial bake phase heats the entire assembly evenly — the bottom layer warms through, the cheese begins to melt and merge into a cohesive layer, and the beef redistributes its rendered fat into the cheese matrix around it.
After 8 minutes, switch the oven to broil on high and move the pan up to the top rack if your broiler element is separate. Broil for exactly 90 seconds, watching continuously — do not walk away. The goal is light golden-brown spots across the highest cheese peaks and a slight darkening at the exposed chip edges. Pull it the moment you see that color developing, because broiler heat works in seconds, not minutes.
Post-Bake Fresh Finishes
The moment the pan comes out of the oven, let it rest on a heatproof surface for exactly two minutes before adding anything cold. This brief rest allows the molten cheese layer to stabilize slightly so it can support the weight of fresh toppings without sliding.
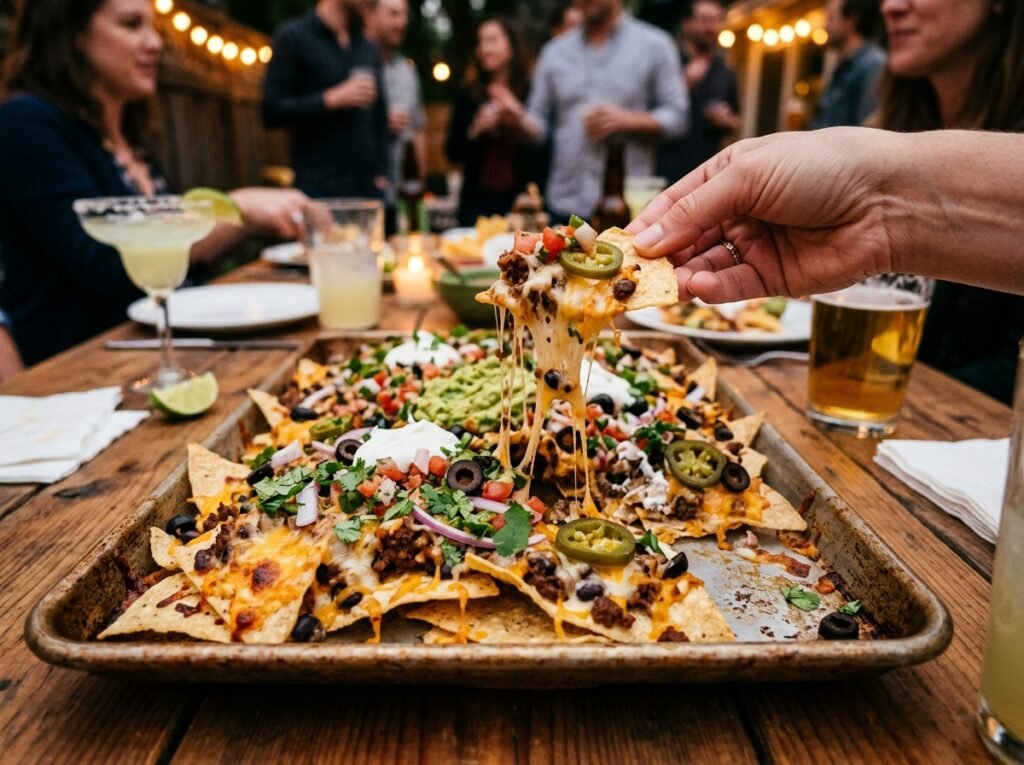
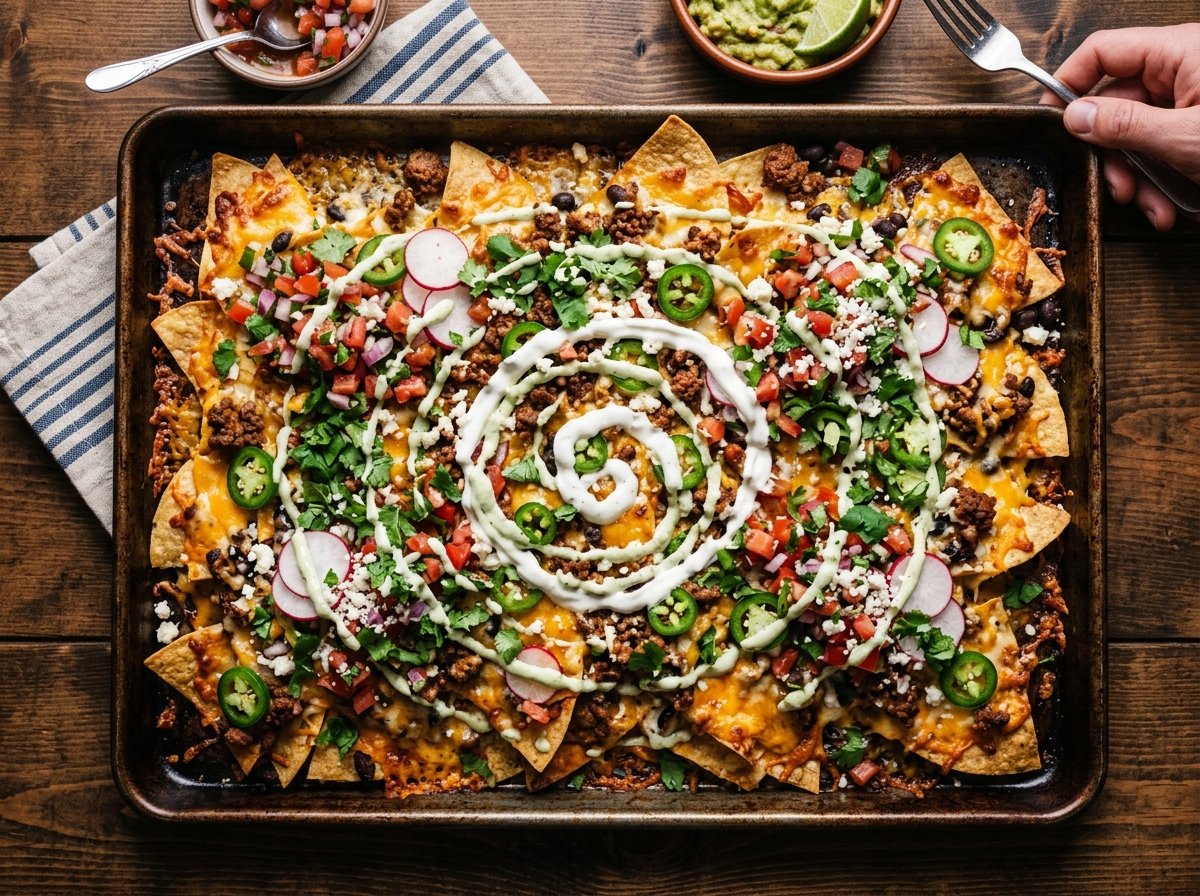
Scatter the diced avocado across the surface first, followed by the pico de gallo in strategic clusters rather than a uniform pour — this keeps the pico’s liquid localized rather than spreading it across the whole chip surface. Dollop sour cream in small pools using a spoon, then finish with torn cilantro and a generous squeeze of fresh lime across everything. Serve immediately with hot sauce on the side and extra lime wedges.

Ultimate Loaded Game Night Nachos
Ingredients
Equipment
Method
- Place your heavy skillet over medium-high heat. Add the ground beef, breaking it apart with a wooden spoon as it cooks. Cook for 5 to 6 minutes until completely browned and the internal temperature reaches 160°F (71°C). Drain off excess grease. Stir in the taco seasoning and water. Simmer for 2 minutes until the liquid reduces and coats the meat. Remove from heat and set aside to cool slightly.
- Preheat your oven to 400°F (204°C) and line a large rimmed baking sheet with aluminum foil. Arrange half of the tortilla chips in a flat, overlapping single layer across the pan. Pop the bare chips into the oven for exactly 3 minutes. Heating the chips first releases their natural corn oils and crisps the starch grid, preparing them for the heavy toppings.
- Remove the hot pan from the oven. Immediately sprinkle half of your freshly grated Cheddar and Monterey Jack cheese directly onto the hot chips. This creates a melt-zone that blocks moisture from entering the porous chip surface. Evenly distribute half of the seasoned ground beef and dried black beans over this base cheese layer.
- Layer the remaining tortilla chips directly over the first layer. Top these chips with the rest of the ground beef, black beans, and the remaining half of the grated cheese. Ensure the cheese is scattered well across the top to act as a final blanket for the ingredients below.
- Return the loaded sheet pan to the oven at 400°F (204°C). Bake for 5 to 7 minutes until the cheese is completely melted, bubbling, and forming beautiful golden brown spots around the edges. Watch closely to prevent the exposed edges of the chips from burning.
- Remove the bubbling nachos from the oven. Let them rest for 2 minutes so the cheese structure stabilizes. Scatter the diced tomatoes, red onions, pickled jalapeños, and fresh avocado cubes evenly across the hot cheese. Garnish with dollops of cool sour cream and chopped cilantro. Serve directly from the sheet pan immediately.
Notes
- The Golden Anti-Soggy Rule: Never use pre-shredded cheese from a plastic bag. Bagged cheese contains anti-caking starches (cellulose) that dry out the cheese and make it separate into a greasy puddle during baking. Shredding fresh blocks ensures a velvety, emulsified cheese pull.
- Moisture Control: Always rinse and dry your canned black beans thoroughly using paper towels. Seed your tomatoes before dicing to remove their watery interiors. Eliminating liquid before baking keeps the chips perfectly crunchy.
- Vegetarian Swap: You can substitute the ground beef with seasoned pinto beans, soy-based chorizo, or extra roasted corn, keeping the exact same layering process.
Chef John’s Insight
There is a tendency to treat party food as something beneath real cooking — as if nachos or wings or dips do not deserve the same structural thinking you would give a braise or a soufflé. I have always disagreed with that. If anything, food that is going to be shared, grabbed at, and eaten over the course of three hours in front of a television demands more engineering than a plated dinner. A plated dish has one moment. A nacho platter has a lifetime. It needs to survive heat, cold air, multiple hands reaching in, and the slow passage of time. The lipid barrier is not a trick — it is respect for the people eating your food. Give your party guests something that holds together in the fourth quarter. The most powerful moves in the kitchen are almost always the quiet oness.
— Chef John, Food Hacks Hub
Nutrition Table
Per serving — based on 8 servings. Values are estimates calculated using USDA FoodData Central nutritional database. Actual values may vary based on specific brands, portion sizes, and topping quantities used.
| Nutrient | Per Serving |
|---|---|
| Calories | 524 kcal |
| Protein | 27g |
| Total Fat | 29g |
| Saturated Fat | 12g |
| Total Carbohydrates | 38g |
| Sodium | 710mg |
| Cholesterol | 82mg |
Food Safety Temperature Guide
| Checkpoint | Temperature | Notes |
|---|---|---|
| USDA Minimum Safe Internal Temp — Ground Beef | 160°F / 71°C | Unlike whole muscle cuts, ground beef must reach 160°F throughout — no pink center exemptions apply |
| Safe Oven Bake Temp for Nachos | 400°F / 204°C | Heats the full assembly evenly without scorching the exposed chip edges |
| Broil Finishing Temp | High broil — surface only | Never exceed 90 seconds unattended — cheese protein denatures and browns within this window |
| Hot-Holding Safety Rule — Dairy and Meat | Above 140°F / 60°C | Nachos left at room temperature during a long broadcast enter the danger zone within 2 hours — do not leave the platter sitting out beyond that window |
| Danger Zone — Do Not Leave Assembled Nachos Out | 40°F–140°F / 4°C–60°C | Ground beef and dairy toppings left in this temperature range for over 2 hours present a genuine food safety risk during game day events |
USDA Food Safety and Inspection Service
Storage & Reheating Table
| State | Refrigerator | Freezer | Best Reheat Method |
|---|---|---|---|
| Seasoned taco beef (cooked, no assembly) | Up to 4 days in airtight container | Up to 3 months | Reheat in a skillet over medium heat with 1 tbsp water. Stir until warmed through — do not microwave uncovered, it dries the meat |
| Fully assembled baked nachos (leftover) | Up to 1 day only — chips degrade fast | Not recommended — see note | Spread on a foil-lined sheet pan and bake at 375°F / 190°C for 8 minutes, OR air fry at 350°F / 177°C for 4–5 minutes. The air fryer is the superior method — circulating heat re-crisps chips without steaming them further |
| Fresh toppings (pico, avocado, sour cream) | Store separately — up to 2 days | Not suitable | Add fresh after reheating, never before |
Freezer Note: Fully assembled and baked nachos cannot be frozen successfully. The gelatinized corn starch in the chip structure retrogrades during freezing — when thawed, the starch molecules re-crystallize in a way that creates a permanently tough, cardboard-like texture that no amount of reheating can rescue. Freeze the seasoned meat component only, and always build nachos fresh on the day of serving.
FAQ Section
How do I keep my nachos from getting soggy?
Three non-negotiable steps: shred your own cheese from a block and apply it directly on the chips before any wet toppings, drain and blot your beans completely dry before they go anywhere near the platter, and add every water-based fresh topping — sour cream, pico de gallo, guacamole — strictly after the nachos come out of the oven. Those three steps eliminate 95% of the sogginess problem.
Can I make these nachos ahead of time?
You can prep every component up to 24 hours in advance — cook and refrigerate the seasoned beef, shred the cheese and store it in a sealed bag, chop the fresh garnishes separately. But do not assemble the sheet pan until 30 minutes before you plan to bake. Once chips meet any moisture, the clock starts. Assembly is a same-day-only event.
What is the best cheese blend for nachos?
Sharp cheddar and Monterey Jack in equal parts is the gold standard, and there is real chemistry behind it. Sharp cheddar brings bold, tangy flavor and good color. Monterey Jack brings the stretch and the smooth melt — it has a higher moisture content and a softer protein structure that flows beautifully under heat. Combined, they balance each other: flavor from the cheddar, texture from the Jack. Block-shredded only — always.
Can I use chicken instead of ground beef?
Absolutely. Shredded rotisserie chicken — pulled from a Costco or Kroger rotisserie bird — is one of the best substitutions you can make. Toss it with the same taco seasoning and a small amount of the rendered chicken fat before layering. It delivers a lighter nacho with just as much structural integrity, and the pre-cooked bird cuts your active cooking time to nearly zero.
What is the best way to reheat leftover nachos?
The air fryer. Set it to 350°F / 177°C, spread the leftover nachos in a single layer in the basket — do not stack them — and run it for 4 to 5 minutes. The circulating hot air draws residual moisture out of the chip surface rather than steaming it back in the way a microwave does. Pull them when the cheese just begins to bubble again and serve immediately with fresh garnishes added on top.
Keep the Party Going — More From Food Hacks Hub
Best Loaded Chicken Taco Fries Recipe
Best Crack Chicken Stuffed Bread Recipe
Best Garlic Butter Chicken Alfredo Bake Recipe
10 Easy Homemade Soup Recipes for Cozy Nights