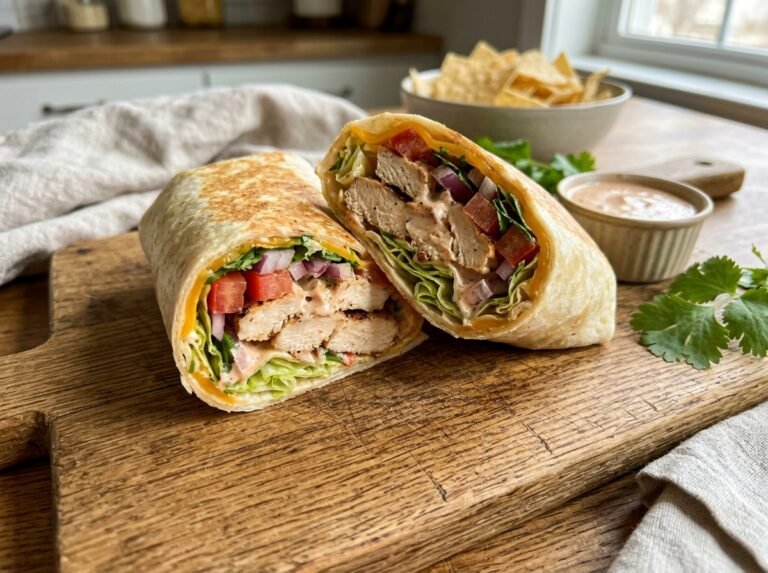
Best Crispy Honey Mustard Chicken Wrap Recipe
By Chef John | Easy Recipes & Smart Cooking Hacks
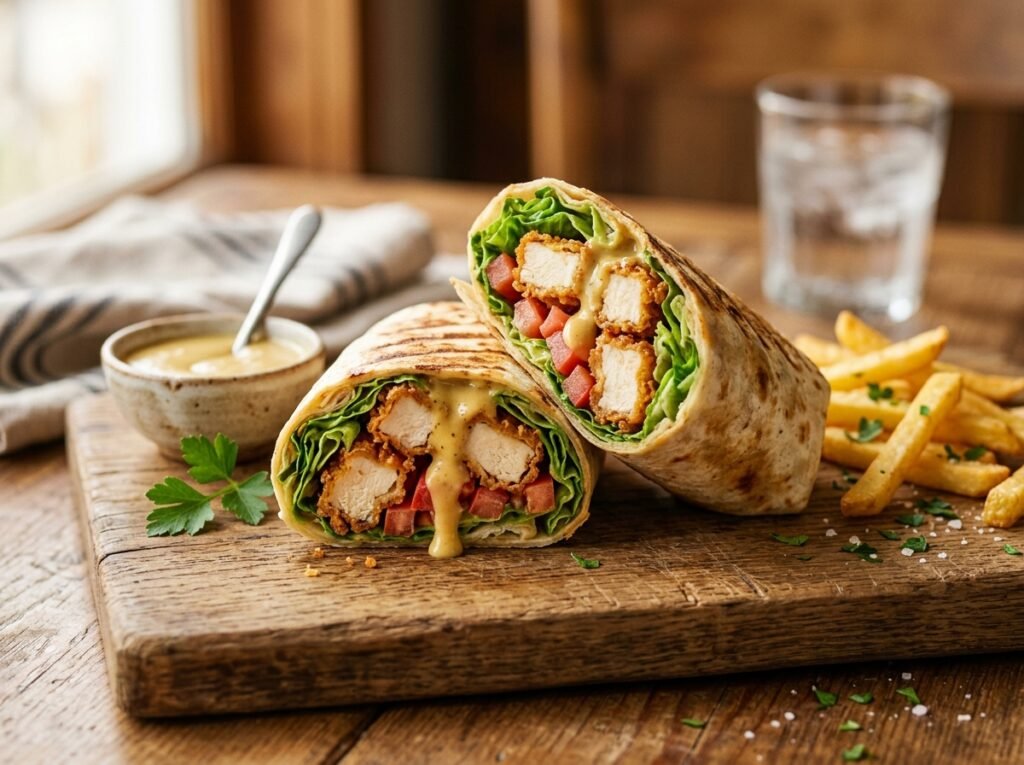
The Perfect Bite: When Crunch Meets Sweet-Tangy Heaven
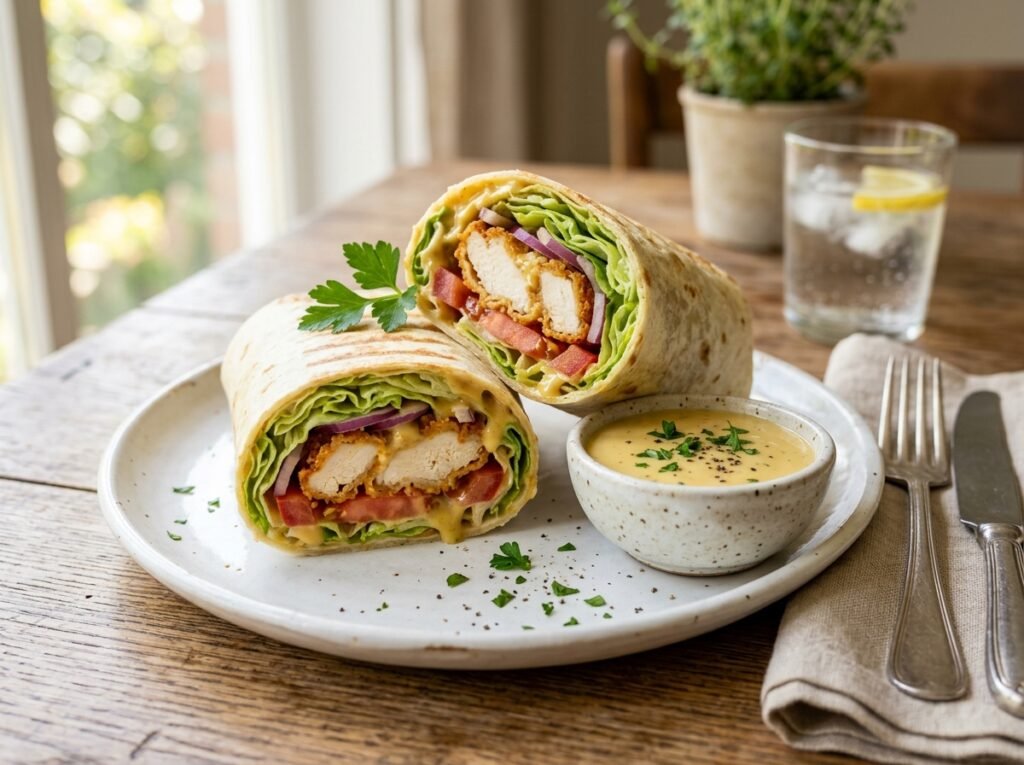
The first bite tells you everything. Your teeth break through a golden, shattering crust, releasing a puff of steam and that unmistakable aroma of caramelized breading. Then comes the tender chicken, the cool crunch of lettuce, and finally—the sweet-tangy punch of honey mustard sauce that somehow hasn’t turned your tortilla into a soggy disaster. That is what a proper crispy honey mustard chicken wrap should deliver every single time. andCrispy Honey Mustard Chicken Wrap Recipe
But here is the problem most home cooks face: you nail the chicken—golden, crunchy, perfect—and then the moment you add the sauce and roll it up, everything falls apart. The tortilla gets wet. The breading goes limp. The whole thing tastes good but feels like a texture failure.
I have tested this batter-to-sauce ratio across dozens of batches in our test kitchen to isolate exactly how to keep that crunch intact from the first bite to the last. The secret is not just in how you cook the chicken—it is in how you layer, sauce, and assemble the wrap to create moisture barriers that protect your hard-earned crispiness.
The Science of the Perfect Crunch
Let’s talk about why this works—and why most recipes fail.
When you cook chicken breast, you are triggering protein denaturation. The muscle fibers tighten and squeeze out moisture. Cook it too long or too hot, and you get dry, rubbery chicken. But coat it properly in starch and breadcrumbs, and something magical happens: the exterior crisps up fast enough to seal in the juices while the interior gently reaches a safe temperature.
That golden crust you are after? That is the Maillard reaction in action—a complex chemical dance between amino acids and reducing sugars that creates hundreds of new flavor compounds. It only happens above 285°F (140°C), which is why shallow frying or air frying at high heat works so much better than baking at moderate temps.
Starch + Heat→Crispy Dextrin Crust
In simple terms: starches on the surface break down into dextrins—those are what give you that shattering, stay-crispy texture even under a sauce.
Now, the honey mustard sauce. Honey and oil do not want to mix. But mustard contains natural emulsifiers (thanks to mucilage in mustard seeds) that act as a bridge, keeping your sauce smooth and stable. A stable sauce means it clings to the chicken instead of soaking into the tortilla. That is the difference between a soggy mess and a wrap that holds its structure for twenty minutes.
The final trick? Moisture barriers. A thin layer of dry lettuce between the sauced chicken and the tortilla creates a hydrophobic shield. It is the same principle chefs use in layered sandwiches—protect the bread.
Pro Buying Guide & Equipment (USA Focused)
Where to Shop & What to Buy
For the best results, here is what I recommend picking up at your local grocery stores:
At Walmart or Kroger:
- Boneless, skinless chicken breasts (look for the organic or air-chilled options—they retain less water)
- All-purpose flour (King Arthur or Gold Medal)
- Panko breadcrumbs (Kikkoman brand—larger flakes = crispier coating)
- Large flour tortillas (Mission or Guerrero—10-inch size)
At Trader Joe’s:
- Their honey mustard dressing works great if you are short on time
- Pre-washed romaine hearts
- Organic chicken tenders (already trimmed and uniform)
At Whole Foods:
- Dijon mustard (Maille brand for best emulsification)
- Raw honey (local if possible—better flavor complexity)
- Avocado oil for frying (high smoke point at 520°F)
Air Fryer vs. Deep Frying
I have tested both methods extensively. Deep frying at 350°F (177°C) gives you the most even, restaurant-quality crust in about 6-7 minutes. But an air fryer at 400°F (204°C) gets you 90% of the way there with zero oil mess—it just takes 12-14 minutes and you need to flip halfway through.
For air frying, I prefer the Cosori or Ninja models with at least a 5-quart basket so you are not overcrowding.
Ingredients Table
| Category | Ingredient | US Customary | Metric |
|---|---|---|---|
| Chicken | Boneless, skinless chicken breasts | 1 lb | 450g |
| Breading | All-purpose flour | ½ cup | 60g |
| Breading | Eggs (beaten) | 2 large | 2 large |
| Breading | Panko breadcrumbs | 1½ cups | 150g |
| Breading | Garlic powder | 1 tsp | 3g |
| Breading | Paprika | 1 tsp | 3g |
| Breading | Salt | 1 tsp | 6g |
| Breading | Black pepper | ½ tsp | 1g |
| Sauce | Dijon mustard | 3 tbsp | 45ml |
| Sauce | Raw honey | 2 tbsp | 30ml |
| Sauce | Mayonnaise | ¼ cup | 60ml |
| Sauce | Apple cider vinegar | 1 tsp | 5ml |
| Wrap | Large flour tortillas (10-inch) | 4 tortillas | 4 tortillas |
| Wrap | Romaine lettuce (shredded) | 2 cups | 100g |
| Wrap | Tomatoes (diced) | 1 cup | 150g |
| Wrap | Red onion (thinly sliced, optional) | ¼ cup | 30g |
| Frying | Avocado or vegetable oil | 2 cups | 480ml |
Common Mistakes Table
| The Mistake | What Actually Happens | The Fix |
|---|---|---|
| Using cold chicken straight from the fridge | Cold protein does not cook evenly; breading can brown before the inside is safe | Let chicken sit at room temp for 15-20 minutes before breading |
| Skipping the flour-egg-breadcrumb order | Breadcrumbs slide right off during cooking; no adhesion | Always do a three-stage dredge: flour (dries surface), egg (glue), breadcrumbs (texture) |
| Overcrowding the pan or air fryer basket | Steam gets trapped, breading turns soggy instead of crispy | Fry in batches with at least 1 inch between pieces |
| Adding sauce directly to hot chicken | Sauce breaks down from the heat, becomes watery, soaks into tortilla | Let chicken rest 3-4 minutes after frying, or sauce the tortilla first and add cooled chicken |
| Using cold tortillas | Cold tortillas crack and tear when rolled | Warm tortillas for 15 seconds per side in a dry skillet before assembling |
| Over-saucing the wrap | Too much liquid = instant sogginess and structural failure | Use 1-2 tablespoons of sauce max per wrap; add extra on the side for dipping |
Step-by-Step Method
Prep the Chicken
Start by slicing your chicken breasts horizontally into cutlets about half an inch thick. This ensures fast, even cooking and maximizes the crispy surface area. If they are uneven, pound them gently with a meat mallet between plastic wrap until uniform.
Pat the chicken completely dry with paper towels. This is not optional—surface moisture is the enemy of crispy breading. Any water left on the surface will turn to steam and create gaps between the meat and the coating.
Season both sides lightly with salt. Let it sit for 10 minutes. This dry-brines the meat and helps it retain moisture during cooking.
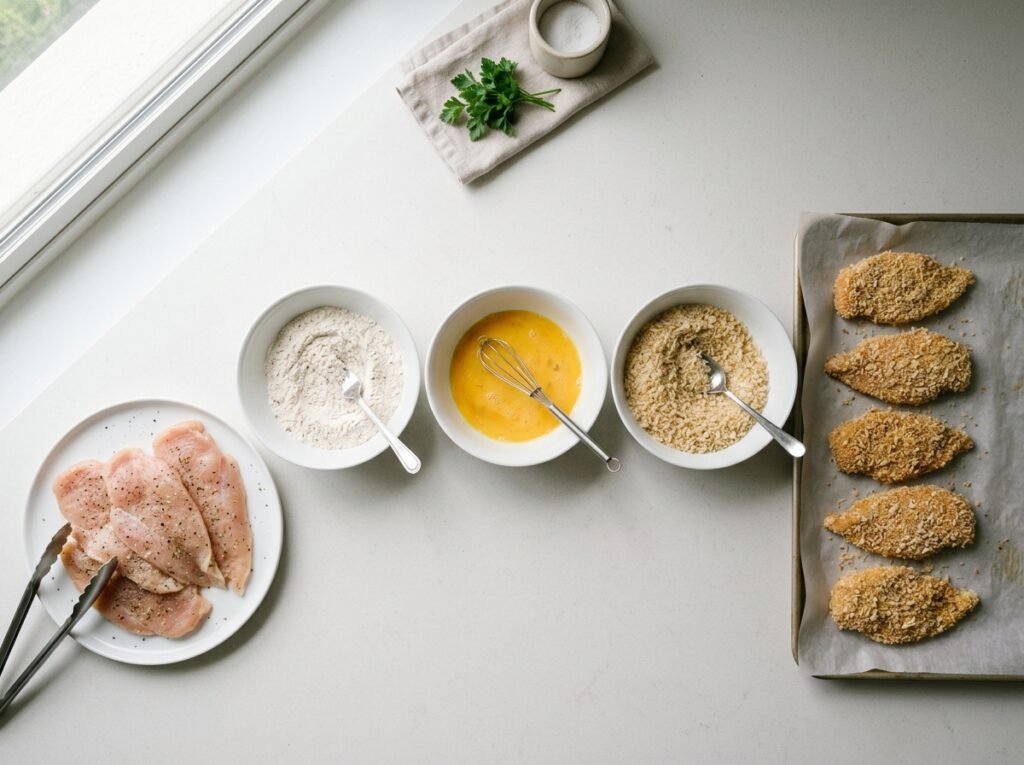
Set Up Your Breading Station
Grab three shallow bowls. In the first, add your flour. In the second, beat the eggs until completely combined. In the third, mix the panko breadcrumbs with garlic powder, paprika, salt, and black pepper.
Here is the move that changes everything: add one tablespoon of water to your beaten eggs. It thins them slightly, which creates a thinner, more even glue layer. Thick egg coating means thick, doughy breading.
Dredge each chicken piece first in flour (shake off excess), then egg (let drips fall off), then press firmly into the panko. Really press it in—you want full coverage with no bald spots.
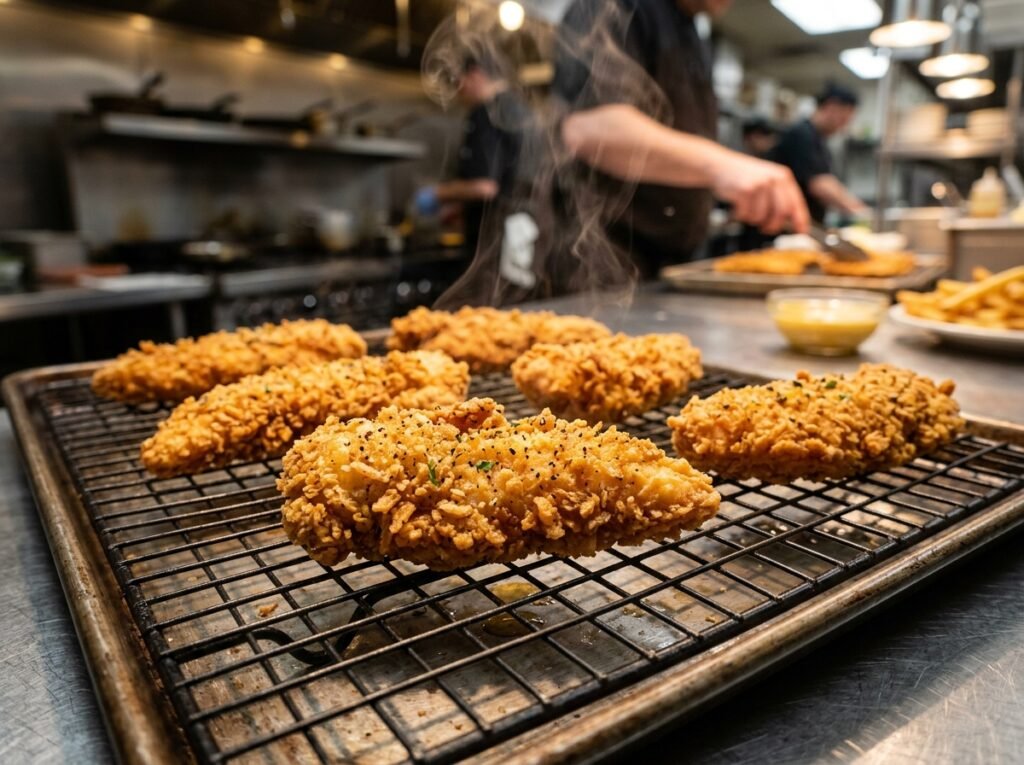
Fry to Golden Perfection
Heat your oil in a deep skillet or Dutch oven to exactly 350°F (177°C). Use a thermometer—this temperature is critical. Too low and the breading absorbs oil and gets greasy. Too high and it burns before the chicken cooks through.
Gently lower each piece into the oil. Do not drop it—that splashes and creates dangerous hot oil bubbles. Fry for 3-4 minutes per side until deep golden brown. You will know it is ready when the bubbling around the chicken slows down—that is the moisture escaping the breading.
If using an air fryer, spray the basket lightly with oil, arrange the chicken in a single layer, spray the tops, and cook at 400°F (204°C) for 12-14 minutes, flipping halfway.
Transfer to a wire rack, not paper towels. Paper towels trap steam underneath and soften your crust. Let the chicken rest for four minutes while you prep the wraps.
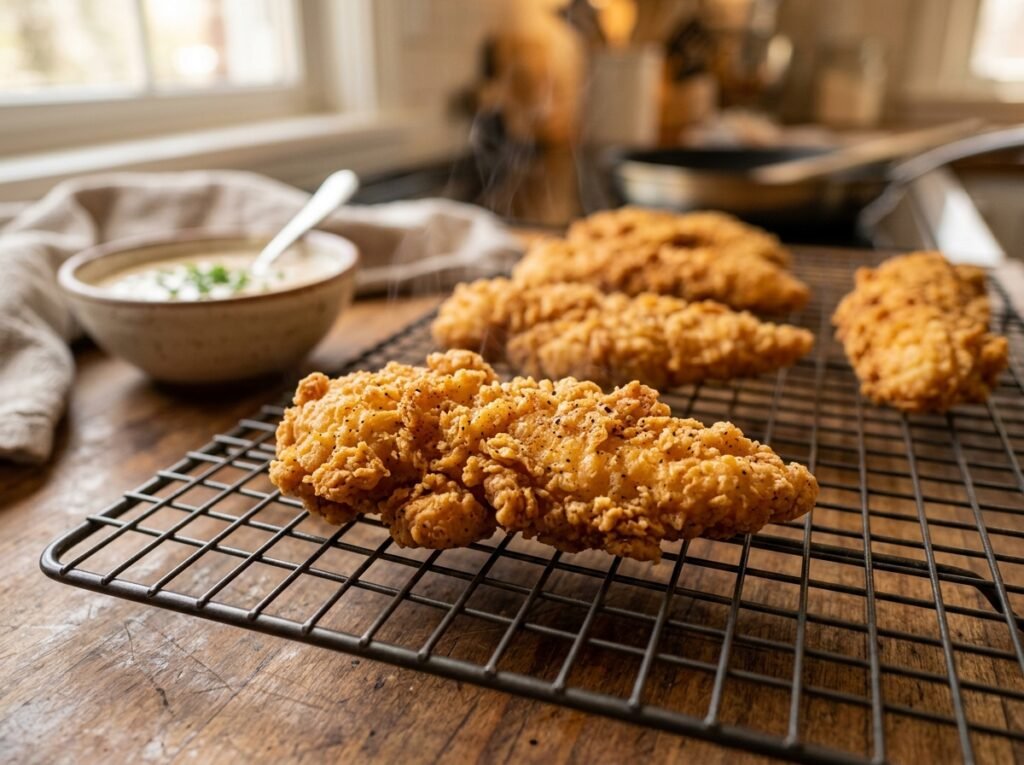
Make the Honey Mustard Sauce
In a small bowl, whisk together the Dijon mustard, honey, mayonnaise, and apple cider vinegar. Whisk hard for about 30 seconds until it is completely smooth and emulsified. The sauce should cling to the back of a spoon.
Taste it. If it is too sharp, add a bit more honey. If it is too sweet, add a tiny splash more vinegar. This sauce should be balanced—not candy-sweet and not face-puckering tangy.
Assemble the Wraps
Warm each tortilla in a dry skillet over medium heat for 15 seconds per side. This makes them pliable and adds a slight toasted flavor.
Lay the tortilla flat. Spread a very thin layer of sauce in the center—about one tablespoon max. Then add a handful of shredded lettuce in a horizontal line across the middle. The lettuce is your moisture barrier.
Slice the crispy chicken into strips and lay them on top of the lettuce. Add diced tomatoes and red onion if using. Drizzle just a touch more sauce over the chicken—maybe half a tablespoon.
Fold in the sides of the tortilla first, then roll tightly from the bottom up, keeping everything tucked in. The tighter the roll, the better it holds.
Slice diagonally with a sharp serrated knife. One confident cut—do not saw back and forth or you will crush the chicken and squeeze out the sauce.

Best Crispy Honey Mustard Chicken Wrap
Ingredients
Equipment
Method
- Set up three separate shallow bowls. In the first bowl, whisk together the all-purpose flour, garlic powder, paprika, salt, and black pepper. In the second bowl, beat the eggs with a splash of water. In the third bowl, add the Panko breadcrumbs. Dredge each chicken strip into the flour first, dip it into the egg wash, and finally press firmly into the breadcrumbs until completely coated.
- If using an Air Fryer, preheat to 400°F (204°C). Spray the coated chicken strips lightly with cooking oil and fry for 12–15 minutes, flipping halfway through, until the internal temperature reaches 165°F (74°C). For deep frying, heat your oil to 350°F (175°C) and fry the strips for 5–6 minutes until deep golden brown and exceptionally crunchy.
- In a small mixing bowl, combine the mayonnaise, Dijon mustard, raw honey, apple cider vinegar, and garlic powder. Use a whisk to vigorously blend the ingredients together until the sauce becomes entirely smooth, velvety, and fully emulsified.
- Place the flour tortillas on a hot skillet or griddle over medium heat for about 15–20 seconds on each side. Warming them relaxes the gluten in the flour, making the tortillas soft, pliable, and easy to roll without tearing or cracking.
- Lay each warmed tortilla flat. Place a handful of shredded romaine lettuce and diced tomatoes right across the center. Lay 2 to 3 crispy chicken strips on top of the vegetables. Drizzle a generous amount of the honey mustard sauce and sprinkle with cheddar cheese if desired. Fold the left and right sides of the tortilla inward, then roll tightly from the bottom up. Cut diagonally and serve immediately.
Notes
Recipe Notes (Chef John’s Pro Tips)
- How to Prevent Sogginess: If you are packing these wraps for school or work lunches, do not pour the sauce directly onto the chicken. Instead, spread a thin layer of sauce directly on the tortilla, add the lettuce layer as a barrier, and place the crispy chicken on top. This keeps the crunch intact for hours.
- Gluten-Free Alternative: To easily make this recipe gluten-free, swap the all-purpose flour for cornstarch, use certified gluten-free Panko breadcrumbs, and use your favorite gluten-free or corn-based wraps.
- The Best Way to Reheat: Never use a microwave to reheat leftover crispy chicken, as it makes the breading completely soggy. Instead, pop the cold chicken strips into an air fryer at 350°F (175°C) for 3–4 minutes to completely restore that freshly fried crispiness.
Chef John’s Insight
There is something deeply satisfying about a dish that delivers on texture as much as flavor. In culinary school, we were taught that great food engages all five senses—but I would argue that in the case of a wrap like this, texture is doing sixty percent of the work. The contrast between the shattering crust and the tender chicken, the cool crispness of lettuce against the warmth of the filling, the way that honey mustard clings without drowning—these are not accidents. They are the result of understanding how ingredients behave under heat, how moisture moves, and how structure holds. Every bite should feel like an experience, not just a meal. The best recipes are not the ones that taste good by accident—they are the ones engineered to never fail.
— Chef John, The Flavor Bazaar
Technical Data & Metrics
Prep Time: 20 minutes
Cook Time: 15 minutes
Total Time: 35 minutes
Servings: 4 wraps
Difficulty: Easy to Moderate
Nutrition Information (Per Wrap)
| Nutrient | Amount |
|---|---|
| Calories | 520 kcal |
| Protein | 32g |
| Total Fat | 22g |
| Saturated Fat | 4g |
| Carbohydrates | 48g |
| Dietary Fiber | 3g |
| Sodium | 780mg |
| Cholesterol | 145mg |
Note: Nutrition estimates are based on deep frying. Air frying reduces total fat by approximately 8-10g per serving.
Food Safety Temperature Guide
According to USDA guidelines, all poultry must reach an internal temperature of 165°F (74°C) to be considered safe for consumption. Use an instant-read thermometer inserted into the thickest part of the chicken.
Remember the Danger Zone for bacterial growth is between 40°F and 140°F (4°C – 60°C). Do not leave cooked chicken at room temperature for more than two hours (one hour if the ambient temperature is above 90°F).
Key Cooking Temperatures:
- Oil temperature for frying: 350°F (177°C)
- Air fryer temperature: 400°F (204°C)
- Minimum safe internal temp for chicken: 165°F (74°C)
- Ideal final temp after resting: 170°F (77°C)
Storage & Reheating Guide
| Component | Refrigerator | Freezer | Best Reheat Method |
|---|---|---|---|
| Breaded chicken (cooked, unsauced) | 3-4 days in airtight container | Up to 2 months wrapped tightly | Air fryer at 375°F for 5-6 min or oven at 400°F for 8-10 min |
| Honey mustard sauce | 5-7 days in sealed jar | Not recommended | Whisk before using; no heat needed |
| Assembled wraps | Not recommended (will get soggy) | Not recommended | N/A |
| Tortillas (unused) | 7-10 days | Up to 3 months | Microwave 10-15 seconds or dry skillet |
Pro Tip: If you want to meal prep, store the crispy chicken, sauce, and chopped veggies separately. Assemble wraps fresh when you are ready to eat. The chicken can go straight from the fridge into the air fryer for a quick reheat that restores the crunch.
FAQ: Your Top Questions Answered
Can I use chicken thighs instead of breasts?
Absolutely. Boneless, skinless thighs are juicier and more forgiving if you slightly overcook them. The breading method stays exactly the same. Just note that thighs have slightly more fat, so your calorie count will increase by about 60-80 per wrap.
How do I stop my tortilla from tearing when I roll it?
Cold tortillas are brittle. Always warm them first—15 seconds per side in a dry skillet makes them pliable. Also, do not overfill. If you are struggling to close it, you have added too much filling.
Can I make this healthier?
Yes. Use whole wheat tortillas, air fry instead of deep fry, and swap the mayo in the sauce for Greek yogurt. You will cut about 150 calories and 12g of fat per wrap. The texture changes slightly—it is a bit less rich—but still delicious.
What if I do not have panko breadcrumbs?
Regular breadcrumbs work, but they give a finer, denser crust. For a closer match to panko’s shatter, crush up cornflakes or Rice Krispies—seriously. The large flake size mimics panko beautifully.
Can I prep the breaded chicken ahead of time?
Yes. Bread the chicken up to 4 hours ahead, place on a parchment-lined tray, cover loosely with plastic wrap, and refrigerate. Let it sit at room temp for 10 minutes before frying. Do not bread it the night before—the coating gets gummy.
You Might Also Love
[Best Air Fryer Garlic Bread Pizza Rolls Recipe]
[Best Honey Sriracha Chicken Rice Bowl Recipe]
[Best Loaded Chicken Taco Fries Recipe]