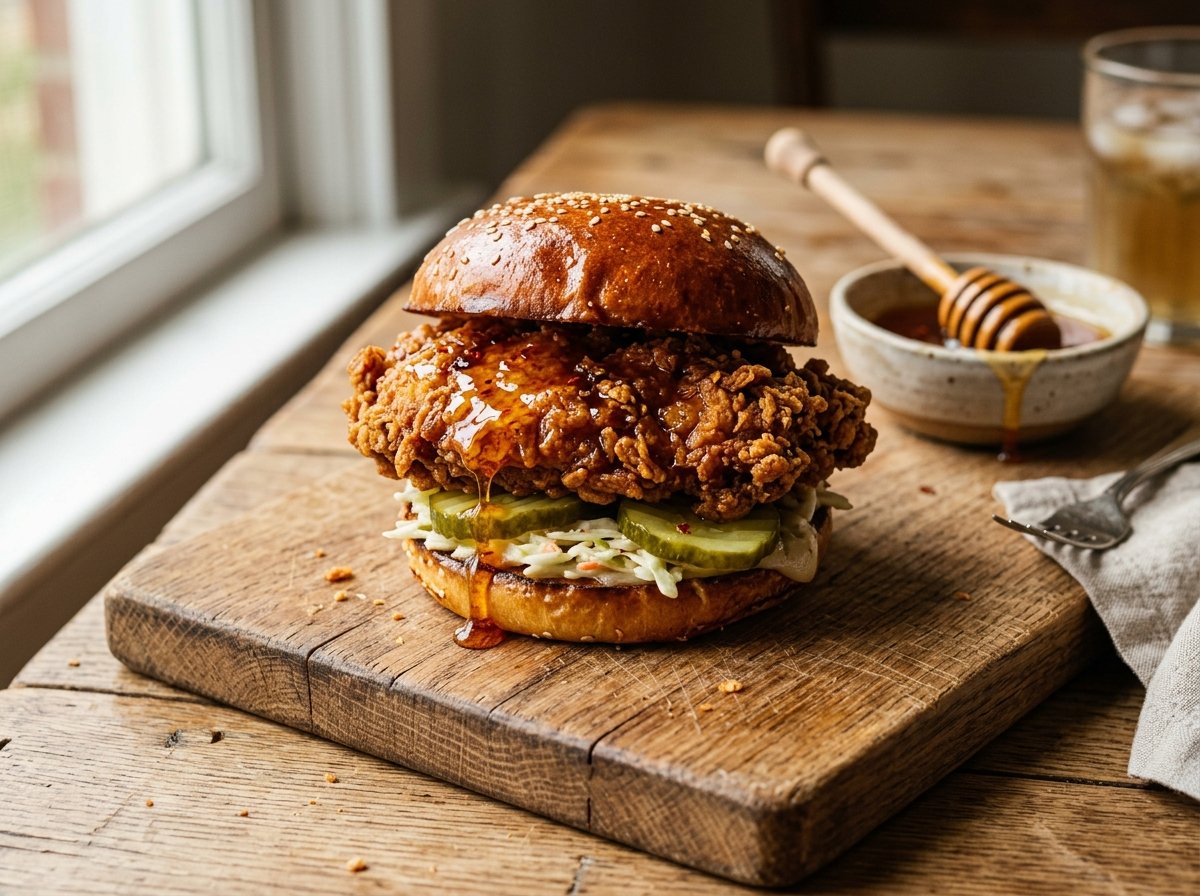
Crispy Hot Honey Chicken Sandwich Recipe: The Science of Perfect Crunch
By Chef John | Easy Recipes & Smart Cooking Hacks
The Perfect Balance of Fire and Sweetness
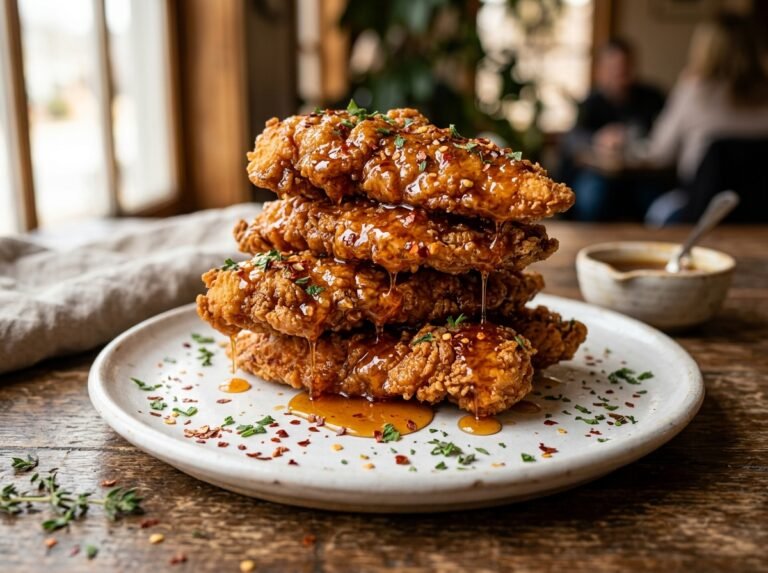
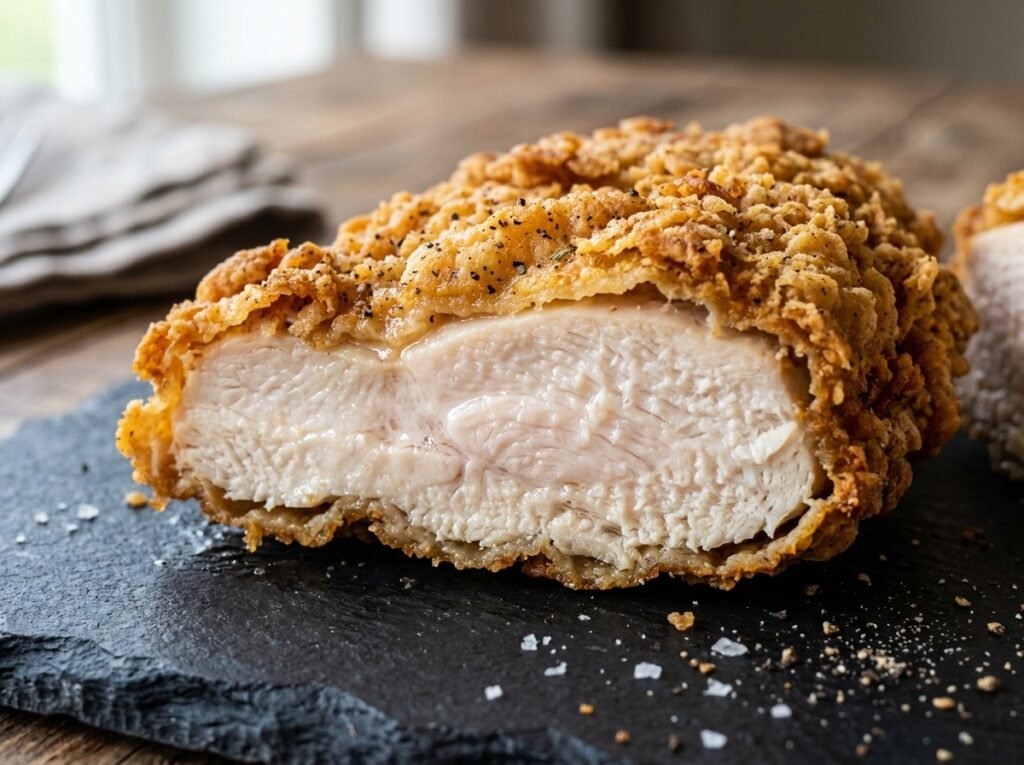
The first bite hits you with a shatter—that clean, audible crack of breading that tells you everything went right. Then comes the heat, riding on a wave of honey sweetness that builds slowly, coating your tongue with just enough Scoville bite to make you reach for another piece before you’ve even finished chewing. and Crispy Hot Honey Chicken Sandwich Recipe
I have spent weeks in the test kitchen balancing the Scoville heat of the honey against the moisture migration of the breading to ensure a sandwich that stays crisp for over 30 minutes. That number matters more than you think. Most fried chicken sandwiches lose their crunch within 10 minutes as steam from the hot meat softens the coating from the inside out. The solution is not just in the frying—it is in the architecture of the crust itself.
The crispy hot honey chicken sandwich has become the benchmark dish at fast-casual restaurants across the USA, and for good reason. It delivers on every sensory level: texture contrast, balanced heat, savory depth, and that sticky-sweet finish that keeps your taste buds engaged. But replicating that experience at home requires understanding exactly what is happening at the molecular level when buttermilk meets flour and when sugar meets heat.
The Science Behind the Shatter
When you bite into a perfectly fried chicken sandwich, you are experiencing two fundamental chemical reactions happening simultaneously: the Maillard reaction and protein denaturation. Understanding these processes is what separates a good sandwich from an unforgettable one.
The Maillard reaction occurs when amino acids (from the chicken and buttermilk) react with reducing sugars (naturally present in flour and added through the hot honey glaze) at temperatures above 285°F (140°C). This creates melanoidins—complex brown pigments that give fried chicken its signature golden color and deeply savory flavor.
Amino Acids+Reducing Sugars→Melanoidins
In simple terms: high heat + protein + sugar = that irresistible fried chicken flavor and color. But temperature control is everything. Too low, and you get pale, greasy coating. Too high, and you burn the outside before the inside cooks through.
Protein denaturation is equally critical. When chicken breast hits 140°F (60°C) internal temperature, the muscle proteins begin to unwind and reorganize. By the time it reaches the USDA-recommended 165°F (74°C), those proteins have formed a firm, sliceable structure. But here is the trick: if you push beyond 175°F (79°C), those same proteins squeeze out moisture like wringing a towel, leaving you with dry, chalky meat.
The hot honey adds another layer of complexity. Honey contains fructose and glucose, which caramelize at different temperatures (230°F and 320°F respectively). When you brush hot honey onto fried chicken, residual heat from the crust causes surface caramelization, creating a lacquered finish that is both sticky and crisp—a textural paradox that makes this sandwich so addictive.
USA Pro Buying Guide: What to Buy and Where
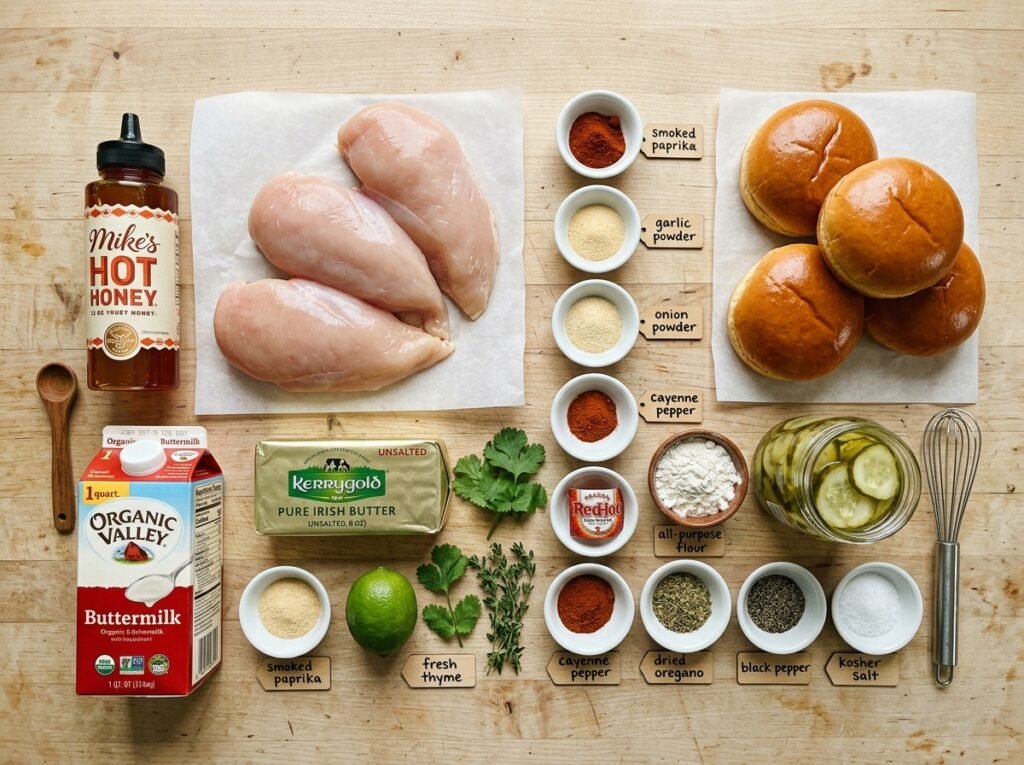
Getting this sandwich right starts at the grocery store. I have tested dozens of ingredient combinations, and these specific products consistently deliver the best results.
Chicken: Look for air-chilled chicken breasts at Whole Foods or Kroger. They retain less water than water-chilled options, which means better browning and less moisture to fight against during frying. Brands like Mary’s Organic or Bell & Evans are worth the extra dollar per pound.
Buttermilk: Full-fat buttermilk is non-negotiable. The lactic acid tenderizes the chicken while the fat helps breading adhere. You can find quality buttermilk at any Target or Walmart, but I prefer the Organic Valley brand for its consistency and tangy flavor.
Hot Honey: Mike’s Hot Honey is the gold standard. You can grab it at Trader Joe’s, Whole Foods, or order it online. The Scoville level sits around 1,500-2,000 units—enough heat to make you notice without overwhelming the sweetness. If you want to make your own, combine local honey with Frank’s RedHot and a pinch of cayenne.
Flour: All-purpose flour from Bob’s Red Mill creates a lighter crust than cheaper brands. The protein content (around 11%) is ideal for creating structure without toughness.
Butter for Buns: Kerrygold butter makes a noticeable difference when toasting brioche buns. The higher fat content (82% vs. 80% in standard butter) gives you better browning and richer flavor.
Brioche Buns: The bakery section at Whole Foods carries fresh brioche that is sturdy enough to hold up to the hot honey without dissolving into mush. Look for buns that are slightly dense—not airy.
Deep Frying vs. Air Fryer: I have tested both methods extensively. A traditional Dutch oven with peanut oil at 350°F (177°C) gives you the most even crust and best texture. But if you are using a Ninja Air Fryer (the 8-quart model), you can get 85% of the way there with significantly less oil. Preheat to 400°F (204°C) and spray the breaded chicken generously with cooking oil before air frying for 12-14 minutes, flipping halfway.
Ingredients Table
| Category | Ingredient | US Customary | Metric |
|---|---|---|---|
| Chicken | Boneless, skinless chicken breasts | 2 large (1.5 lb) | 680g |
| Brine | Buttermilk | 2 cups | 480ml |
| Hot sauce (Frank’s RedHot) | 2 tbsp | 30ml | |
| Kosher salt | 1 tbsp | 15g | |
| Black pepper | 1 tsp | 3g | |
| Garlic powder | 1 tsp | 3g | |
| Breading | All-purpose flour | 2 cups | 240g |
| Cornstarch | ½ cup | 60g | |
| Baking powder | 1 tsp | 5g | |
| Smoked paprika | 1 tbsp | 8g | |
| Cayenne pepper | 1 tsp | 3g | |
| Onion powder | 1 tsp | 3g | |
| Salt | 1 tsp | 5g | |
| Hot Honey | Mike’s Hot Honey (or honey) | ½ cup | 120ml |
| Frank’s RedHot | 2 tbsp | 30ml | |
| Apple cider vinegar | 1 tsp | 5ml | |
| Assembly | Brioche buns | 4 buns | 4 buns |
| Kerrygold butter | 2 tbsp | 28g | |
| Dill pickles | 12-16 slices | 12-16 slices | |
| Coleslaw (optional) | 1 cup | 240ml | |
| Frying | Peanut oil or vegetable oil | 2 quarts | 1.9L |
Common Mistakes Table
| The Mistake | What Actually Happens | The Fix |
|---|---|---|
| Frying at too low temperature (under 325°F / 163°C) | Breading absorbs oil, becomes greasy and soggy instead of crisp | Use a thermometer; maintain 350°F (177°C) consistently |
| Crowding the pan with multiple pieces | Oil temperature drops 40-50°F, causing uneven cooking and pale breading | Fry only 2 pieces at a time; let oil recover between batches |
| Skipping the buttermilk brine | Chicken is tough, breading does not adhere well, lacks flavor depth | Brine for minimum 2 hours, ideally overnight in refrigerator |
| Applying hot honey immediately after frying | Steam softens the crust instantly; honey slides off instead of coating | Let chicken rest on wire rack for 2-3 minutes before glazing |
| Heating honey too aggressively | Honey crystallizes or burns, becomes grainy and bitter | Warm honey gently to 110°F (43°C) maximum; never boil |
| Using water-chilled chicken without drying | Excess moisture creates steam pockets, breading separates from meat | Pat chicken completely dry with paper towels before dredging |
Step-by-Step Method
The Brine Secret
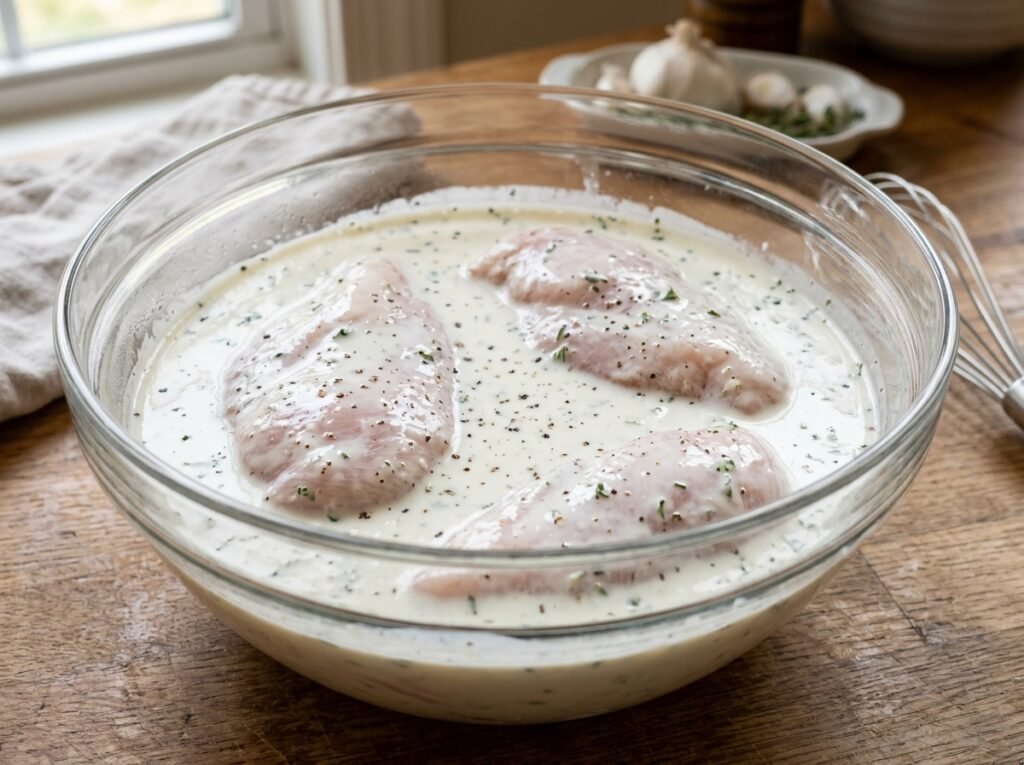
Start by butterflying your chicken breasts to create even thickness. Place each breast on a cutting board and use a sharp knife to slice horizontally through the middle, stopping about half an inch from the edge so the two halves remain connected. Open it like a book, then gently pound to an even three-quarter-inch thickness using a meat mallet.
In a large bowl, whisk together the buttermilk, hot sauce, kosher salt, black pepper, and garlic powder until the salt dissolves completely. Submerge the chicken breasts, making sure they are fully covered. Cover the bowl with plastic wrap and refrigerate for at least 2 hours, though overnight is ideal. The lactic acid in buttermilk breaks down muscle fibers, resulting in chicken that is noticeably more tender.
During this time, the salt penetrates deep into the muscle tissue through osmosis, seasoning the meat from the inside out. This is why properly brined chicken tastes seasoned throughout, not just on the surface.
The Double-Dredge Technique
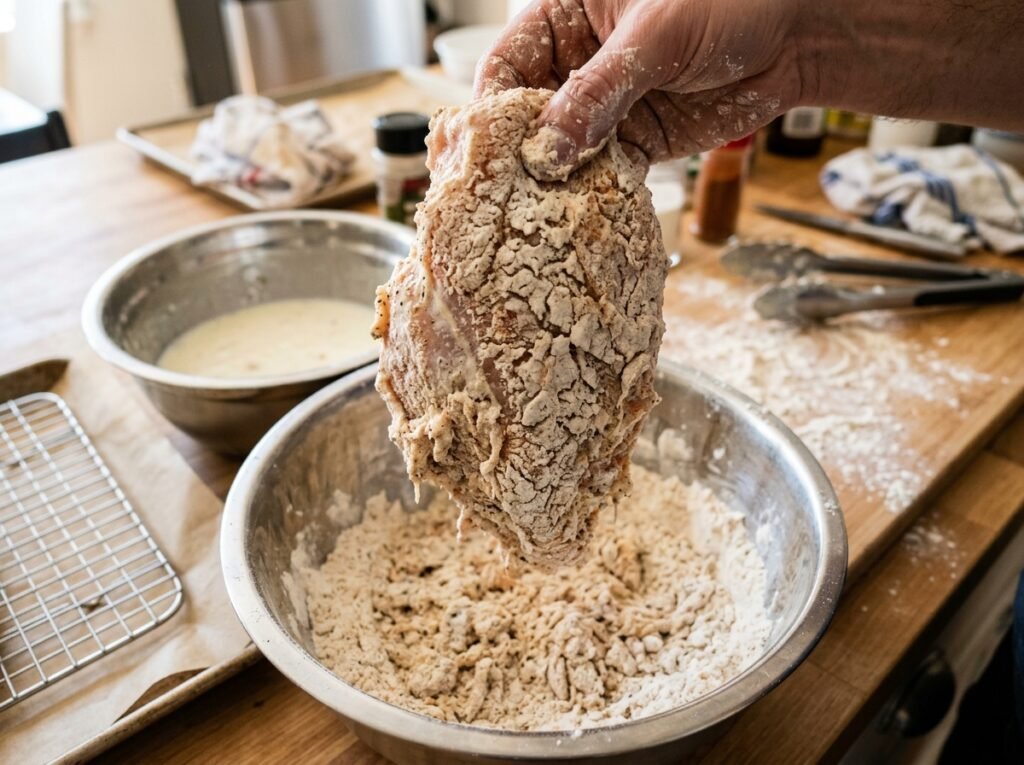
Remove the chicken from the buttermilk but do not shake off excess—you want that clingy coating. In a wide, shallow dish, whisk together the flour, cornstarch, baking powder, smoked paprika, cayenne, onion powder, and salt. The cornstarch is critical here; it creates a lighter, crispier crust than flour alone.
Take one piece of chicken and press it firmly into the flour mixture, coating both sides completely. Shake off the excess, then dip it back into the buttermilk for just a second. Finally, dredge it through the flour mixture one more time, pressing gently to create thick, shaggy layers.
These layers are what create the craggy, extra-crispy texture you want. As the chicken fries, moisture trapped between these layers turns to steam, puffing the breading and creating air pockets that shatter when you bite down.
Place each breaded piece on a wire rack and let them rest for 10 minutes. This resting period allows the coating to hydrate and adhere properly, reducing the chance of breading falling off during frying.
The Fry: Temperature is Everything
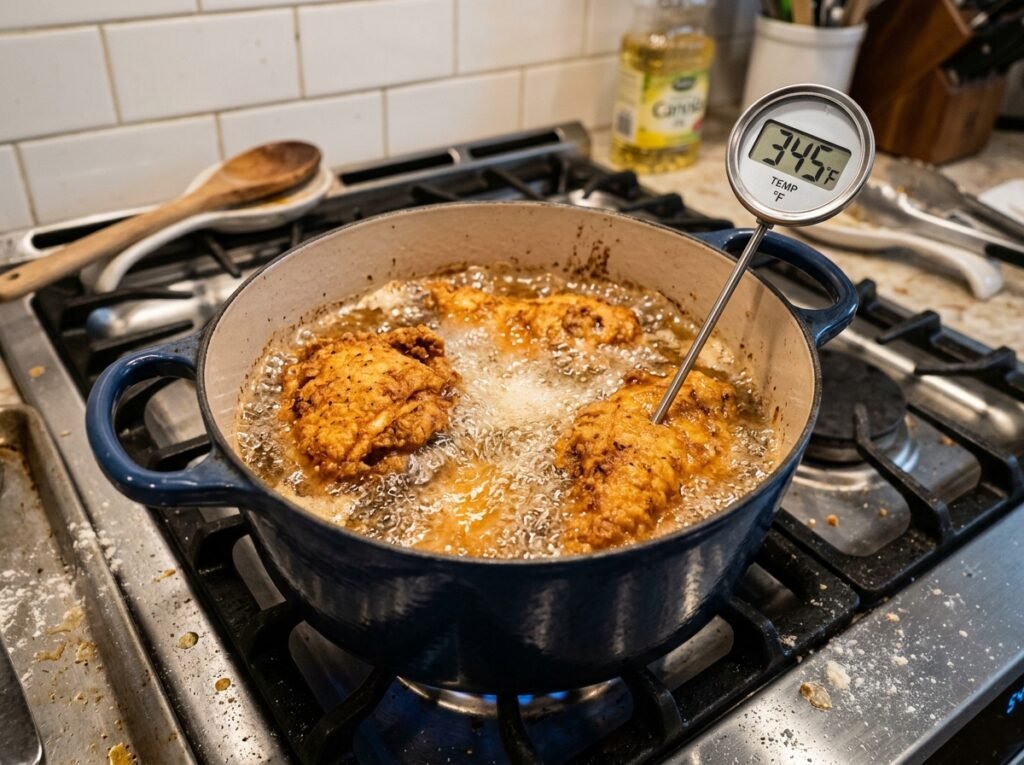
Pour peanut oil into a heavy-bottomed Dutch oven until it reaches a depth of 2 to 3 inches. Clip a thermometer to the side and heat over medium-high until the oil hits exactly 350°F (177°C). This temperature is not arbitrary—it is the sweet spot where the breading sets instantly on contact, creating a moisture barrier that keeps the crust dry while the inside steams to perfection.
Gently lower one piece of chicken into the oil using tongs. The oil temperature will drop immediately; adjust your heat to bring it back to 340-345°F (171-174°C). Fry for 6 to 7 minutes, then flip and cook another 6 to 7 minutes. You are looking for a deep golden-brown color and an internal temperature of 165°F (74°C).
Remove the chicken and place it on a clean wire rack set over a baking sheet. Never drain fried chicken on paper towels—the steam gets trapped underneath, making the bottom soggy. The wire rack allows air circulation on all sides.
Let the oil return to 350°F before adding the next piece. Patience here is what separates restaurant-quality fried chicken from the sad, greasy kind.
The Hot Honey Glaze
While the chicken rests, prepare your hot honey. In a small saucepan, combine Mike’s Hot Honey (or regular honey), Frank’s RedHot, and a teaspoon of apple cider vinegar. Warm it over low heat, stirring gently, until it becomes pourable but not hot—around 110°F (43°C). If you overheat honey, you risk crystallization and loss of delicate floral notes.
The apple cider vinegar serves two purposes: it thins the honey slightly so it coats evenly, and it adds a bright acidic note that cuts through the richness of the fried chicken.
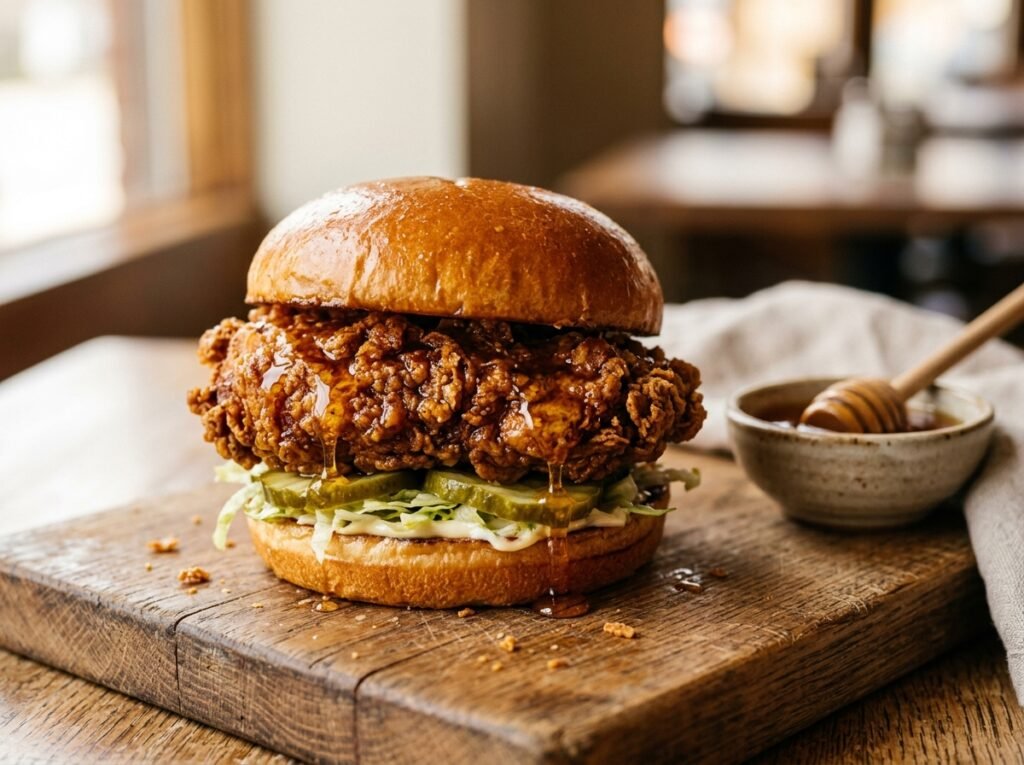
After the chicken has rested for 2 to 3 minutes, brush the hot honey generously over both sides. The residual heat from the crust will cause the honey to set into a glossy, slightly tacky glaze. For extra drama, drizzle a bit more right before serving.
Assembly and the Final Toast
Slice your brioche buns in half and spread a thin layer of Kerrygold butter on the cut sides. Heat a skillet over medium heat and toast the buns cut-side down until golden and fragrant—about 2 minutes. This toasted layer creates another moisture barrier that keeps the bottom bun from getting soggy.
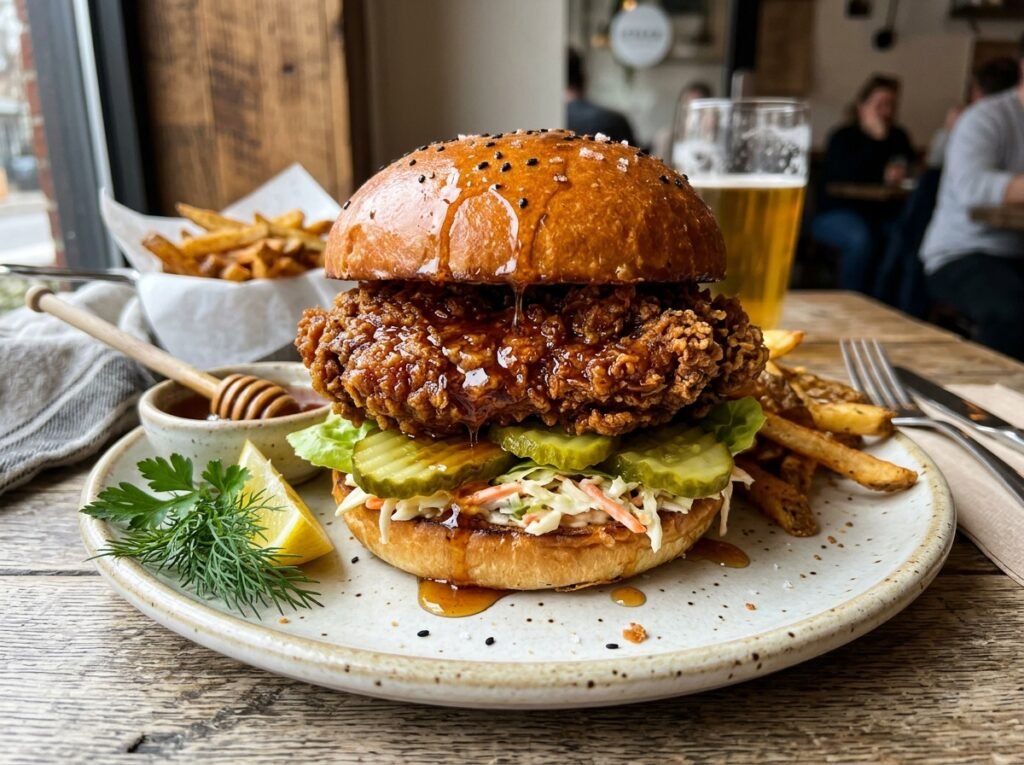
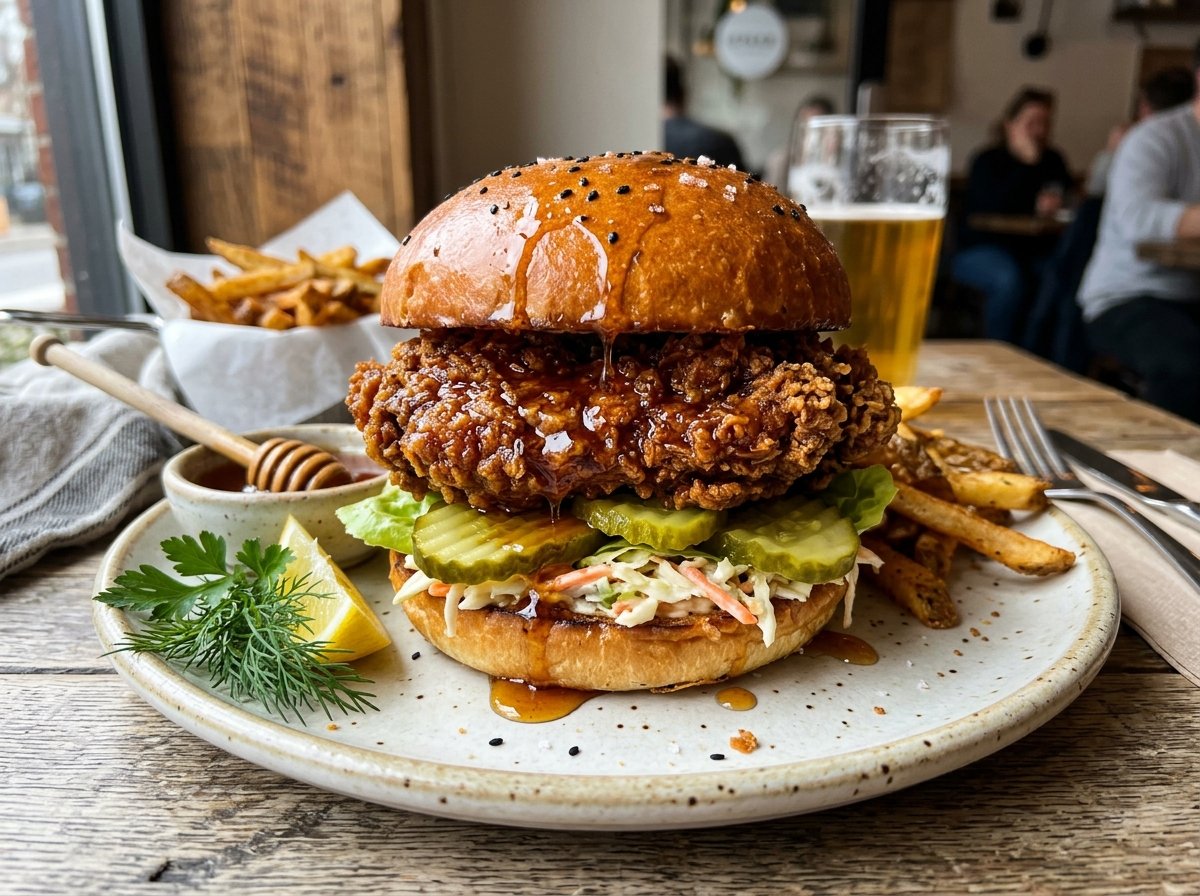
Place the hot honey-glazed chicken on the bottom bun. Top with 3 to 4 dill pickle slices—the acidity and crunch are essential for cutting through the richness. If you want to add coleslaw, use a vinegar-based slaw rather than a creamy one; mayo-heavy slaws add too much moisture.
Cap with the top bun and press down gently. The sandwich should hold together but still have some give.
Ultimate Crispy Hot Honey Chicken Sandwich
Ingredients
Equipment
Method
Instruction Group 1: Prepare the Brine
- Butterfly the chicken breasts by placing them on a cutting board and slicing horizontally through the middle, stopping about ½ inch from the edge so the two halves remain connected. Open like a book and gently pound to an even ¾-inch thickness using a meat mallet.
- In a large bowl, whisk together the buttermilk, Frank’s RedHot, kosher salt, black pepper, and garlic powder until the salt dissolves completely.
- Submerge the chicken breasts completely in the buttermilk mixture, making sure they are fully covered. Cover the bowl with plastic wrap and refrigerate for at least 2 hours, though overnight is ideal for maximum tenderness.
Instruction Group 2: Prepare the Breading
- In a wide, shallow dish, whisk together the all-purpose flour, cornstarch, baking powder, smoked paprika, cayenne pepper, onion powder, and salt until evenly combined.
- Remove one piece of chicken from the buttermilk but do not shake off the excess. Press it firmly into the flour mixture, coating both sides completely. Shake off the excess, then dip it back into the buttermilk for just a second.
- Dredge through the flour mixture one more time, pressing gently to create thick, shaggy layers. These layers create the craggy, extra-crispy texture.
- Dredge through the flour mixture one more time, pressing gently to create thick, shaggy layers. These layers create the craggy, extra-crispy texture.
Instruction Group 3: Fry the Chicken
- Pour peanut oil into a heavy-bottomed Dutch oven until it reaches a depth of 2 to 3 inches. Clip a cooking thermometer to the side and heat over medium-high heat until the oil reaches exactly 350°F (177°C).
- Gently lower one piece of chicken into the oil using tongs. The oil temperature will drop immediately; adjust your heat to bring it back to 340-345°F (171-174°C).
- Fry for 6 to 7 minutes, then flip and cook another 6 to 7 minutes. You are looking for a deep golden-brown color and an internal temperature of 165°F (74°C) when checked with an instant-read thermometer.
- Remove the chicken and place it on a clean wire rack set over a baking sheet. Never drain fried chicken on paper towels as the steam gets trapped underneath, making the bottom soggy. Let the chicken rest for 2-3 minutes.
- Let the oil return to 350°F (177°C) before adding the next piece. Repeat until all chicken is cooked.
Instruction Group 4: Make Hot Honey Glaze & Assemble
- While the chicken rests, prepare the hot honey. In a small saucepan, combine Mike’s Hot Honey, Frank’s RedHot, and apple cider vinegar. Warm it over low heat, stirring gently, until it becomes pourable but not hot—around 110°F (43°C). Do not overheat or boil.
- After the chicken has rested for 2 to 3 minutes, brush the hot honey generously over both sides. The residual heat from the crust will cause the honey to set into a glossy, slightly tacky glaze.
- Slice your brioche buns in half and spread a thin layer of softened Kerrygold butter on the cut sides. Heat a skillet over medium heat and toast the buns cut-side down until golden and fragrant—about 2 minutes.
- Place the hot honey-glazed chicken on the bottom bun. Top with 3 to 4 dill pickle slices. Add coleslaw if desired. Cap with the top bun, press down gently, and serve immediately.
Notes
Chef John’s Insight
There is something deeply satisfying about mastering a dish that exists at the intersection of comfort and technique. The crispy hot honey chicken sandwich is not complicated, but it demands respect for process. The overnight brine is not optional. The oil temperature is not negotiable. The resting period is not a suggestion. These are the quiet disciplines that transform ordinary ingredients into something memorable. I have made this sandwich dozens of times, and I still feel a small thrill when that first bite delivers the shatter I was chasing. Cooking is not about shortcuts—it is about understanding why each step matters and honoring that knowledge every single time you step into the kitchen.
— Chef John, The Flavor Bazaar
Nutrition Information (Per Sandwich)
| Nutrient | Amount |
|---|---|
| Calories | 680 kcal |
| Protein | 42g |
| Total Fat | 28g |
| Saturated Fat | 7g |
| Carbohydrates | 68g |
| Dietary Fiber | 2g |
| Sugars | 24g |
| Sodium | 1,340mg |
| Cholesterol | 125mg |
Note: Nutrition values are estimates based on standard ingredient measurements. Actual values may vary depending on specific brands and portion sizes.
USDA Food Safety & Temperature Guide
| Cooking Stage | Target Temperature | Why It Matters |
|---|---|---|
| Chicken internal temp (USDA minimum) | 165°F / 74°C | Kills harmful bacteria including Salmonella |
| Oil frying temperature | 350°F / 177°C | Optimal for Maillard reaction and moisture barrier |
| Danger Zone (avoid holding food here) | 40-140°F / 4-60°C | Bacteria multiply rapidly in this range |
| Resting temp before glazing | 155-160°F / 68-71°C | Allows carryover cooking to finish; crust stabilizes |
Always use an instant-read thermometer. Visual cues alone are not reliable for food safety.
“USDA guidelines for safe poultry internal temperatures
Storage & Reheating Guide
| State | Refrigerator | Freezer | Best Reheat Method |
|---|---|---|---|
| Fried chicken (no sauce) | 3-4 days in airtight container | Up to 3 months wrapped tightly | Air fryer at 375°F for 6-8 min or oven at 400°F for 10-12 min |
| Fried chicken (with hot honey) | 2-3 days in airtight container | Not recommended (texture degrades) | Oven at 375°F for 8-10 min; reapply fresh honey after |
| Assembled sandwich | Not recommended | Not recommended | Assemble fresh; reheat chicken separately |
| Hot honey sauce | 2 weeks in sealed jar | Not necessary | Warm gently to 110°F before use |
Pro tip: Never microwave fried chicken. The moisture turns the breading into a soggy, rubbery mess.
FAQ: Crispy Hot Honey Chicken Sandwich
Can I use chicken thighs instead of breasts?
Absolutely. Boneless, skinless thighs are more forgiving and stay juicier because of their higher fat content. They also cook slightly faster—check for 165°F (74°C) internal temp around the 10-11 minute mark. The dark meat pairs beautifully with hot honey.
Why is my breading falling off during frying?
This usually happens because the chicken was too wet when dredged, or you skipped the 10-minute rest after breading. Make sure to press the flour firmly into the buttermilk-coated chicken, and let the coating hydrate and set before it hits the oil.
Can I make this in an air fryer?
Yes, though the texture will be slightly different. Preheat your air fryer to 400°F (204°C), spray the breaded chicken generously with cooking spray, and cook for 12-14 minutes, flipping halfway. You will not get the same deep golden color, but you will still get satisfying crunch.
How do I prevent the honey from making the chicken soggy?
Let the chicken rest on a wire rack for 2-3 minutes after frying so steam can escape. Apply the hot honey when the chicken is still warm but not scorching hot. The residual heat sets the glaze without creating excess steam.
What can I substitute for buttermilk?
Mix 2 cups of whole milk with 2 tablespoons of white vinegar or lemon juice. Let it sit for 10 minutes until it curdles slightly. This creates a similar acidic environment for tenderizing and flavor, though the texture will not be quite as thick.
More Recipes You’ll Love
If you enjoyed this crispy hot honey chicken sandwich, check out these related recipes on The Flavor Bazaar:
[7 Amazing Crispy Air Fryer Chicken Wings Recipe]
[Easy Mexican Street Corn Salad Recipe]
[Easy Crispy Honey Garlic Chicken Bites Recipe]
[4 Secret Reasons Your Chicken Coating Falls Off]