Best Sweet Chili Chicken Crunch Bowls Recipe
By Chef John | Easy Recipes & Smart Cooking Hacks
The Problem Every Home Cook Faces With Saucy Chicken Bowls
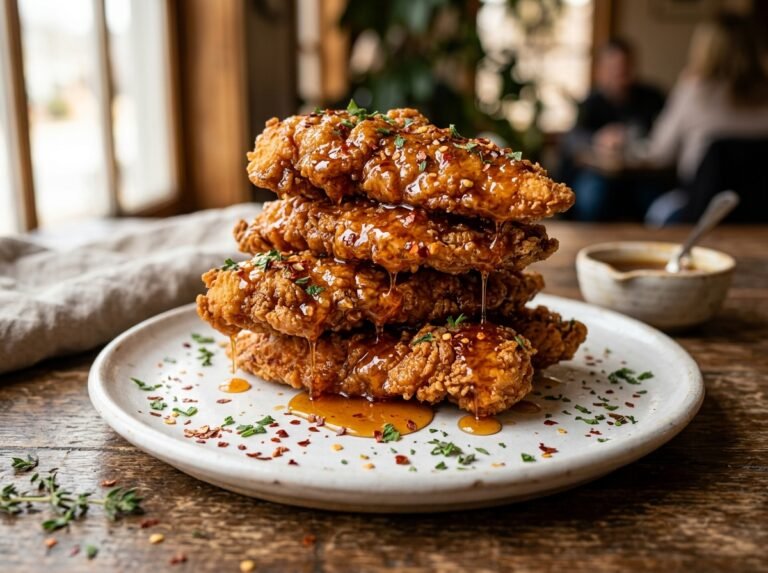
The smell hits you before the fork even touches down—sweet, tangy, with that faint edge of garlic and chili heat rising from the bowl. You pile glossy red sauce over golden chicken pieces, layering them onto rice with a rainbow of fresh vegetables. It looks like something you’d pay eighteen dollars for at a fast-casual chain. and Sweet Chili Chicken Crunch Bowls Recipe
Then you take the first bite. The chicken? Soggy. The coating that was shatteringly crisp thirty seconds ago has turned into a gummy, deflated mess under all that sticky sweet chili glaze. You have been betrayed by physics.
Here is what keeps going wrong: most recipes tell you to toss hot fried chicken directly in sauce, which creates a steam trap between the coating and the meat. That moisture has nowhere to go, so it softens every bit of crunch you worked so hard to build.
I have tested this method across dozens of batches, adjusting coating ratios, frying temperatures, and sauce application techniques to isolate exactly what makes the difference. The solution is not just about how you fry the chicken—it is about when and how you introduce the sauce, and what kind of structural reinforcement your coating actually has.
The Science of Staying Crispy Under Sauce
The secret to chicken that stays crunchy even when drenched in sweet chili sauce comes down to starch chemistry—specifically, the behavior of amylose molecules under high heat.
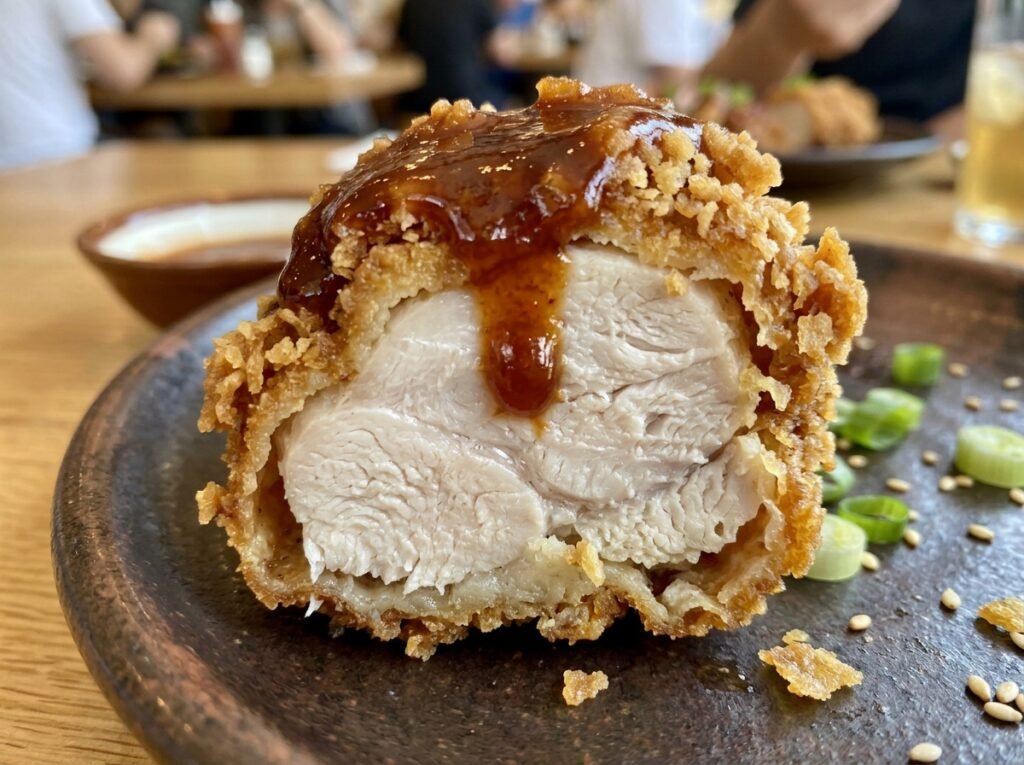
When you coat chicken in cornstarch or potato starch and expose it to oil at 350°F (177°C) or higher, the starch granules absorb trace moisture from the chicken surface, swell rapidly, and then burst. As they cool, those ruptured granules form a rigid, interlocking network that is far more resistant to moisture reabsorption than wheat flour coatings.
Wheat flour contains gluten proteins that create a softer, bread-like crust. That structure holds moisture in, which is great for fried chicken you eat immediately—but terrible when you are about to add a viscous, sugar-heavy sauce on top.
Starch Granules+High Heat→Rigid Amylose Matrix
In simple terms: cornstarch creates a glassy, chip-like shell. Flour creates a bready crust. When sauce hits both, the starch shell resists sogginess for 15–20 minutes longer than flour—long enough to actually enjoy your meal.
The second part of the equation is sauce application timing. If you toss the chicken while it is still releasing steam, you are doomed. Let it rest on a wire rack for 90 seconds after frying. That allows surface steam to escape and the coating to fully harden before you introduce any liquid.
Finally, the sauce itself matters. A thick, glossy sweet chili sauce clings to the surface without soaking in, while a thin, watery glaze seeps through every microscopic crack in the coating. Viscosity is your friend here.
Pro Buying Guide: Tools, Starches, and Sauces (USA Edition)
Best Starches for Maximum Crunch
If you shop at Walmart or Target, grab Argo Cornstarch—it is pure, fine, and creates a light, delicate crust. For an even crispier result, look for Bob’s Red Mill Potato Starch at Whole Foods or Kroger. Potato starch has a slightly larger granule size, which gives you more surface texture and holds up better under heavy saucing.
Avoid all-purpose flour for this recipe. It has its place, but not in a bowl where sauce is the star.
Sweet Chili Sauce: Jarred vs. Homemade
Mae Ploy Sweet Chili Sauce (available at most Trader Joe’s, Whole Foods, and Asian grocers) is the gold standard. It has the right balance of sugar, vinegar, garlic, and chili flakes—thick enough to coat without drowning the chicken.
If you want to make your own, you will need rice vinegar, sambal oelek, honey, garlic, and a cornstarch slurry to thicken. Homemade lets you control the heat level and sweetness, but jarred Mae Ploy is shockingly good and saves you ten minutes.
Air Fryer vs. Cast Iron Skillet
I have made this recipe both ways more times than I can count. Here is the truth: a cast iron skillet with 1 inch of neutral oil gives you the most even, golden crust and the deepest flavor from the Maillard reaction. It is also faster—chicken thighs fry in about 4 minutes per side.
An air fryer (I use a Cosori 5.8-quart from Target) will get you 85% of the way there with way less mess. You will need to spray the coated chicken generously with oil and flip halfway through. Texture is great, but you lose a bit of that deep-fried richness.
For vegetables, grab pre-shredded red cabbage and matchstick carrots from the Trader Joe’s salad section. They are a time-saver and stay crunchy in the bowl.
Ingredients
| Component | Ingredient | US Customary | Metric |
|---|---|---|---|
| Chicken | Boneless, skinless chicken thighs | 1.5 lbs | 680g |
| Cornstarch (or potato starch) | ¾ cup | 95g | |
| Garlic powder | 1 tsp | 3g | |
| Onion powder | 1 tsp | 3g | |
| Salt | 1 tsp | 6g | |
| Black pepper | ½ tsp | 1g | |
| Neutral oil (for frying) | 2 cups | 480ml | |
| Sweet Chili Sauce | Mae Ploy sweet chili sauce | ⅔ cup | 160ml |
| Fresh lime juice | 1 tbsp | 15ml | |
| Soy sauce (low sodium) | 1 tsp | 5ml | |
| Bowl Base | Cooked jasmine rice | 3 cups | 540g |
| Shredded red cabbage | 1 cup | 90g | |
| Matchstick carrots | 1 cup | 110g | |
| Cucumber, thinly sliced | 1 medium | 150g | |
| Green onions, sliced | 3 stalks | 30g | |
| Garnish | Sesame seeds (white or black) | 1 tbsp | 9g |
| Fresh cilantro | ¼ cup, chopped | 10g | |
| Lime wedges | 4 wedges | — |
Common Mistakes and How to Fix Them
| The Mistake | What Actually Happens (The Science) | The Chef’s Fix |
|---|---|---|
| Tossing chicken in sauce immediately | Steam trapped between coating and meat softens the crust within 60 seconds | Let chicken rest on a wire rack for 90 seconds before saucing |
| Using all-purpose flour instead of starch | Gluten forms a bread-like coating that absorbs moisture like a sponge | Use pure cornstarch or potato starch for a glassy, moisture-resistant shell |
| Overcrowding the pan while frying | Oil temperature drops below 325°F, leading to greasy, pale chicken | Fry in small batches; maintain oil at 350°F (177°C) |
| Not patting chicken dry before coating | Excess moisture creates clumps of wet starch that fry unevenly | Pat chicken completely dry with paper towels before dredging |
| Adding sauce to the entire bowl at once | Vegetables wilt and rice turns sticky under the weight of heavy sauce | Sauce only the chicken; let diners mix the bowl themselves |
| Skipping the lime juice in the sauce | Sweet chili sauce tastes one-dimensional and cloying without acid balance | Add 1 tablespoon fresh lime juice to brighten and cut sweetness |
Step-by-Step Method
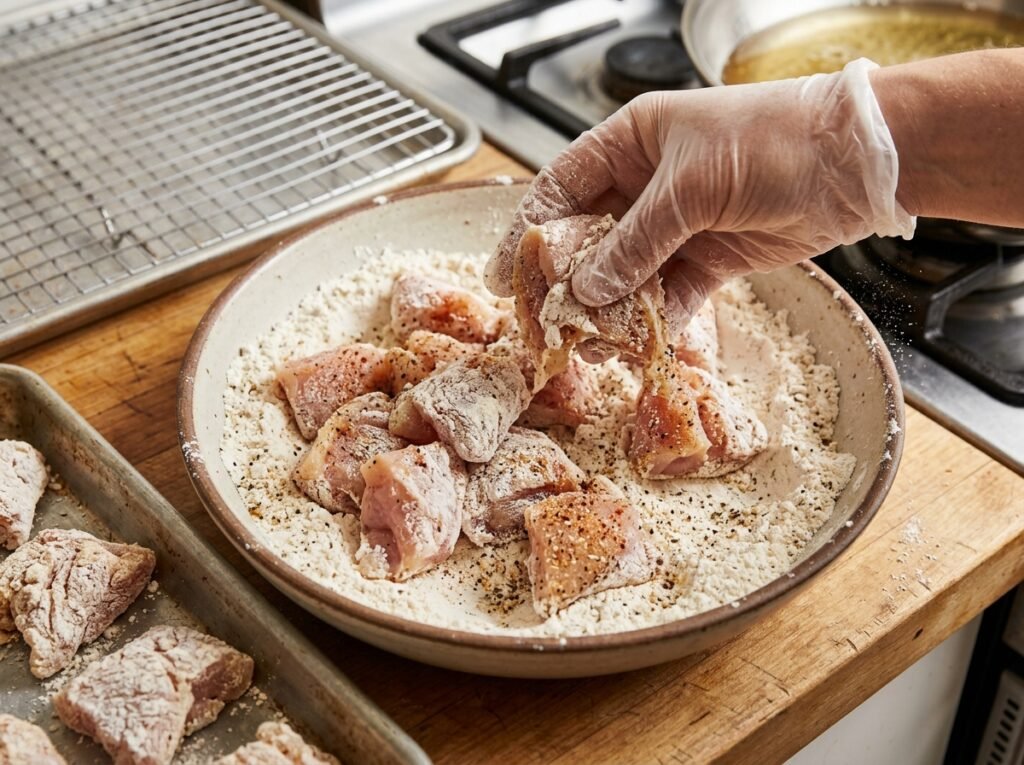
Prepare and Season the Chicken
Start by cutting the chicken thighs into roughly 2-inch chunks. You want pieces large enough to stay juicy inside but small enough to fry quickly and evenly. Pat each piece completely dry with paper towels—this is not optional. Any surface moisture will turn your starch coating into a gummy paste instead of a crisp shell.
In a medium bowl, whisk together the cornstarch, garlic powder, onion powder, salt, and black pepper. The seasoning goes directly into the starch, which ensures every bit of the crust is flavorful. Toss the dried chicken pieces into the starch mixture and use your hands to press the coating into every crevice. Let the coated chicken sit on a plate for about 5 minutes. This brief rest allows the starch to hydrate slightly from the chicken’s residual moisture, which helps it adhere better during frying.
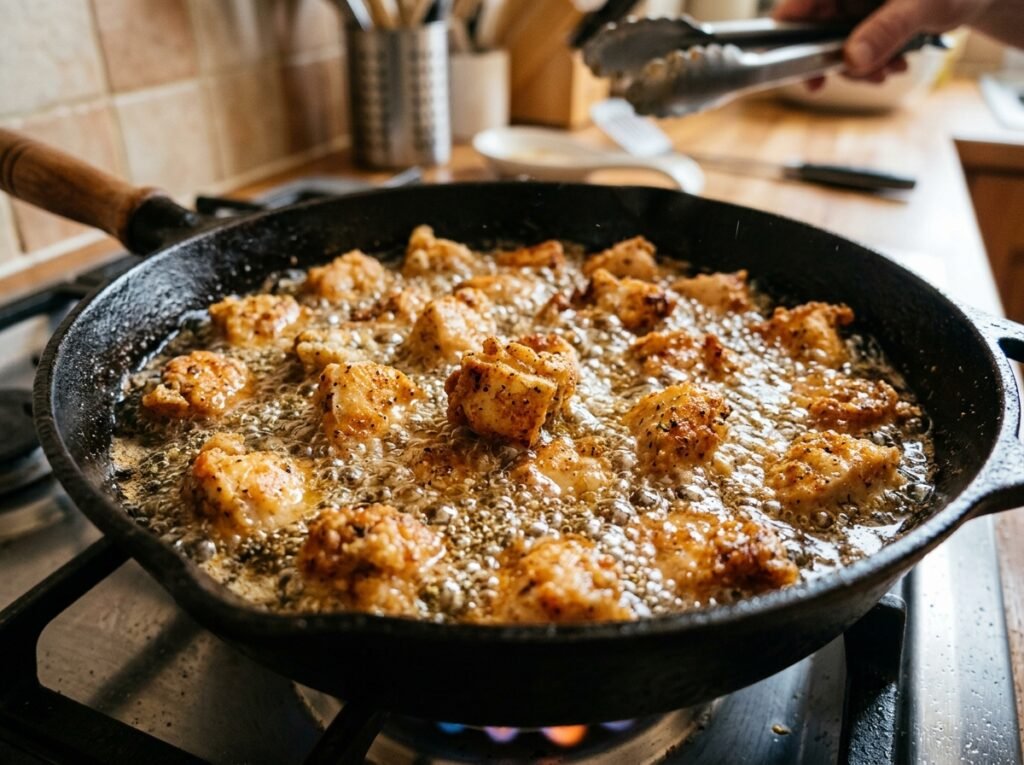
Heat the Oil and Fry in Batches
Pour about 2 cups of neutral oil (canola, vegetable, or peanut) into a heavy-bottomed skillet or cast iron pan. You want the oil to come up about 1 inch on the sides. Heat over medium-high until the oil reaches exactly 350°F (177°C)—use a digital thermometer if you have one, or test with a small pinch of starch. It should sizzle vigorously on contact.
Add the chicken in a single layer, working in two batches if necessary. Do not crowd the pan. Each piece needs space for the oil to circulate and maintain temperature. Fry for about 4 minutes on the first side without moving the pieces. You will see the edges turn golden and the coating firm up. Flip carefully and fry another 3–4 minutes until the internal temperature hits 165°F (74°C) and the exterior is deeply golden.
Transfer the finished chicken to a wire rack set over a baking sheet—never paper towels, which trap steam underneath. Let it rest here for at least 90 seconds while you fry the second batch. This resting period is when the coating fully hardens into that glassy, chip-like texture.
Make the Sweet Chili Glaze
While the chicken rests, pour the Mae Ploy sweet chili sauce into a small bowl. Stir in the fresh lime juice and soy sauce. The lime juice cuts through the sweetness and adds a bright, citrusy note that keeps the bowl from feeling heavy. The soy sauce adds a whisper of umami depth.
Taste it. If you want more heat, add a pinch of red pepper flakes or a few drops of sambal oelek. If it is too sweet for your palate, add another squeeze of lime.
Once the chicken has rested and the coating is fully set, transfer the pieces to a clean mixing bowl. Drizzle about half the sweet chili glaze over the top and toss gently with tongs. You want the sauce to coat the outside without pooling at the bottom of the bowl. The chicken should look glossy and lightly lacquered—not drowned.
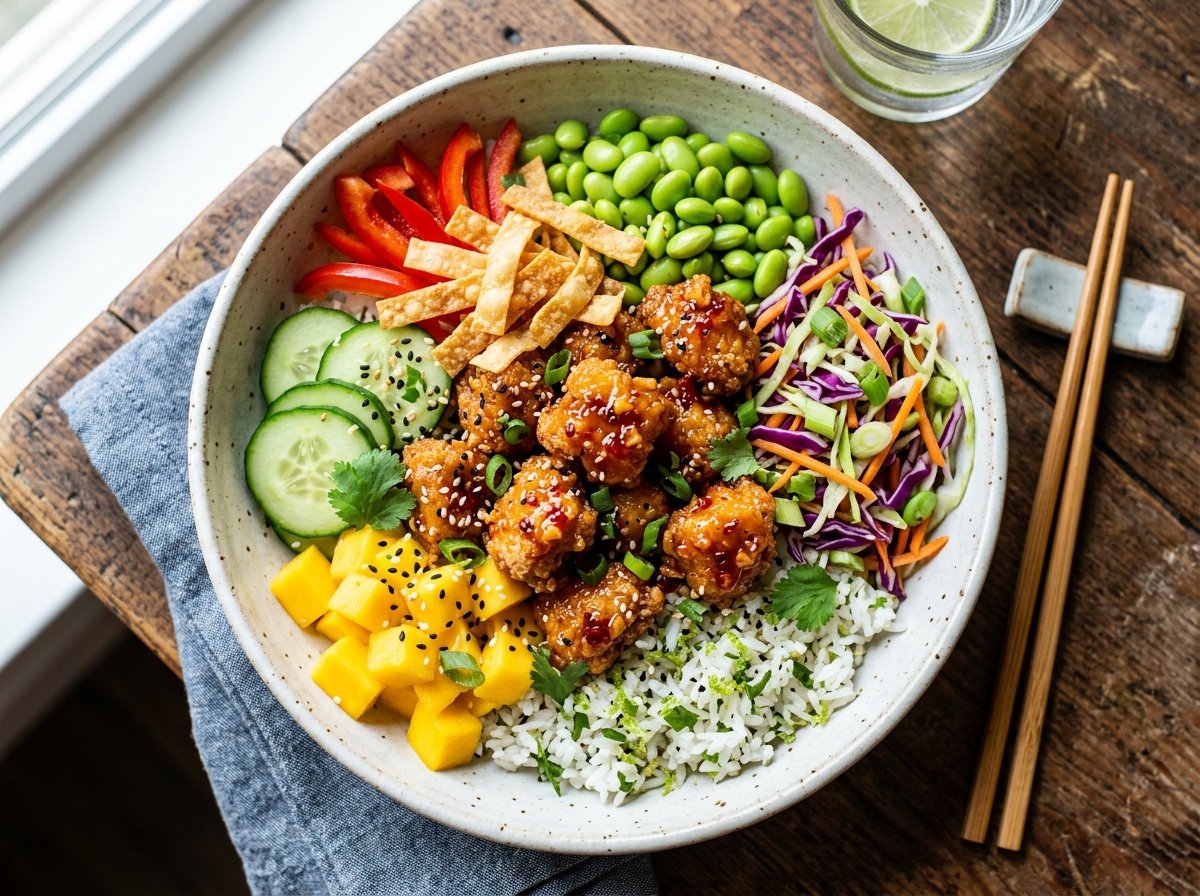
Assemble the Crunch Bowls
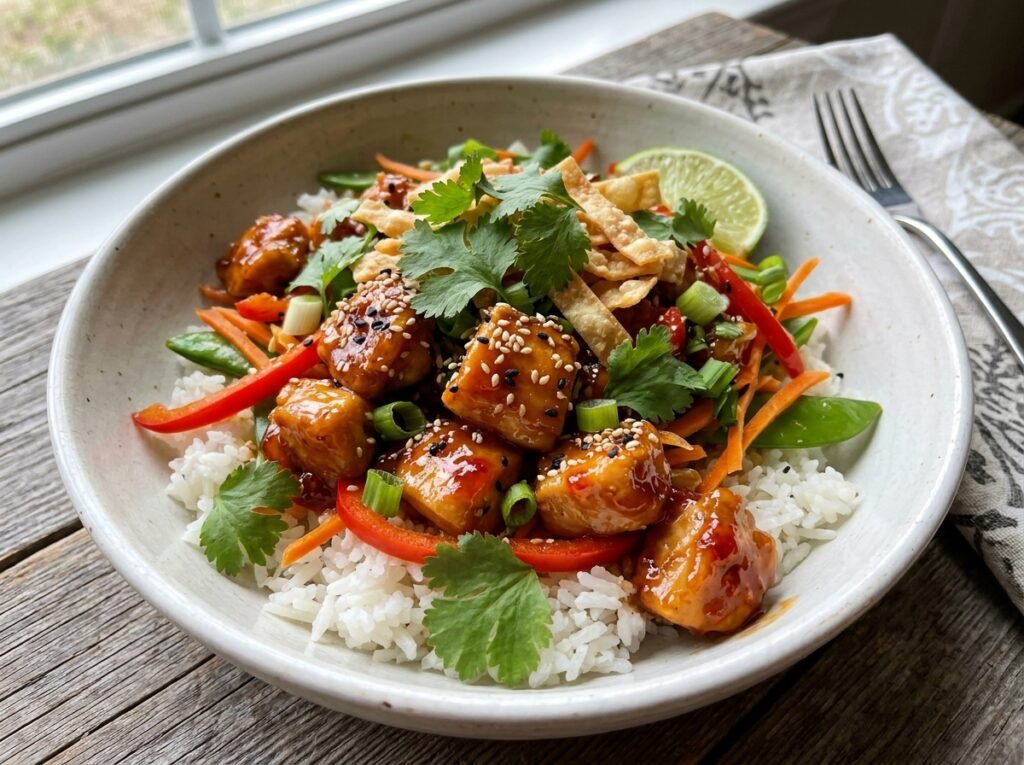
Divide the cooked jasmine rice among four wide, shallow bowls. Fluffy, short-grain jasmine rice works best here because it clumps just enough to hold together under the sauce but does not turn mushy.
Arrange the shredded red cabbage, matchstick carrots, and cucumber slices in separate sections around the edge of each bowl, leaving the center open for the chicken. This is not just for looks—it keeps the vegetables crisp and prevents them from wilting under the heat of freshly fried chicken.
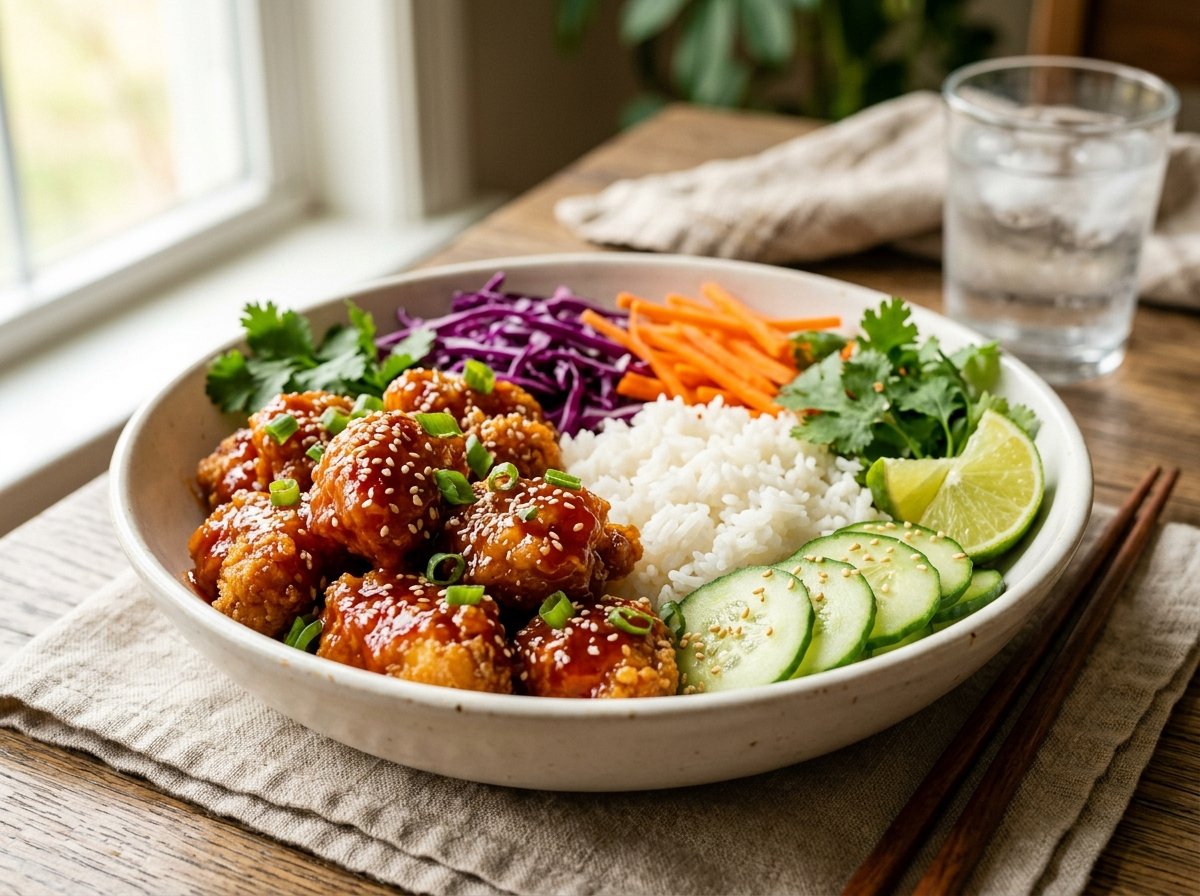
Pile the sauced chicken in the center of each bowl. Drizzle any remaining glaze over the chicken (not the vegetables). Scatter sliced green onions, sesame seeds, and fresh cilantro over the top. Tuck a lime wedge into the side of each bowl.
Serve immediately. The contrast between the hot, crispy chicken and the cool, crunchy vegetables is what makes this bowl unforgettable.

Best Sweet Chili Chicken Crunch Bowls Recipe
Ingredients
Equipment
Method
- Cut your boneless chicken breasts into uniform one-inch cubes so they cook at the exact same rate. Season the chicken pieces thoroughly with kosher salt and garlic powder, then toss them in the beaten eggs until every surface is evenly coated.
- Pour your cornstarch into a wide, shallow bowl. Lift the chicken pieces from the egg wash, letting any excess liquid drip away, and drop them into the starch. Press down firmly so the starch packs tightly into every fold of the meat, shake off any loose powder, and let them rest on a wire rack for 2 minutes to help the coating adhere.
- Heat your frying oil in a heavy cast-iron skillet over medium-high heat until it reaches a steady 350°F / 177°C. Carefully lower the chicken pieces into the hot oil in small, single-layer batches to avoid crowding, fry for 5 to 6 minutes until light golden-blonde, and drain on a paper-towel-lined plate.
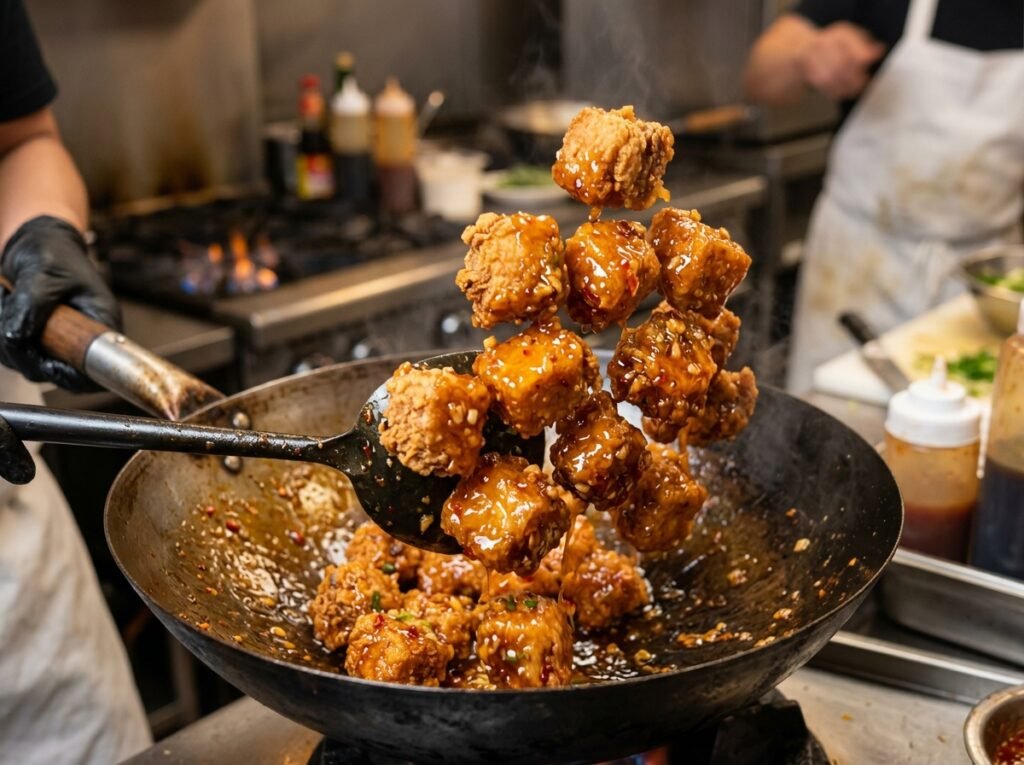
- While the chicken drains, combine the Thai sweet chili sauce, soy sauce, grated ginger, minced garlic, and rice vinegar in a large skillet or wok over medium heat. Bring the mixture to a gentle simmer for 2 to 3 minutes until the garlic softens and the sauce thickens slightly into a glossy, sticky glaze, then turn off the heat completely.
- Dump the hot fried chicken directly into the warm glaze pan and quickly fold the meat using a rubber spatula until every piece is evenly coated. Divide your warm cooked jasmine rice across four serving bowls, arrange the shredded purple cabbage, edamame, and sliced cucumbers in distinct sections over the rice, pile the sweet chili chicken right in the center, and garnish with sliced green onions and toasted sesame seeds.
Notes
Recipe Notes
- The Golden Frying Rule: Never crowd your frying pan. Dropping too much chicken at once plummets the oil temperature, which makes the starch absorb oil and turn greasy instead of crisping up. Fry in batches!
- Keep it Crunchy: Never simmer or boil the fried chicken inside the sauce. Always turn off the burner heat completely before tossing the chicken in the warm glaze right before assembling the bowls.
- Air Fryer Alteration: Preheat your air fryer to 400°F / 204°C. Spritz the cornstarch-coated chicken cubes generously with cooking oil spray so no dry white powder remains, and air fry for 12 to 14 minutes, shaking the basket halfway through.
- Gluten-Free Swap: To make this completely gluten-free, simply replace the standard soy sauce in the glaze with an equal amount of certified gluten-free Tamari or coconut aminos.
Chef John’s Insight
There is a kind of alchemy that happens when textures collide in a single bowl. The crunch of cabbage against the yielding chew of jasmine rice. The glassy snap of a perfectly fried coating giving way to tender, juicy chicken. The cool brightness of cucumber cutting through sticky, sweet heat. This is not just dinner—it is architecture. Every element holds its position, plays its role, and refuses to dissolve into the others. That is what separates a great bowl from a forgettable one. The best meals do not blend into mush on your plate. They stay distinct, stay alive, all the way to the last bite. The lesson? Respect each ingredient’s texture, and the bowl will take care of itself.
— Chef John
Estimated Nutrition (Per Serving)
| Nutrient | Amount |
|---|---|
| Calories | 520 kcal |
| Protein | 32g |
| Total Fat | 18g |
| Saturated Fat | 3g |
| Carbohydrates | 58g |
| Sodium | 680mg |
| Cholesterol | 110mg |
Note: Nutrition values are estimates based on standard ingredient databases. Actual values may vary depending on specific brands and preparation methods.
Food Safety & Temperature Guide
| Safety Checkpoint | Temperature | Why It Matters |
|---|---|---|
| USDA Minimum Internal Temp (Chicken) | 165°F / 74°C | Kills harmful bacteria like Salmonella and Campylobacter |
| Ideal Frying Oil Temperature | 350°F / 177°C | High enough for rapid crisping without burning; low enough to cook through |
| Food Safety Danger Zone | 40°F – 140°F / 4°C – 60°C | Bacteria multiply rapidly in this range; keep cooked chicken above 140°F or refrigerate within 2 hours |
| Safe Reheating Temperature | 165°F / 74°C | Ensures any potential bacterial growth during storage is eliminated |
Always use a digital instant-read thermometer inserted into the thickest part of the chicken to confirm doneness. Visual cues alone are not reliable. USDA Food Safety Guidelines
Storage & Reheating Guide
| Component | Fridge (35–40°F) | Freezer (0°F) | Best Reheat Method |
|---|---|---|---|
| Sauced chicken | 2–3 days | Not recommended | Oven at 375°F for 8–10 min on a wire rack (crisps back up) |
| Unsauced fried chicken | 3–4 days | Up to 2 months | Air fryer at 375°F for 5 min or oven at 400°F for 10 min |
| Cooked jasmine rice | 4–5 days | Up to 3 months | Microwave with 1 tbsp water, covered, for 90 seconds |
| Fresh vegetables | 3–4 days (store separately) | Not recommended | Serve cold or at room temp; do not reheat |
| Sweet chili sauce | 7–10 days | Up to 6 months | Bring to room temp or gently warm in microwave |
Pro Tip: For meal prep, store all components separately. Assemble bowls fresh each day to preserve maximum crunch and flavor contrast.
FAQ
Can I make this gluten-free?
Yes. Use pure cornstarch or potato starch (both naturally gluten-free) for the coating, and make sure your soy sauce is a certified gluten-free brand like Tamari or Coconut Aminos. Mae Ploy sweet chili sauce is also gluten-free.
Will this work with chicken breast instead of thighs?
It will, but thighs stay juicier and more forgiving if you accidentally overcook by a minute or two. If you use breasts, pound them to an even thickness and watch your frying time closely—they dry out faster.
Can I use an air fryer instead of frying in oil?
Absolutely. Spray the coated chicken generously with cooking oil spray and air fry at 400°F (204°C) for 12–14 minutes, flipping halfway. The crust will not be quite as rich, but it will still be crispy and delicious.
How do I keep the vegetables from getting soggy?
Store them separately if you are meal prepping, and only add them to the bowl right before serving. Never pour sauce over the vegetables—sauce the chicken only.
What is the best rice to use?
Jasmine rice is ideal for its light floral aroma and slightly sticky texture. Short-grain white rice or even brown jasmine rice works well too. Avoid instant rice—it turns mushy too quickly.
You Might Also Love
[7 Amazing Crispy Air Fryer Chicken Wings Recipe]
[Easy Mexican Street Corn Salad Recipe]
[Easy Crispy Honey Garlic Chicken Bites Recipe]