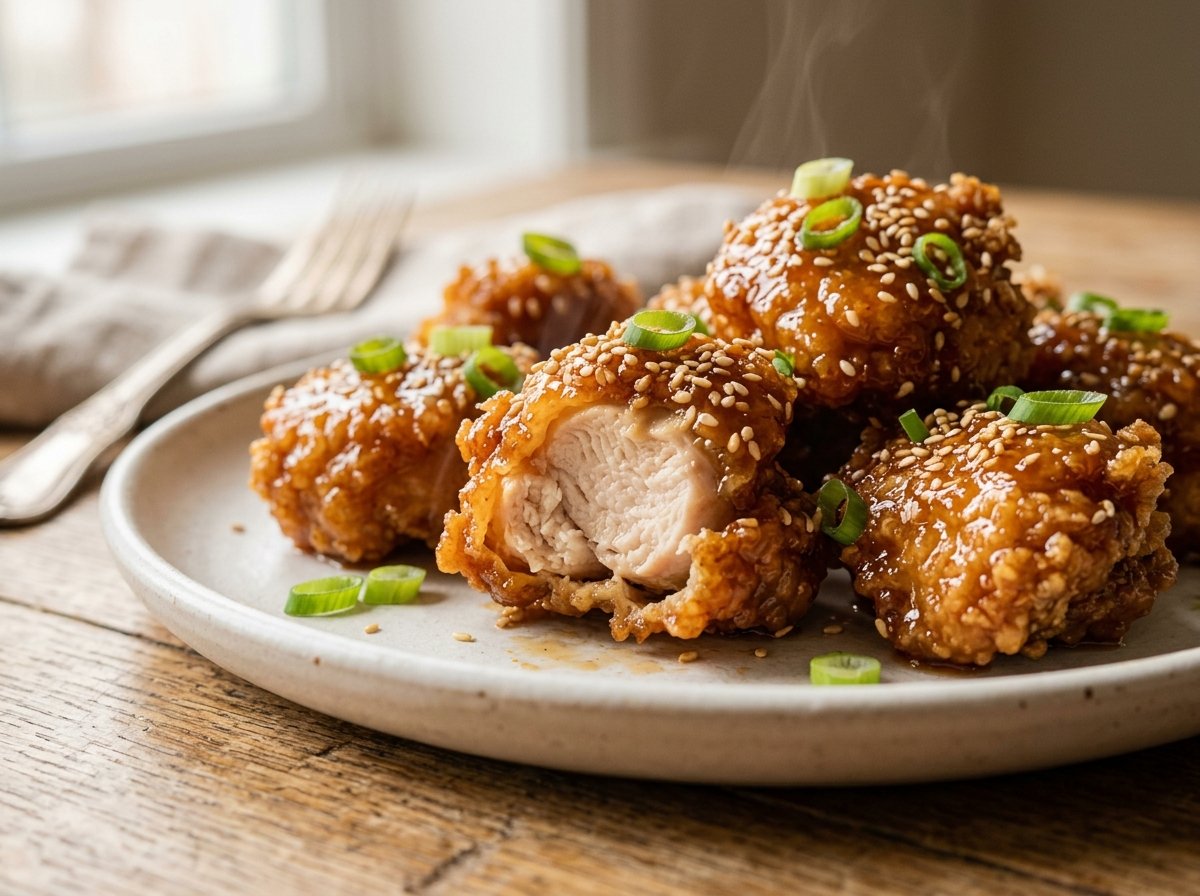
Easy Crispy Honey Garlic Chicken Bites Recipe
By Chef John | Easy Recipes & Smart Cooking Hacks
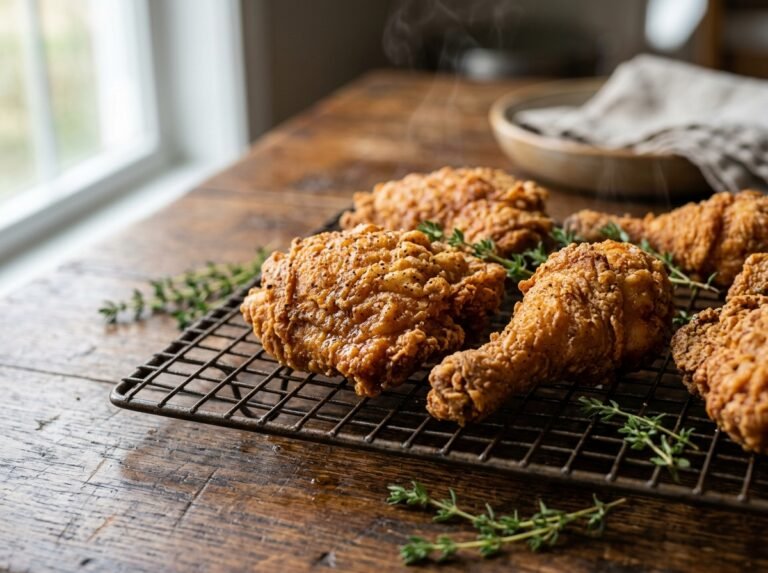
The Crunch You Can Hear Across the Room
This Crispy Honey Garlic Chicken Bites Recipe delivers restaurant-style crunch with a sweet and sticky garlic glaze.
That first bite into truly crispy chicken should announce itself. You know the sound I mean — that sharp, shattering crack that tells everyone at the table you did it right. But most honey garlic chicken bites fail before they even hit your plate. The coating goes limp. The glaze turns them into gummy, sweet-sticky lumps. You wanted restaurant-quality crunch and got sad, soggy takeout instead.
I have spent weeks in the test kitchen tweaking the starch-to-flour ratio to ensure these stay glass-crisp even after hitting the glaze. The problem was never the honey or the garlic — it was always about understanding what happens when different starches meet hot oil, and then how to protect that texture when liquid gold cascades over the surface.
This recipe solves all of it. You will get chicken bites with a coating so crunchy it practically splinters, glazed with a savory-sweet sauce that clings without destroying the texture. And the best part? It works whether you are deep frying or using an air fryer.
The Science Behind Glass-Crisp Chicken (And Why Most Recipes Get It Wrong)
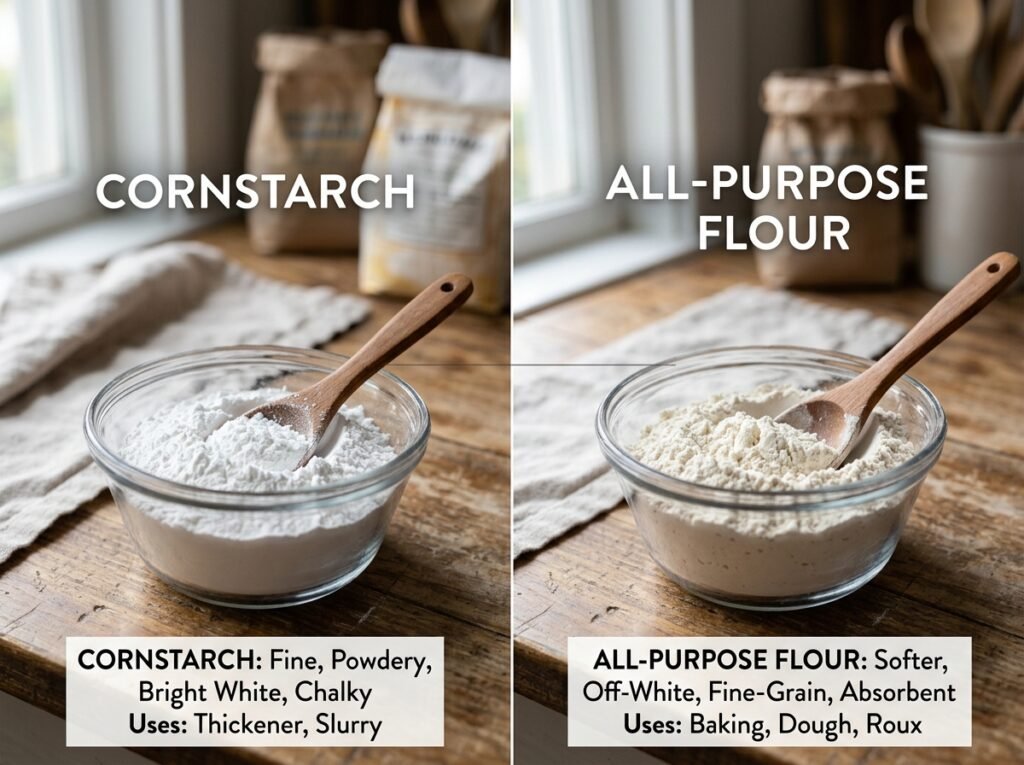
The secret to shatter-crisp chicken coating lives in the molecular structure of starch. When you dust chicken in flour, you are working with wheat starch — a mix of two types of glucose chains called amylose and amylopectin.
Amylose is a straight-chain molecule. It absorbs water quickly and forms a dense, soft coating when fried. Amylopectin, on the other hand, is branched and bushy. It creates a rigid, brittle structure when dehydrated in hot oil — exactly the texture we want.
Cornstarch is nearly pure amylopectin. That is why Asian fried chicken recipes rely on it so heavily. When you use a blend of cornstarch and all-purpose flour (around 60% cornstarch, 40% flour), you get the best of both worlds: structure from the flour’s protein, and explosive crunch from the starch.
But here is where it gets interesting. When you introduce honey into the equation, you are not just adding sweetness — you are triggering invert sugar chemistry. Honey contains the enzyme invertase, which breaks down sucrose into simpler sugars:
C12H22O11+H2O→Glucose+Fructose
In simple terms: honey’s glucose and fructose caramelize at lower temperatures than regular sugar, giving you deeper color and complexity without burning. But those sugars are also hygroscopic — they pull moisture from the air and from your crispy coating. That is why timing the glaze is everything.
The double-fry method I use here creates a moisture barrier. The first fry sets the protein and creates initial crispness. The rest period lets steam escape. The second fry crystallizes the starch shell into an almost waterproof armor. Only then does the glaze go on.
Pro Buying Guide: Getting the Right Ingredients & Tools (USA)
Chicken
Look for boneless, skinless chicken thighs at Whole Foods or Kroger. Thighs have more intramuscular fat than breasts, which means they stay juicy even if you slightly overcook them. I prefer the organic options from Whole Foods’ 365 brand or the Murray’s Organic line at Kroger — they have better texture and moisture retention.
If you can only find chicken breasts, buy the thicker “airline breast” cuts and pound them to even thickness. Target usually carries these in their Good & Gather line.
Starch & Flour
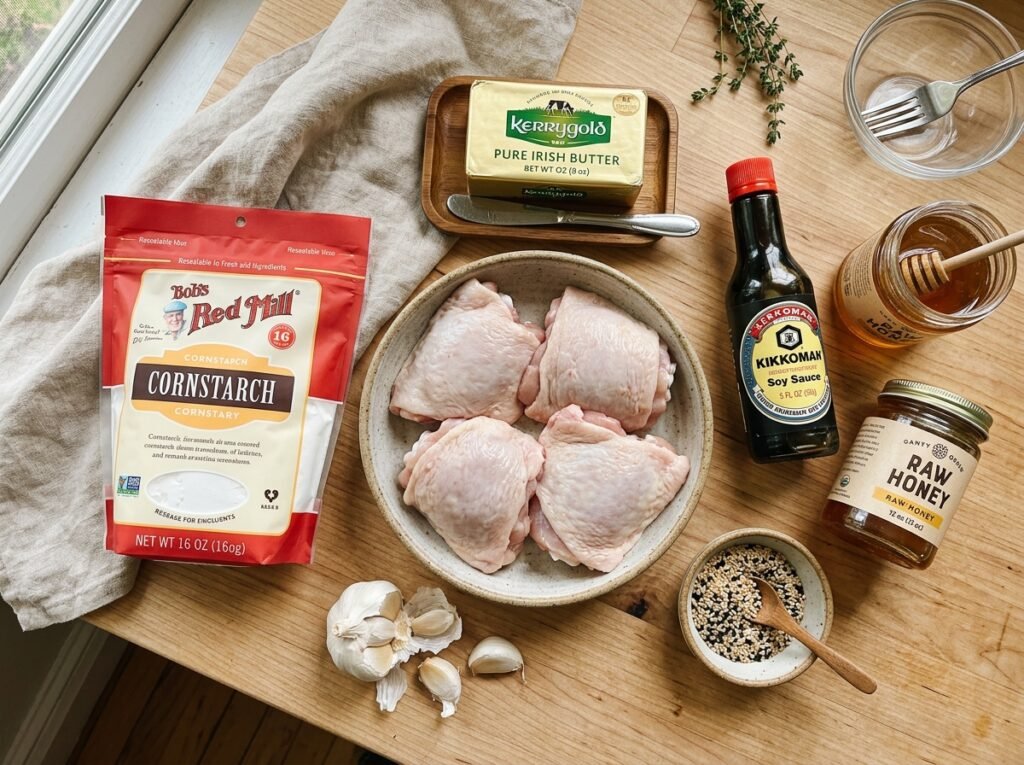
Bob’s Red Mill Cornstarch is my go-to. It is finely milled and creates an incredibly even coating. You can grab it at nearly any Kroger, Whole Foods, or even Walmart. For the all-purpose flour, King Arthur Baking Company has the most consistent protein content (around 11.7%), which gives you reliable gluten structure.
Honey
Do not use the plastic bear stuff. Get raw, unfiltered honey from Trader Joe’s or Whole Foods. Raw honey has more enzymatic activity and deeper flavor. I love the Trader Joe’s Organic Raw Honey — it is affordable and regionally sourced.
Butter
Kerrygold Irish Butter (salted or unsalted, your choice) brings richness that regular butter cannot touch. The higher butterfat content (82% vs. 80%) emulsifies better with honey and creates a glossier sauce. Available at Target, Whole Foods, and most Kroger locations.
Equipment: Air Fryer vs. Deep Fryer
If you are deep frying, I recommend the Cuisinart CDF-200P1 (about $70 at Target). It holds temperature beautifully and has a 4-quart capacity — perfect for batch frying without crowding.
For air frying, the Cosori Pro II Air Fryer (5.8-quart model at Walmart or Amazon) gives the most even browning. Preheat it to 400°F (204°C) and work in single layers. You will need two batches, but the crunch rivals deep frying.
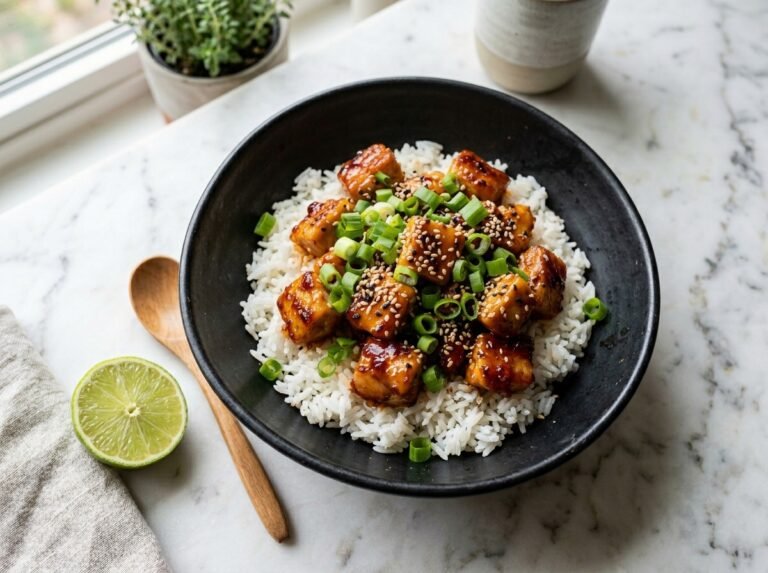
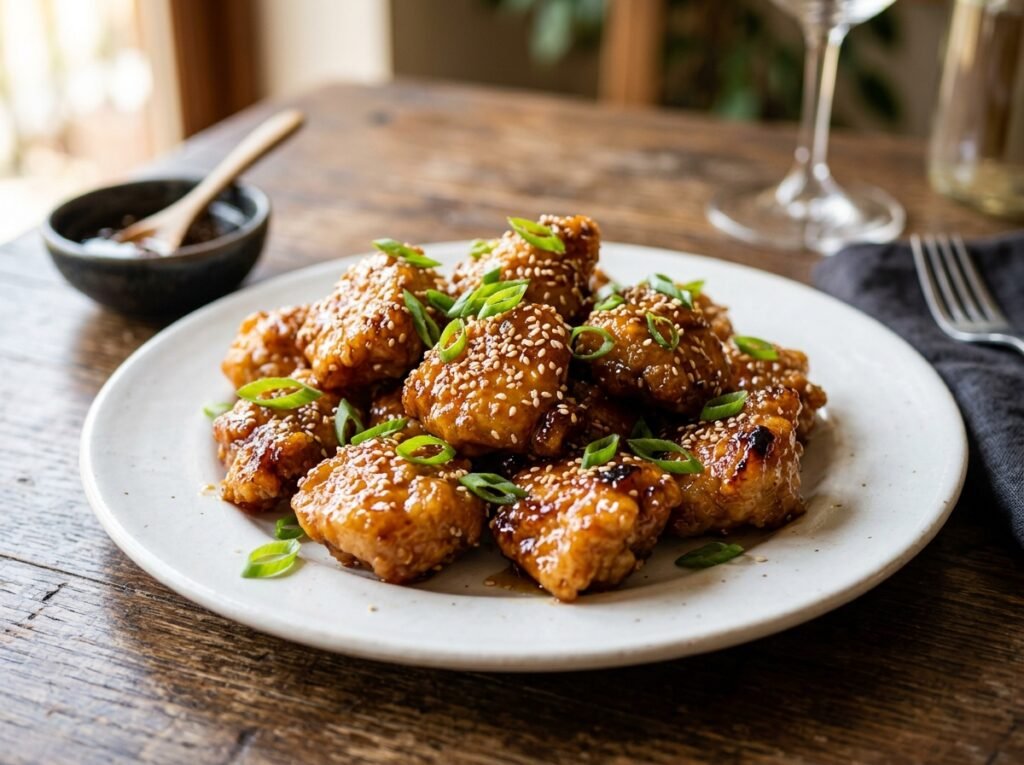
This Crispy Honey Garlic Chicken Bites Recipe uses a cornstarch coating for extra crunch and a sticky homemade honey garlic glaze.
Ingredients
| Ingredient | US Customary | Metric |
|---|---|---|
| For the Chicken | ||
| Boneless, skinless chicken thighs | 1.5 lbs | 680g |
| Cornstarch | ¾ cup | 96g |
| All-purpose flour | ½ cup | 60g |
| Garlic powder | 1 tsp | 3g |
| Onion powder | 1 tsp | 3g |
| Smoked paprika | ½ tsp | 1.5g |
| Kosher salt | 1 tsp | 6g |
| Black pepper | ½ tsp | 1g |
| Eggs (beaten) | 2 large | 100g |
| Neutral oil for frying | 4 cups | 960ml |
| For the Honey Garlic Glaze | ||
| Raw honey | ⅓ cup | 113g |
| Soy sauce (low sodium) | 3 tbsp | 45ml |
| Rice vinegar | 2 tbsp | 30ml |
| Kerrygold butter | 2 tbsp | 28g |
| Fresh garlic (minced) | 5 cloves | 15g |
| Fresh ginger (grated) | 1 tsp | 5g |
| Red pepper flakes | ¼ tsp | 0.5g |
| Cornstarch slurry | 1 tsp + 2 tbsp water | 5g + 30ml |
| For Garnish | ||
| Sesame seeds | 1 tbsp | 9g |
| Green onions (sliced) | 2 stalks | 20g |
Common Mistakes (And How to Avoid Disaster)
| The Mistake | What Actually Happens | The Fix |
|---|---|---|
| Using only flour (no cornstarch) | Coating turns soft and bready, not crispy | Use 60% cornstarch, 40% flour blend |
| Skipping the egg wash | Coating slides off during frying, leaving bare patches | Double-dip: egg wash, then starch-flour blend |
| Crowding the pan/air fryer | Steam gets trapped, coating turns soggy and limp | Fry in single layers with space between each piece |
| Adding cold honey to the pan | Honey seizes up, won’t emulsify, creates clumps | Warm honey slightly (10 seconds microwave) before using |
| Glazing immediately after first fry | Steam under coating + wet glaze = instant sogginess | Use double-fry method: fry, rest, fry again, then glaze |
| Not drying the chicken before coating | Water dilutes egg wash, coating won’t stick properly | Pat chicken completely dry with paper towels before coating |
| Using high-heat honey in the sauce | Honey burns and turns bitter before garlic is fragrant | Cook garlic in butter first, remove from heat, add honey |
👨🍳 The Method: Double-Fry for Maximum Crunch
Step 1: Prep the Chicken
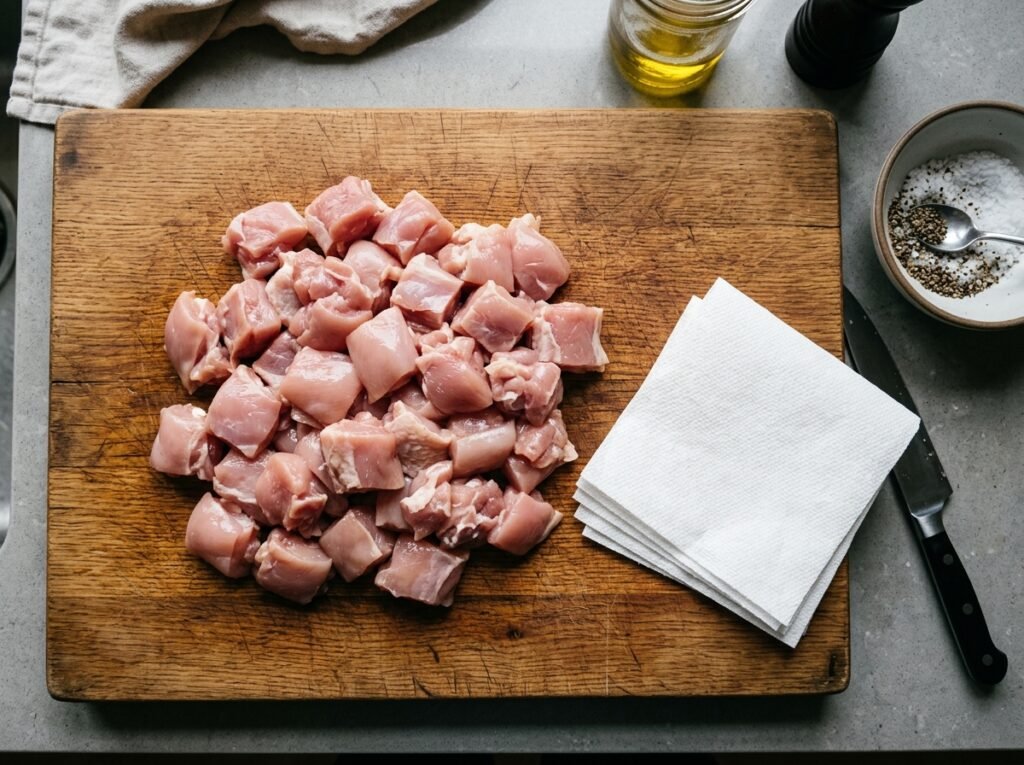
Cut your chicken thighs into 1.5-inch (4cm) cubes — bite-sized but substantial. Pat them completely dry with paper towels. Any surface moisture will dilute your coating and prevent adhesion.
Season the chicken pieces lightly with a pinch of salt and let them sit at room temperature for 15 minutes. This brief rest allows the salt to penetrate and the chill to come off the meat, which means more even cooking.
Step 2: Set Up Your Dredging Station
In a wide, shallow bowl, whisk together the cornstarch, all-purpose flour, garlic powder, onion powder, smoked paprika, salt, and black pepper. In a second bowl, beat the two eggs until completely uniform.
This is your assembly line: chicken → egg wash → starch-flour blend. The egg acts as a glue. The starch blend creates the armor.
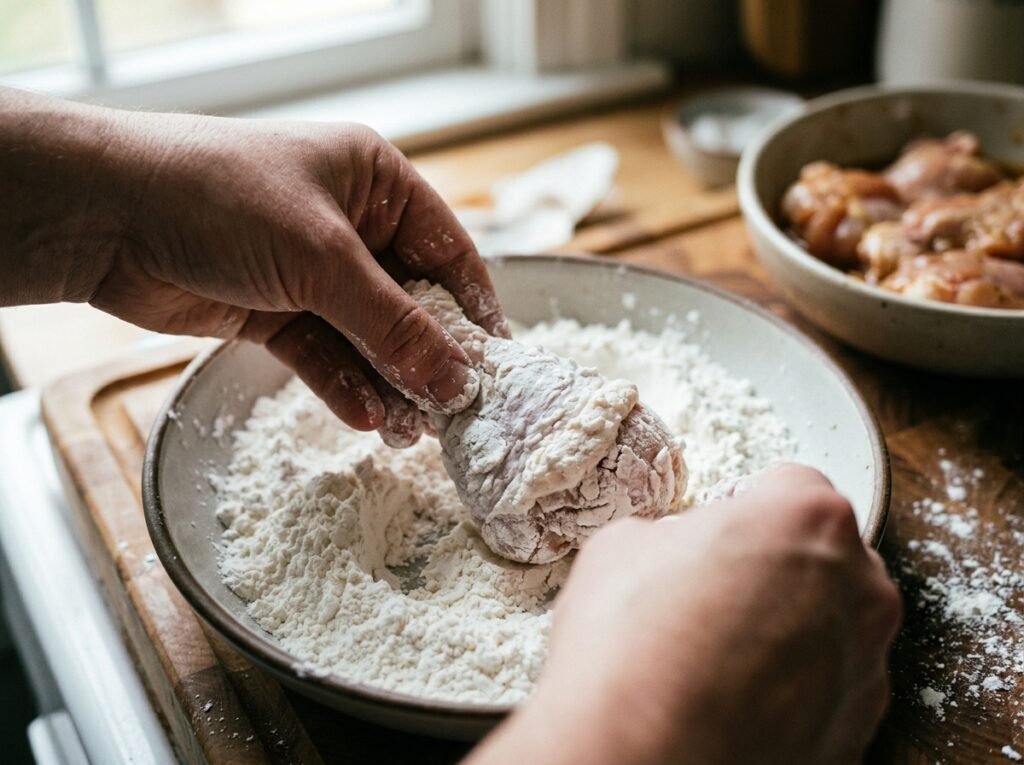
Step 3: Coat the Chicken (Double-Dip Technique)
Dip each chicken piece in the egg wash, letting excess drip off. Then press it firmly into the starch-flour mixture, turning to coat all sides. Here is the key: shake off the excess, then dip it back in the egg wash for a second pass, and coat again in the dry mixture.
This double-dip creates a thicker, more resilient crust that can withstand the glaze. Lay the coated pieces on a wire rack and let them rest for 10 minutes. This drying time helps the coating adhere and prevents it from sloughing off in the oil.
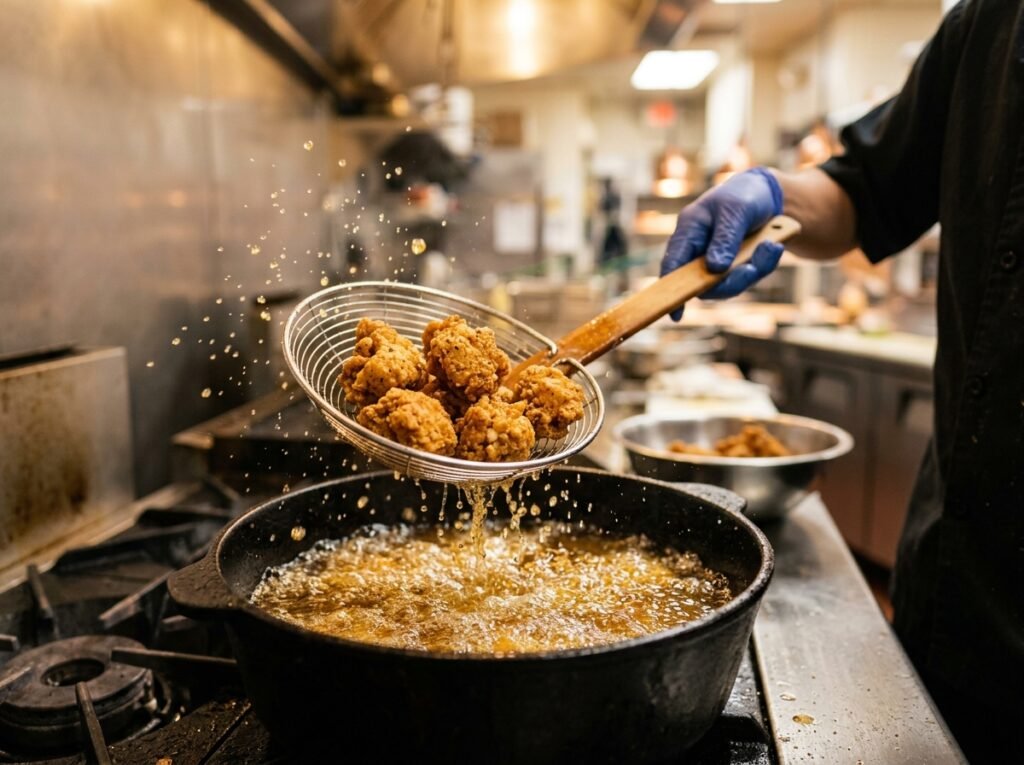
Step 4: First Fry (Setting the Crust)
Heat your neutral oil (canola, vegetable, or peanut) to 325°F (163°C) in a deep, heavy pot or your deep fryer. Use a thermometer — guessing will ruin this.
Gently lower 5–6 pieces into the oil. Do not crowd them. Fry for 4 minutes, turning once halfway through. You are not looking for deep golden color yet — just a light blonde and a set crust.
Remove the chicken to a wire rack (never paper towels — they trap steam). Let the pieces rest for 5 minutes. During this time, steam escapes from the interior, and the coating firms up.
Step 5: Second Fry (Achieving Glass-Crisp Texture)
Increase your oil temperature to 375°F (190°C). This is the critical move. The higher heat flash-fries the exterior, crystallizing the starch into that signature shatter-crisp shell.
Return the chicken to the oil in batches. Fry for 2–3 minutes until deep golden brown and audibly crackling. The sound will change — you will hear sharper, more aggressive bubbling. That is the starch structure locking in.
Drain on a wire rack. Do not sauce them yet.
Step 6: Make the Honey Garlic Glaze
In a wide skillet or sauté pan, melt the Kerrygold butter over medium heat. Add the minced garlic and grated ginger. Cook for 45–60 seconds until fragrant but not browned.
Remove the pan from the heat. This is important — if the pan stays on the burner, the honey will scorch. Add the honey, soy sauce, rice vinegar, and red pepper flakes. Stir until fully combined.
Return the pan to low heat. Bring the mixture to a gentle simmer. Add the cornstarch slurry (1 teaspoon cornstarch whisked into 2 tablespoons cold water). Stir constantly for 30–45 seconds. The glaze will thicken noticeably and turn glossy.
Step 7: Glaze the Chicken
Add the hot, crispy chicken bites directly into the glaze. Toss gently but thoroughly using a silicone spatula or tongs. Work quickly — 20–30 seconds max. You want every piece coated but not sitting in the sauce long enough to soften.
The residual heat from the chicken will thin the glaze slightly and help it cling. You should see a glossy, amber sheen on every surface.
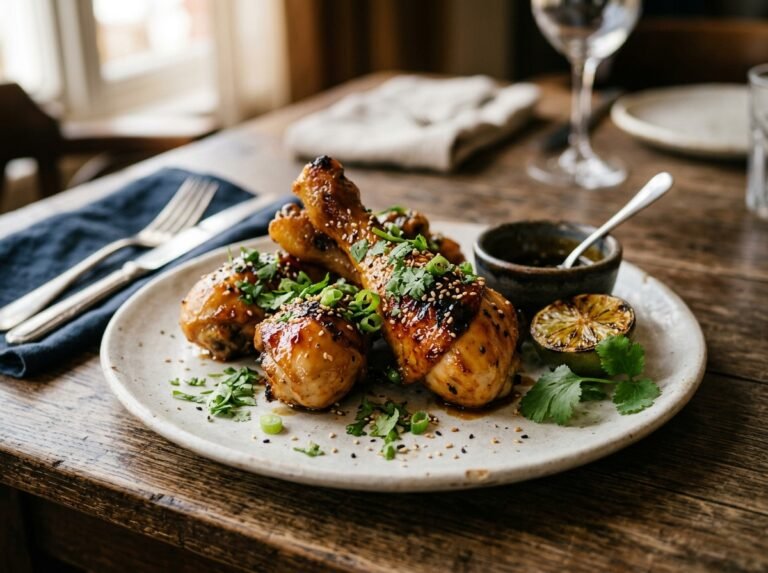
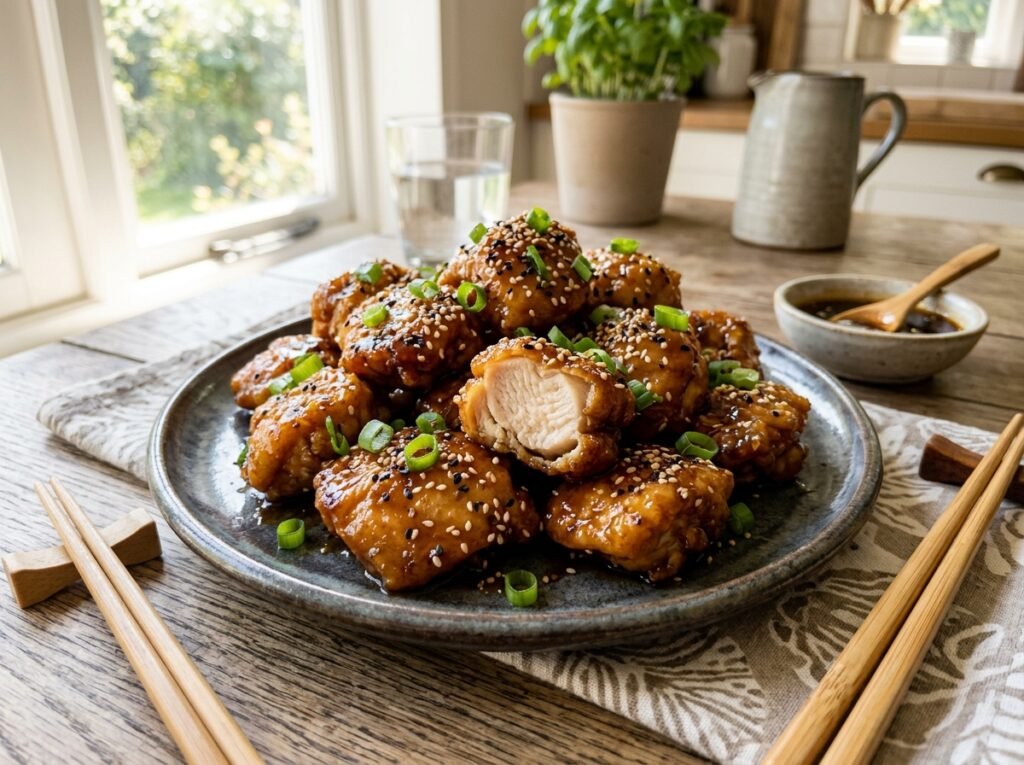
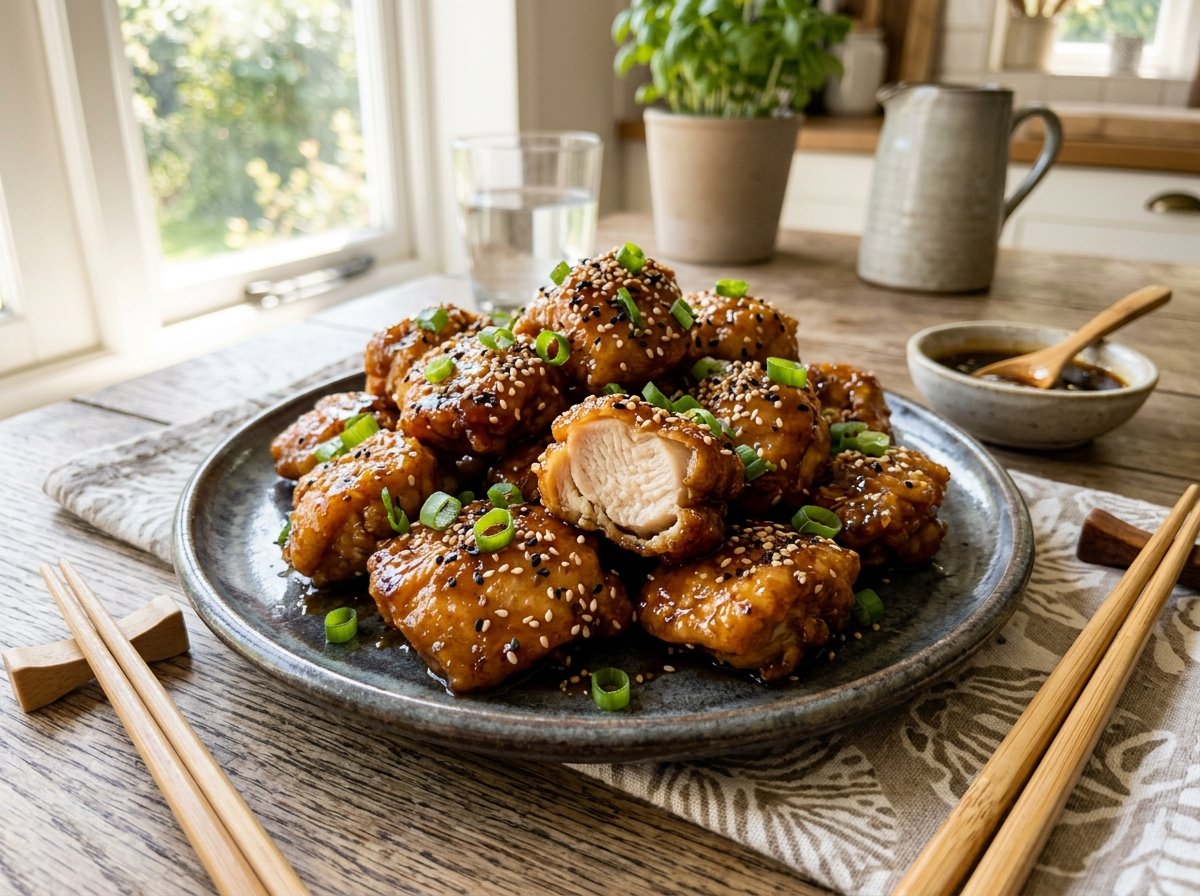
Step 8: Garnish and Serve Immediately
Transfer the glazed chicken to a serving platter. Sprinkle with sesame seeds and sliced green onions. Serve immediately while the coating still has that audible crunch.
These are best eaten within 15 minutes. The glaze will slowly soften the crust — it is the nature of the chemistry — but that first bite window is pure magic.
Why This Crispy Honey Garlic Chicken Bites Recipe Stays Crispy Longer
Chef John’s Insight
There is a paradox at the heart of this dish. Honey and crispness should not coexist — one is liquid and clingy, the other is dry and brittle. But when you understand the science of starch crystallization and control your frying temperatures with precision, you can hold both in the same bite for just long enough to matter. That is what separates home cooking from restaurant magic: not better ingredients or fancier equipment, but a willingness to understand why things work the way they do. The double-fry is not a trick. It is respect for physics. And the ten-minute wait before glazing is not impatience — it is wisdom. Great cooking is almost always about waiting for the right moment, not rushing to the finish.
— Chef John, The Flavor Bazaar
📊 Nutrition Information (Per Serving — Serves 4)
| Nutrient | Amount |
|---|---|
| Calories | 485 kcal |
| Protein | 32g |
| Total Fat | 22g |
| Saturated Fat | 6g |
| Carbohydrates | 38g |
| Fiber | 0.5g |
| Sugars | 20g |
| Sodium | 780mg |
| Cholesterol | 165mg |
Note: Nutritional values are estimates based on standard ingredient databases. Actual values may vary depending on specific brands and preparation methods.
🌡️ Food Safety & Temperature Guide (USDA Standards)
| Cooking Stage | Target Temperature |
|---|---|
| Chicken internal temp (safe) | 165°F / 74°C (minimum) |
| First fry oil temp | 325°F / 163°C |
| Second fry oil temp | 375°F / 190°C |
| Danger zone (avoid) | 40°F–140°F / 4°C–60°C |
| Glaze simmer temp | 180°F–200°F / 82°C–93°C |
USDA Reminder: Always use a meat thermometer to verify internal temperature. Visual cues alone are not reliable indicators of doneness.
🗄️ Storage & Reheating Guide
| State | Refrigerator | Freezer | Best Reheat Method |
|---|---|---|---|
| Glazed chicken bites | 3 days (airtight) | Not recommended | Air fryer at 375°F for 4–5 min |
| Unglazed fried chicken | 4 days (airtight) | Up to 2 months | Oven at 400°F for 8–10 min, glaze after reheating |
| Honey garlic sauce (separate) | 1 week | 3 months | Stovetop on low, whisk until smooth |
Pro Tip: If you plan to meal prep, fry the chicken and store it separately from the glaze. Reheat the chicken until crispy, then toss with freshly warmed sauce. This preserves maximum texture.
❓ FAQ: Your Honey Garlic Chicken Questions Answered
Can I use chicken breast instead of thighs?
Yes, but be extra cautious with cooking time. Breasts dry out faster. Cut them into slightly larger pieces (closer to 2 inches) and reduce the second fry by 30–45 seconds. Check internal temp religiously.
Can I make these in an air fryer?
Absolutely. Preheat your air fryer to 400°F (204°C). Spray the coated chicken lightly with oil spray. Air fry for 10 minutes, flip, then air fry another 6–8 minutes until golden and crispy. You will not get the exact same texture as double-frying, but it is close — and way less messy.
My glaze is too thick/too thin. What went wrong?
Too thick: You added too much cornstarch slurry or simmered it too long. Thin it with a tablespoon of water or rice vinegar. Too thin: Your slurry did not activate. Make sure the sauce was simmering when you added it, and give it a full minute to thicken.
Can I prep the coated chicken ahead of time?
Yes. Coat the chicken and place it on a wire rack over a sheet pan. Refrigerate uncovered for up to 4 hours. This actually improves adhesion. Let it come to room temp for 15 minutes before frying.
How do I keep these crispy at a party?
Fry them as close to serving time as possible. If you need to hold them, place them on a wire rack in a 200°F (93°C) oven (not covered). Glaze them in small batches as guests arrive, not all at once.
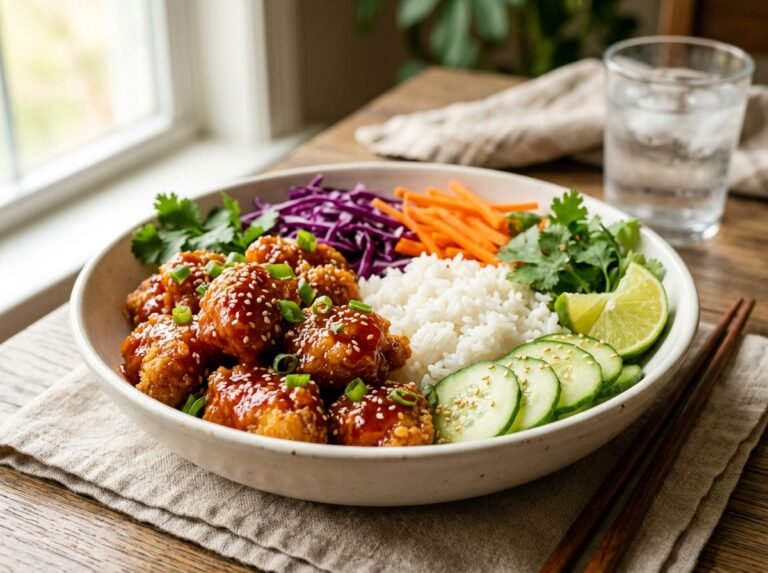
Conclusion
This Crispy Honey Garlic Chicken Bites Recipe is perfect for parties, game nights, and easy family dinners.
Crispy Honey Garlic Chicken Bites
Ingredients
Equipment
Method
INSTRUCTIONS
- Cut your chicken thighs into 1.5-inch cubes and pat them completely dry with paper towels. Season lightly with a pinch of salt and let them sit at room temperature for 15 minutes to take the chill off.
- In a wide, shallow bowl, whisk together the 3/4 cup cornstarch, 1/2 cup all-purpose flour, garlic powder, onion powder, smoked paprika, 1 tsp kosher salt, and black pepper. In a second bowl, beat the two eggs until completely uniform.
- Dip each chicken piece in the egg wash, letting excess drip off, then press firmly into the starch-flour mixture. Shake off excess, dip back into the egg wash for a second pass, and coat again in the dry mixture. Lay on a wire rack and rest for 10 minutes.
- Heat your neutral oil to 325°F (163°C) in a deep pot. Gently lower 5-6 pieces into the oil without crowding. Fry for 4 minutes, turning once, until the crust is set and light blonde. Remove to a wire rack and let rest for 5 minutes to let steam escape.
- Increase the oil temperature to 375°F (190°C). Return the chicken to the oil in batches and fry for 2-3 minutes until deep golden brown and audibly crackling. Drain on a wire rack.
- In a wide skillet, melt the butter over medium heat. Add the minced garlic and grated ginger, cooking for 45-60 seconds until fragrant. Remove the pan from the heat to prevent burning, then stir in the honey, soy sauce, rice vinegar, and red pepper flakes.
- Return the pan to low heat and bring to a gentle simmer. Whisk in the cornstarch slurry and stir constantly for 30-45 seconds until the glaze thickens and turns glossy.
- Add the hot, crispy chicken bites directly into the glaze. Toss gently for 20-30 seconds until every piece is evenly coated. Transfer to a platter, garnish with sesame seeds and green onions, and serve immediately.
Notes
Chef John’s Insight
There is a paradox at the heart of this dish. Honey and crispness should not coexist — one is liquid and clingy, the other is dry and brittle. But when you understand the science of starch crystallization and control your frying temperatures with precision, you can hold both in the same bite for just long enough to matter. That is what separates home cooking from restaurant magic: not better ingredients or fancier equipment, but a willingness to understand why things work the way they do. The double-fry is not a trick. It is respect for physics. And the ten-minute wait before glazing is not impatience — it is wisdom. Great cooking is almost always about waiting for the right moment, not rushing to the finish.
— Chef John, The Flavor Bazaar
📊 Nutrition Information (Per Serving — Serves 4)
| Nutrient | Amount |
|---|---|
| Calories | 485 kcal |
| Protein | 32g |
| Total Fat | 22g |
| Saturated Fat | 6g |
| Carbohydrates | 38g |
| Fiber | 0.5g |
| Sugars | 20g |
| Sodium | 780mg |
| Cholesterol | 165mg |
Note: Nutritional values are estimates based on standard ingredient databases. Actual values may vary depending on specific brands and preparation methods.
🌡️ Food Safety & Temperature Guide (USDA Standards)
| Cooking Stage | Target Temperature |
|---|---|
| Chicken internal temp (safe) | 165°F / 74°C (minimum) |
| First fry oil temp | 325°F / 163°C |
| Second fry oil temp | 375°F / 190°C |
| Danger zone (avoid) | 40°F–140°F / 4°C–60°C |
| Glaze simmer temp | 180°F–200°F / 82°C–93°C |
USDA Reminder: Always use a meat thermometer to verify internal temperature. Visual cues alone are not reliable indicators of doneness.
🗄️ Storage & Reheating Guide
| State | Refrigerator | Freezer | Best Reheat Method |
|---|---|---|---|
| Glazed chicken bites | 3 days (airtight) | Not recommended | Air fryer at 375°F for 4–5 min |
| Unglazed fried chicken | 4 days (airtight) | Up to 2 months | Oven at 400°F for 8–10 min, glaze after reheating |
| Honey garlic sauce (separate) | 1 week | 3 months | Stovetop on low, whisk until smooth |
Pro Tip: If you plan to meal prep, fry the chicken and store it separately from the glaze. Reheat the chicken until crispy, then toss with freshly warmed sauce. This preserves maximum texture.
❓ FAQ: Your Honey Garlic Chicken Questions Answered
Can I use chicken breast instead of thighs?
Yes, but be extra cautious with cooking time. Breasts dry out faster. Cut them into slightly larger pieces (closer to 2 inches) and reduce the second fry by 30–45 seconds. Check internal temp religiously.
Can I make these in an air fryer?
Absolutely. Preheat your air fryer to 400°F (204°C). Spray the coated chicken lightly with oil spray. Air fry for 10 minutes, flip, then air fry another 6–8 minutes until golden and crispy. You will not get the exact same texture as double-frying, but it is close — and way less messy.
My glaze is too thick/too thin. What went wrong?
Too thick: You added too much cornstarch slurry or simmered it too long. Thin it with a tablespoon of water or rice vinegar. Too thin: Your slurry did not activate. Make sure the sauce was simmering when you added it, and give it a full minute to thicken.
Can I prep the coated chicken ahead of time?
Yes. Coat the chicken and place it on a wire rack over a sheet pan. Refrigerate uncovered for up to 4 hours. This actually improves adhesion. Let it come to room temp for 15 minutes before frying.
How do I keep these crispy at a party?
Fry them as close to serving time as possible. If you need to hold them, place them on a wire rack in a 200°F (93°C) oven (not covered). Glaze them in small batches as guests arrive, not all at once.
More Crispy, Savory Recipes from The Flavor Bazaar
Easy Mexican Street Corn Salad Recipe – Ultimate Summer Side Dish