Ingredients
Equipment
Method
The Dry Down
- Pat the chicken pieces completely dry with paper towels. Reason: Surface moisture creates a steam barrier that pushes the coating away.
The Buttermilk Bath
- Submerge chicken in buttermilk and hot sauce for 4–24 hours.
The Dredge Press
- Dredge chicken in the flour/cornstarch mix. Chef’s Secret: Press the flour firmly into the meat with your palm to create a physical bond.
The Critical Rest
- Place breaded chicken on a wire rack for 15 minutes. Reason: This allows the flour to hydrate and "glue" itself to the chicken skin.
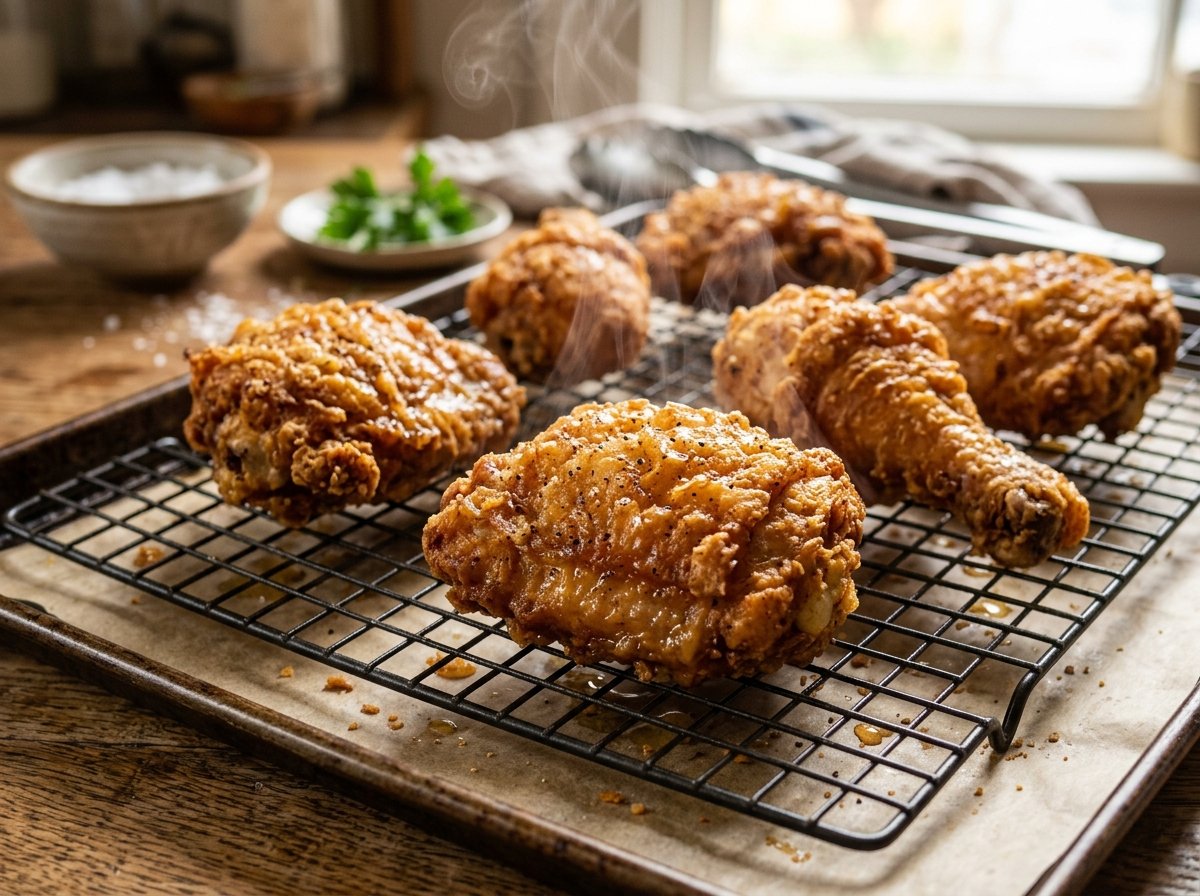
The Precision Fry
- Heat oil in a Lodge Cast Iron skillet to 350°F (177°C). Fry in batches until internal temp reaches 165°F (74°C).
Notes
1. The "Air-Chilled" Advantage 🍗
In the USA, most chicken in grocery stores like Walmart or Kroger is water-chilled. This means the chicken absorbs up to 12% of its weight in water. When you fry it, that water turns into steam, which is the #1 reason the coating slides off. If your budget allows, buy "Air-Chilled" chicken (available at Whole Foods or Trader Joe's). It’s drier and holds the breading much better.2. Flour vs. Cornstarch Ratio 🧪
Using 100% All-Purpose flour often leads to a "bready" or chewy crust. I recommend a 4:1 ratio (4 parts flour to 1 part cornstarch). Cornstarch weakens the gluten development, resulting in a more brittle, "shatter-crisp" texture that stays attached to the skin.3. The 15-Minute "Glue" Phase ⏳
This is the most skipped step in American kitchens. After dredging, let the chicken rest on a wire rack for 15 minutes. During this time, the moisture from the buttermilk hydrates the flour, turning it into a "glue" that chemically bonds to the protein. If you fry immediately, the dry flour will just float away in the oil.4. Oil Temperature Management 🌡️
Do not trust your stove dial; trust an infrared or clip-on thermometer. You want the oil at 350°F (177°C).- Too Low: The coating absorbs oil and becomes heavy, sliding off.
- Too High: The outside burns before the "glue layer" can set, causing the crust to separate.