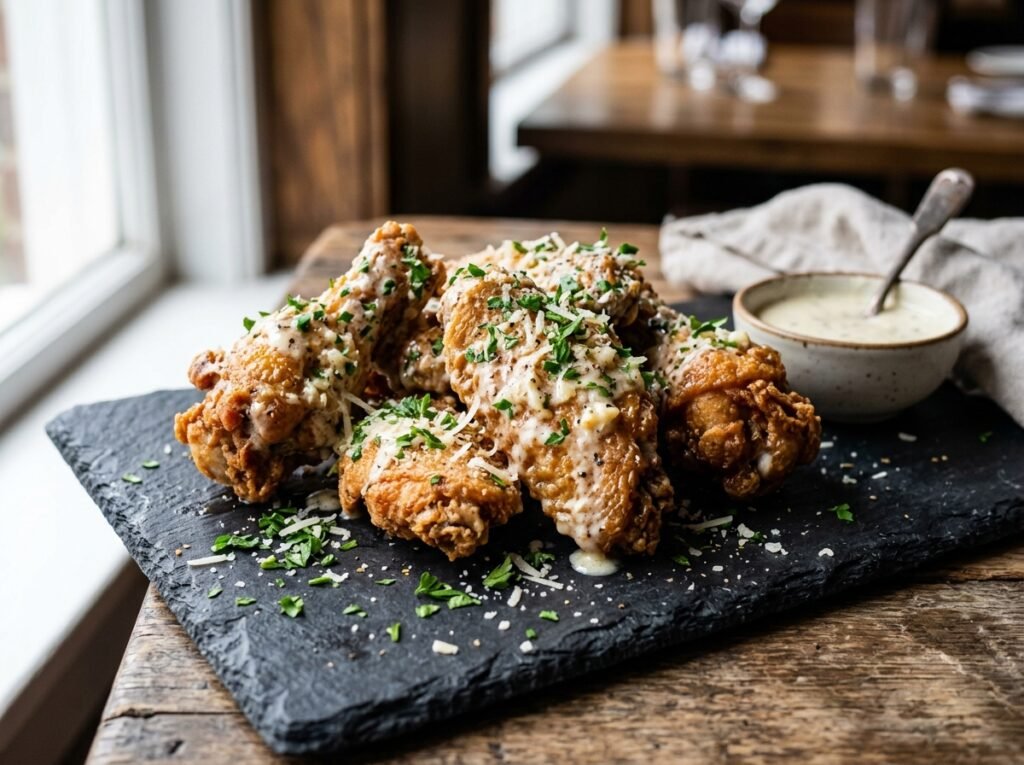
Best Extra Crispy Garlic Parmesan Chicken Wings Recipe
By Chef John | Easy Recipes & Smart Cooking Hacks
The Moment Everything Changed in My Kitchen
There is a precise moment when subcutaneous fat begins to render from chicken skin — around 160°F / 71°C — and if you understand that moment, you will never serve soggy wings again. The difference between limp, greasy chicken and golden, crackling wings is not luck. It is physics.and Garlic Parmesan Chicken Wings Recipe
I have tested this recipe across more than twenty batches, adjusting one variable at a time to isolate exactly what makes the difference. Some batches I skipped the baking powder. Others I crowded the pan. A few I pulled too early because I got impatient. Every single shortcut taught me something, and what I learned is this: crispy wings are not about high heat alone. They are about moisture control, pH manipulation, and patience.
These garlic parmesan chicken wings are not just another party appetizer. They are a masterclass in texture science, wrapped in buttery, umami-rich garlic sauce that clings to every ridge of perfectly crisped skin. And once you understand the method, you will never order wings out again.
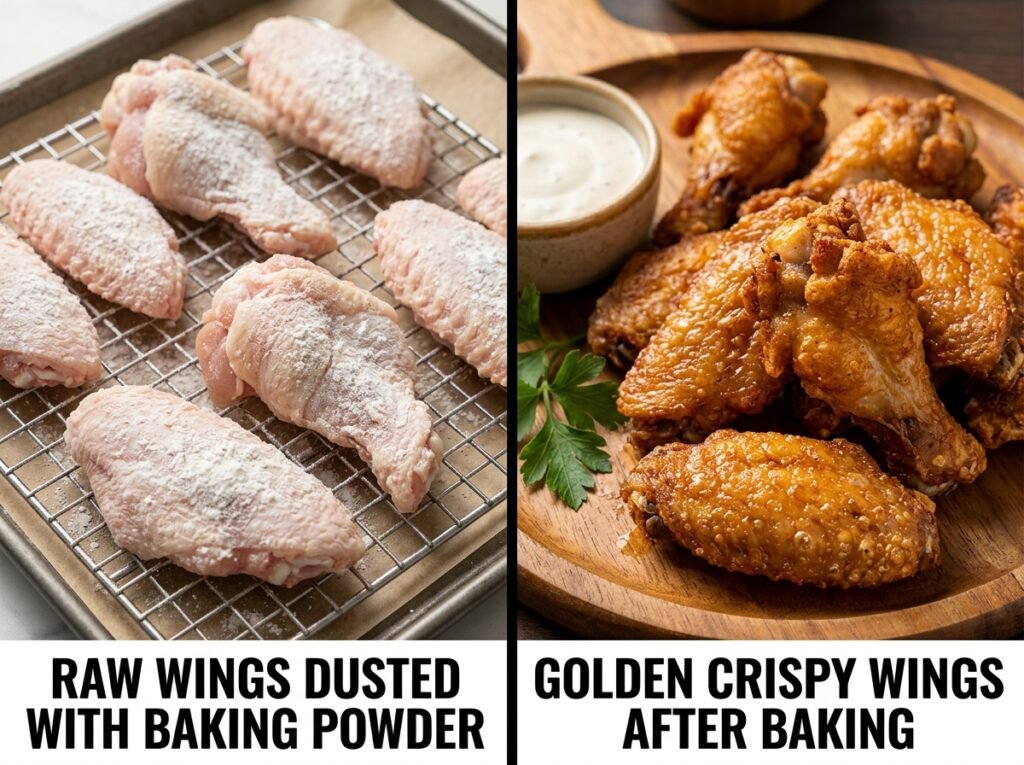
The Science Behind the Crunch: Why Baking Powder Changes Everything
Let me tell you what most home cooks get wrong about crispy chicken skin: they think it is all about temperature. But temperature without the right surface chemistry just gives you burned, leathery wings.
The secret is alkalinity. Chicken skin is naturally acidic, and acid tightens proteins, making them rubbery when cooked. When you dust wings with baking powder (which is alkaline), you raise the pH of the skin surface. This does two critical things: it breaks down the proteins faster, allowing them to crisp rather than toughen, and it accelerates the Maillard reaction — the same browning reaction that makes bread crusts and seared steaks so irresistible.
Protein+Reducing Sugars→Melanoidins (Flavor + Color)
In simple terms: baking powder makes the skin crackle and brown faster without drying out the meat inside. But here is the catch — you must use aluminum-free baking powder, or you risk a metallic aftertaste. Bob’s Red Mill and Rumford are both excellent choices.
The second piece of science is moisture removal. Fat renders beautifully, but only if water evaporates first. That is why we rest the wings uncovered in the fridge. Cold, dry air pulls surface moisture away, leaving behind a thin, tight skin that crisps beautifully under heat.
Pro Buying Guide: What to Buy and Where to Find It (USA)
Let me save you some trial and error. Not all ingredients are created equal when it comes to wings that taste like they came from a high-end gastropub.
The Wings: Look for party wings (drumettes and flats already separated) at Costco, Walmart, or your local Kroger. If you can find organic, air-chilled wings at Whole Foods, even better — they have less added water, which means crispier results. Expect to pay $3–5 per pound for conventional, $7–9 for organic.
Baking Powder: This is non-negotiable. Use aluminum-free baking powder like Bob’s Red Mill or Rumford. You will find both at Target, Trader Joe’s, or any Whole Foods. A small canister costs about $4 and lasts dozens of batches.
Butter: For the sauce, use Kerrygold or another European-style butter with higher fat content (82% vs. standard 80%). It emulsifies better and tastes richer. Available at nearly every grocery chain now — I grab mine at Kroger for about $4 per 8 oz block.
Parmesan: Skip the green can. I mean it. Get a wedge of Parmigiano-Reggiano from the deli section at Whole Foods or Trader Joe’s, or at minimum, use BelGioioso pre-shredded (it is fresher than Kraft). Real aged parmesan has crystalline umami notes that canned powder simply cannot touch. A small wedge runs $6–8 and transforms the sauce.
Garlic: Fresh cloves only. Pre-minced garlic in a jar oxidizes quickly and tastes flat. A whole bulb costs under $1 at any supermarket.
Air Fryer Note: If you are using an air fryer instead of an oven, go for a basket-style model like the Cosori or Ninja. Both handle wings beautifully and are available at Best Buy, Amazon, or Target for $80–120.
Ingredients
| Category | Ingredient | US Customary | Metric |
|---|---|---|---|
| The Wings | Chicken wings (drumettes & flats) | 2 lbs | 900g |
| Baking powder (aluminum-free) | 1 tbsp | 15g | |
| Kosher salt | 1 tsp | 6g | |
| Black pepper | ½ tsp | 2g | |
| The Dry Rub | Garlic powder | 1 tsp | 3g |
| Onion powder | ½ tsp | 2g | |
| Smoked paprika (optional) | ½ tsp | 2g | |
| The Signature Sauce | Unsalted butter | 4 tbsp | 56g |
| Fresh garlic, minced | 4 cloves | ~12g | |
| Parmigiano-Reggiano, finely grated | ½ cup | 50g | |
| Fresh parsley, chopped | 2 tbsp | 8g | |
| Heavy cream (optional, for richness) | 2 tbsp | 30ml | |
| Red pepper flakes (optional) | ¼ tsp | 1g |
Common Mistakes and How to Avoid Them
| The Mistake | What Actually Happens | The Fix |
|---|---|---|
| Using wet wings straight from the package | Steam prevents crisping; wings turn rubbery | Pat wings completely dry, then rest uncovered in the fridge 1–2 hours |
| Skipping the baking powder | Skin stays soft and chewy, no crackle | Always use aluminum-free baking powder; it changes the pH and texture |
| Overcrowding the baking sheet | Wings steam instead of roast; uneven browning | Leave at least ½ inch between each wing; use two pans if needed |
| Pulling wings too early | Skin is pale and flabby, fat has not fully rendered | Wings must hit 165°F / 74°C internally and be deep golden-brown |
| Adding sauce too early | Sauce makes skin soggy; you lose all the crispness you worked for | Sauce wings immediately after baking, then serve right away |
| Using pre-grated “parmesan” from a can | Lacks depth, tastes salty and flat, does not melt into sauce | Grate real Parmigiano-Reggiano fresh; the flavor is incomparable |
The Step-by-Step Method: Building Texture and Flavor
Step 1: Prep the Wings and Begin Moisture Removal
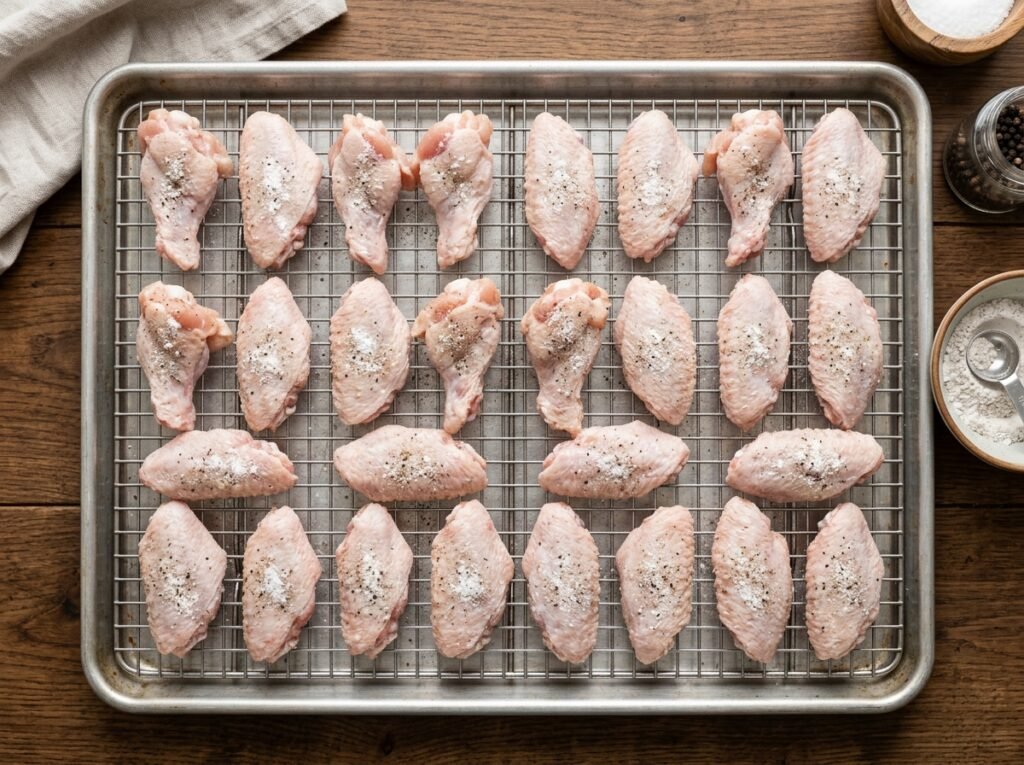
Start by patting your wings completely dry with paper towels. This is not optional. Any surface moisture will turn to steam in the oven, and steam is the enemy of crispness. Once dry, place the wings on a wire rack set over a rimmed baking sheet.
Combine the baking powder, kosher salt, black pepper, garlic powder, onion powder, and smoked paprika in a small bowl. Dust this mixture evenly over every wing, making sure to coat all sides. The baking powder will feel slightly gritty — that is exactly what you want.
Now comes the step most people skip: refrigeration. Place the rack of seasoned wings, uncovered, in the refrigerator for at least one hour, preferably two. Cold air circulation pulls moisture from the skin, leaving it tight and primed for crisping.
Step 2: Preheat and Position for Maximum Airflow
About 15 minutes before you are ready to cook, preheat your oven to 425°F / 218°C. If you have a convection setting, use it — the fan promotes even browning and faster moisture evaporation.
Position your oven rack in the upper third of the oven. This puts the wings closer to the top heating element, which helps achieve that final golden char. Make sure your wire rack is still in place under the wings — this allows hot air to circulate underneath, crisping both sides without flipping.
Step 3: The First Roast — Rendering the Fat
Slide the wings into the oven and roast for 30 minutes. During this time, subcutaneous fat begins to melt and render out, pooling beneath the rack. The skin tightens and starts to turn pale gold. Do not open the oven door. Every time you do, you drop the temperature and add moisture back into the environment.
After 30 minutes, check the wings. They should be starting to brown at the edges, and you will see clear fat drippings below.
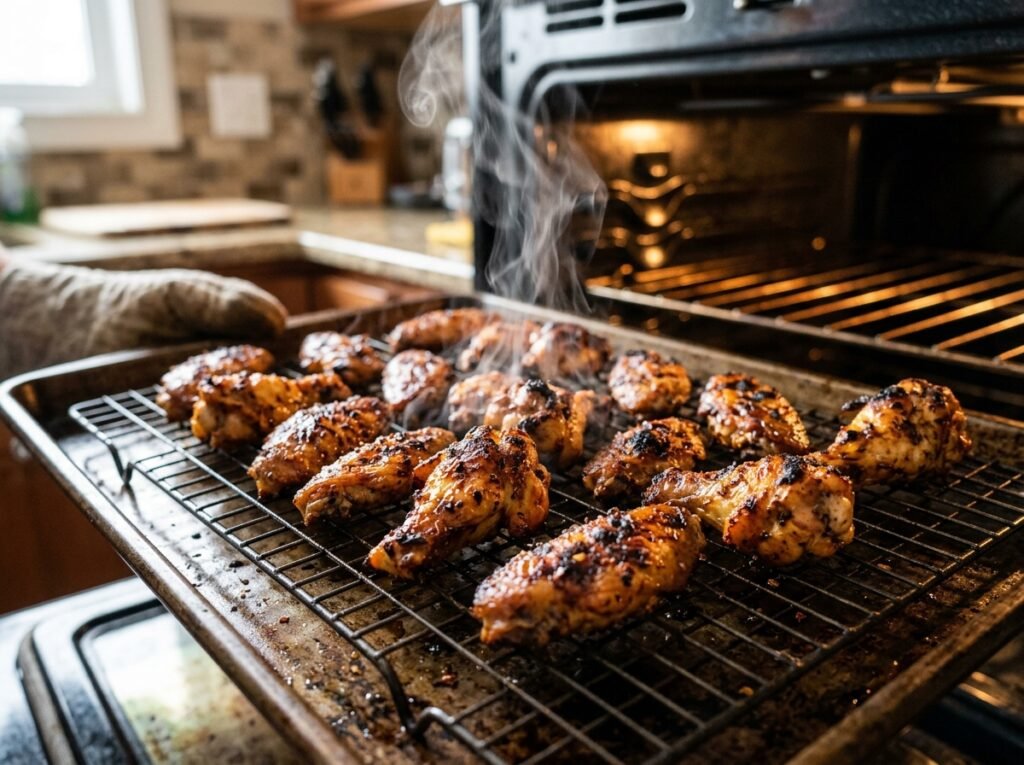
Step 4: The Flip and Final Crisp
Now flip each wing. Yes, even on a wire rack, flipping ensures both sides develop that crackling texture. Return the wings to the oven and roast for another 20–25 minutes, until the internal temperature reads 165°F / 74°C and the skin is deeply golden and crisp.
You will know they are done when you hear a faint crackling sound as the wings come out of the oven. The skin should look almost lacquered, with small blisters forming in spots — that is rendered collagen creating pockets of crunch.
Step 5: The Garlic Parmesan Sauce — Timing is Everything
While the wings finish their final roast, make the sauce. In a small skillet over medium heat, melt the butter. Add the minced garlic and cook, stirring constantly, for about 60 seconds — just until fragrant, not browned. Burned garlic is bitter and ruins the sauce.
Remove from heat and stir in the grated Parmigiano-Reggiano. The residual heat will melt the cheese into the butter, creating a creamy emulsion. If you want extra richness, whisk in the heavy cream now. Add the fresh parsley and red pepper flakes if using.
The sauce should be glossy and coat the back of a spoon. If it is too thick, add a teaspoon of water or more cream. If too thin, add more cheese.
Step 6: Toss and Serve Immediately
Transfer the hot, crispy wings to a large mixing bowl. Pour the garlic parmesan sauce over the top and toss gently but thoroughly, making sure every wing is coated. The heat from the wings will keep the sauce fluid and help it cling to every crevice.
Serve immediately. Do not let them sit. Crispy wings have a short window of perfection, and the clock starts the moment sauce touches skin.


Extra Crispy Garlic Parmesan Chicken Wings
Ingredients
Equipment
Method
- Pat the wings bone-dry using paper towels to ensure maximum moisture removal for skin crispness.
- Toss wings in a large bowl with baking powder and salt until evenly coated.
- Arrange wings on a wire rack over a baking sheet and refrigerate uncovered for at least 1 hour (or overnight) to dehydrate the skin.
- Preheat oven to 400°F / 204°C and bake for 45-50 minutes, flipping halfway, until the skin is golden brown and reaches an internal temp of 165°F / 74°C.
- In a small saucepan, combine melted butter and minced garlic over low heat for 2 minutes to infuse the flavor.
- Whisk in the Parmesan cheese, parsley, and pepper until the sauce is emulsified.
- Transfer the hot wings to a large bowl, pour the garlic parmesan sauce over them, and toss gently until every wing is glazed.
Notes
Chef John’s Insight
“There is something almost meditative about making wings the right way. It is not fast food. It is not convenience. It is patience layered with intention. The overnight rest, the careful seasoning, the refusal to open the oven door too early — these are quiet acts of respect for the ingredient. And when you pull those wings out and hear that crackle, you are not just hearing texture. You are hearing proof that discipline and science can coexist beautifully on a plate. Wings are humble. But cooked right, they teach you everything you need to know about heat, time, and restraint. Master the wing, and you have mastered the fundamentals.”
— Chef John
Nutrition Information (Per Serving – Approximately 6 wings)
| Nutrient | Amount |
|---|---|
| Calories | 420 kcal |
| Protein | 28g |
| Total Fat | 32g |
| Saturated Fat | 12g |
| Carbohydrates | 2g |
| Sodium | 680mg |
| Cholesterol | 135mg |
Note: Nutrition values are estimates and may vary based on specific brands and preparation methods.
Food Safety & Temperature Guide
| Critical Temp | Temperature | Why It Matters |
|---|---|---|
| USDA Safe Minimum (Poultry) | 165°F / 74°C | Kills harmful bacteria like Salmonella |
| Danger Zone | 40–140°F / 4–60°C | Bacteria multiply rapidly; never leave wings here >2 hrs |
| Ideal Finishing Temp (Wings) | 165–175°F / 74–79°C | Skin crisps fully, fat renders completely |
| Reheating Minimum | 165°F / 74°C | Ensures food safety when reheating leftovers |
USDA safe internal temperature for poultry
Storage & Reheating Guide
| State | Refrigerator (35–40°F) | Freezer (0°F / -18°C) | Best Reheat Method |
|---|---|---|---|
| Cooked, unsauced wings | 3–4 days (airtight) | Up to 3 months | Air fryer 375°F / 190°C for 5–7 min |
| Cooked, sauced wings | 2–3 days (airtight) | Not recommended | Oven 400°F / 204°C for 8–10 min, wire rack |
| Raw marinated wings | 1–2 days | Up to 6 months | Thaw in fridge overnight, then cook as normal |
Pro Tip: Never reheat wings in the microwave. It steams the skin and turns it rubbery. Always use dry heat.
Frequently Asked Questions
Can I make these wings in an air fryer?
Absolutely. Preheat your air fryer to 400°F / 204°C. Cook wings in a single layer (do not overcrowd) for 22–25 minutes, shaking the basket halfway through. The baking powder trick works just as well in an air fryer, and you will get even crispier results due to the concentrated airflow.
Do I really need to refrigerate the wings before cooking?
If you want restaurant-quality crispness, yes. The fridge step dries out the skin, which is critical for texture. If you are short on time, an hour is the bare minimum. Overnight is ideal.
Can I use a different cheese?
Parmigiano-Reggiano is best because of its umami depth and low moisture content, which melts smoothly into butter. Grana Padano is a close substitute. Avoid mozzarella or cheddar — they do not have the same sharp, salty punch.
Why did my wings turn out chewy instead of crispy?
Most likely, you skipped the baking powder or the fridge rest. Both are essential. Also check that you did not overcrowd the pan, which traps steam. Finally, make sure your oven actually reached 425°F — use an oven thermometer to verify.
Can I prep these ahead for a party?
Yes. Season and refrigerate the wings up to 24 hours in advance. Bake them fresh just before serving. You can also bake them ahead, refrigerate, and reheat in a 400°F oven for 8 minutes on a wire rack — they will crisp back up beautifully.
You Might Also Love These Recipes
If these garlic parmesan wings hit the spot, here are a few more crowd-pleasers from my kitchen:
[Easy Mexican Street Corn Salad Recipe]
[Crispy Hot Honey Chicken Sandwich Recipe]
[Hot Honey Chicken Tenders Recipe]