Hot Honey Chicken Tenders Recipe – Crispy Better Than Takeout
By Chef John | Easy Recipes & Smart Cooking Hacks
The Sound That Changes Everything
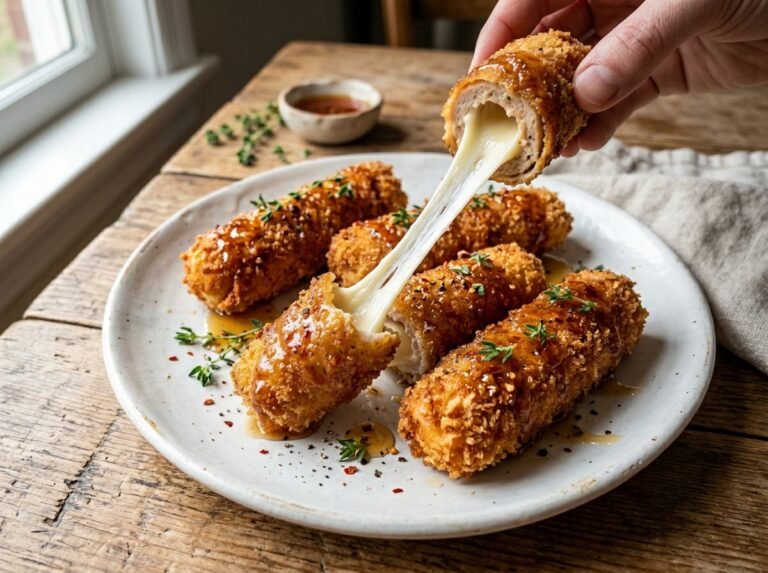
The first bite into properly prepared Hot honey chicken tenders should sound like breaking safety glass. Not a dull crunch. Not a soft give. A sharp, high-pitched crack that tells you the crust has crystallized into something structurally perfect and Hot Honey Chicken Tenders Recipe
But here’s the problem most home cooks face: that beautiful golden shell goes limp the moment you brush on the hot honey glaze. The moisture from the sauce dissolves all your hard work in seconds, leaving you with sticky, soggy skin that peels off in sad sheets. If you want Hot honey chicken tenders that actually stay crunchy, you have to change your approach to the breading chemistry.
I’ve spent months calibrating the starch-to-flour ratio to ensure these Hot honey chicken tenders stay glass-shatter crisp even after hitting the glaze. The secret isn’t just in the breading—it’s in understanding how proteins behave under acid, how sugars caramelize at different temperatures, and why the resting period between frying and saucing is not optional. When these Hot honey chicken tenders are plated, they should glisten without losing their structural integrity.
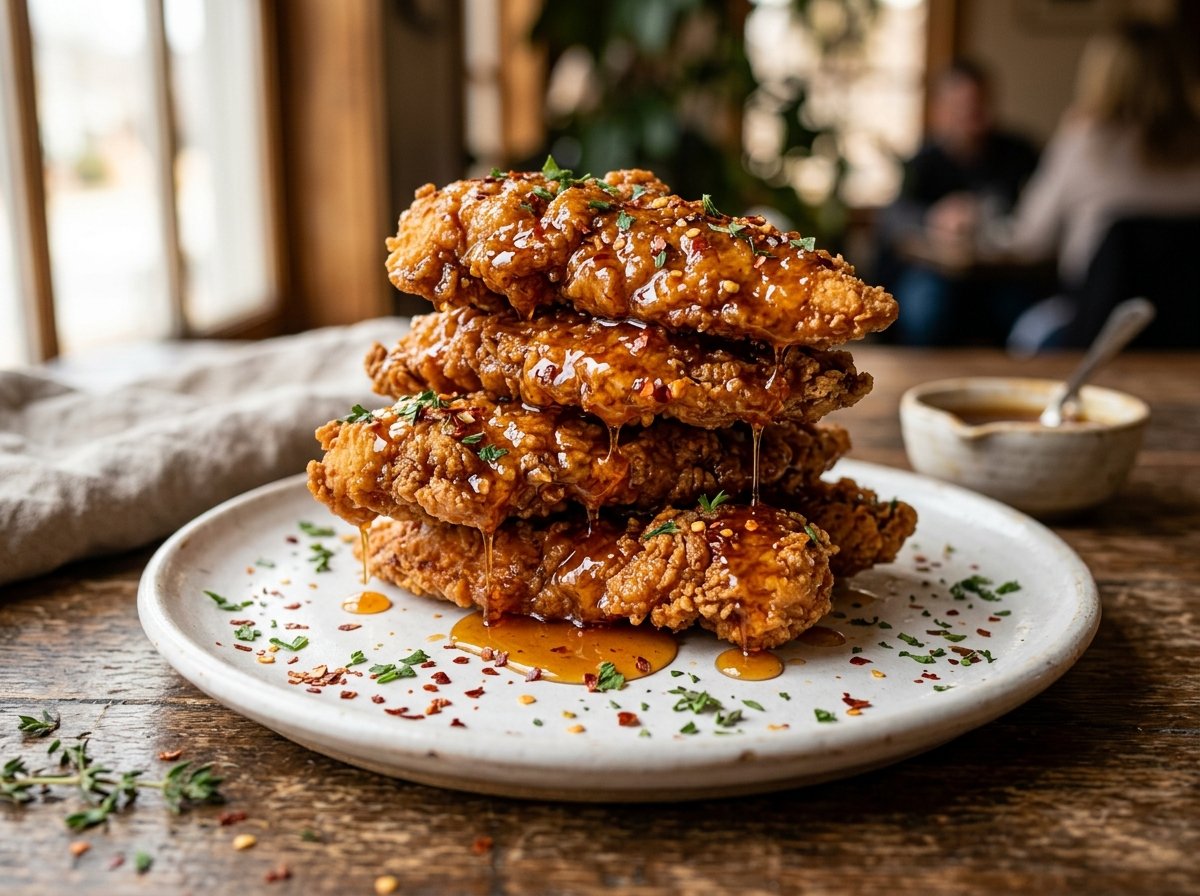
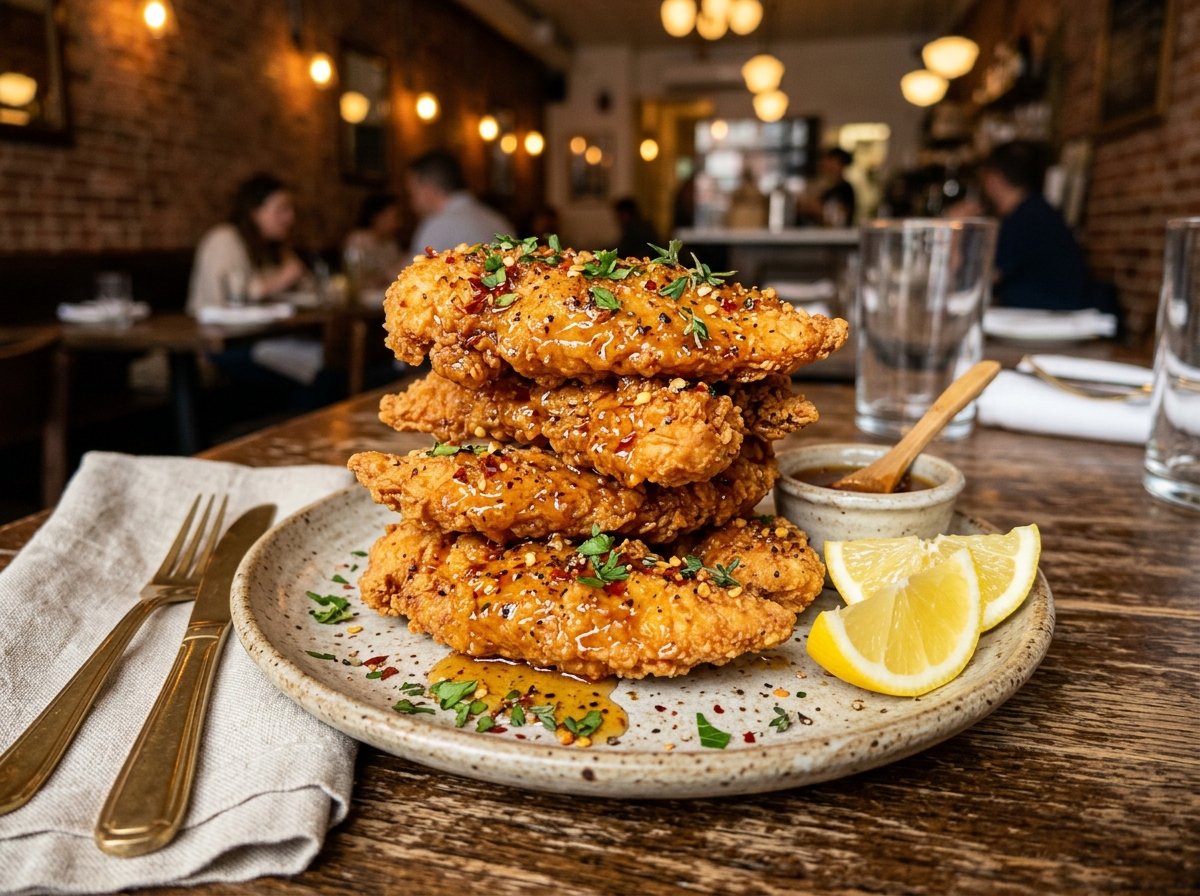
This recipe delivers Nashville-style heat with a sweet counter-punch, wrapped around chicken so tender it barely needs chewing. Whether you’re frying traditionally or using an air fryer, the science stays the same. Once you see these Hot honey chicken tenders plated and taste that contrast of heat and sweetness, you’ll never settle for takeout again. These are, quite simply, the ultimate Hot honey chicken tenders.
“If you are looking for the ultimate Hot honey chicken tenders, this recipe is designed for maximum crunch.”
The Science Behind the Shatter 🧬
When you soak chicken in buttermilk, you’re not just adding flavor—you’re orchestrating a complete restructuring of muscle tissue at the molecular level. Buttermilk contains lactic acid, which lowers the pH around the chicken proteins. This acidic environment causes protein denaturation, unraveling the tight coils of myosin and actin and allowing them to retain more moisture during cooking.
In simple terms: acid makes chicken proteins relax and hold onto water instead of squeezing it out when heat hits.
But the real magic happens when that buttermilk-coated chicken hits the seasoned flour mixture. You’re creating a coating that contains both proteins (from the flour and buttermilk residue) and starches. When this composite layer enters hot oil at 350°F (177°C), two reactions ignite simultaneously.
First, the Maillard reaction begins around 285°F (140°C), creating hundreds of flavor compounds as amino acids and reducing sugars recombine:
Amino Acids+Reducing Sugars→Melanoidins
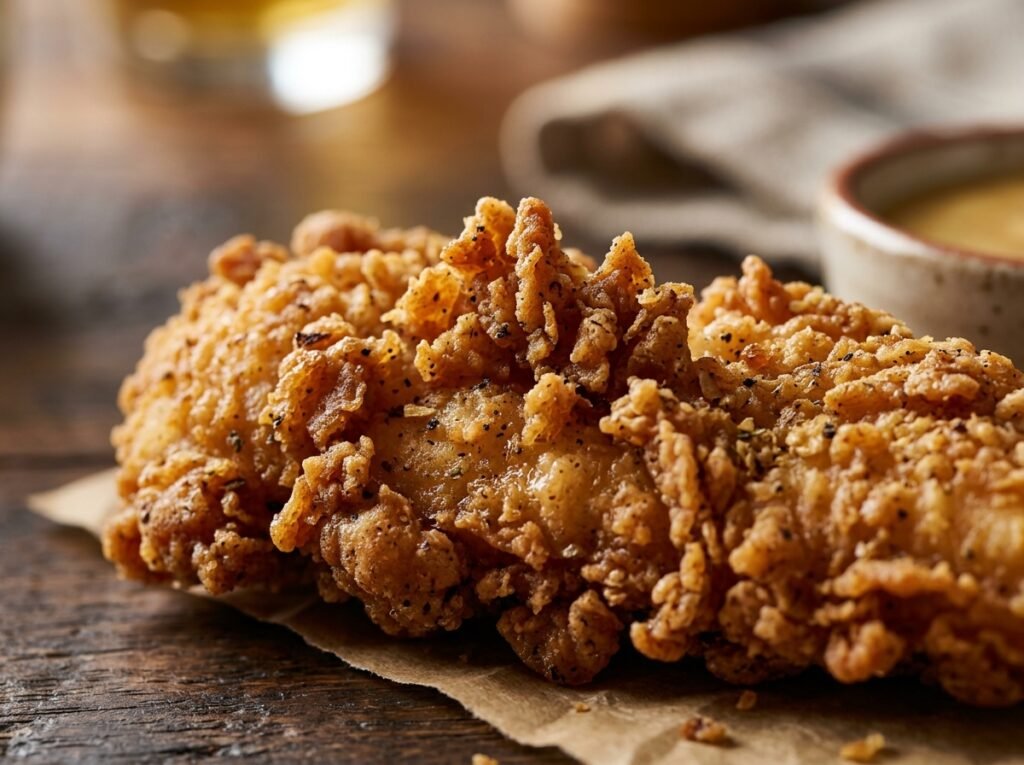
These melanoidins are responsible for that deep golden-brown color and the nutty, complex flavor we associate with perfectly fried foods. Second, the starches gelatinize and then dehydrate, forming a rigid crystalline structure. This is why the starch-to-flour ratio matters so much—too much flour and you get leathery coating; too much starch and it shatters into dust.
The double-dredge technique amplifies this structure. That second pass through buttermilk and flour creates textural peaks and valleys—what I call “craggy bits”—that increase surface area and crunch exponentially.
Pro Buying Guide: What to Grab at the Stores 🛒
Chicken: Look for Perdue Harvestland or Bell & Evans tenders at Whole Foods if you want organic. For budget-friendly options, Tyson or Kroger’s Simple Truth brand work perfectly. The key is uniform sizing—grab tenders that are roughly the same thickness so they cook evenly.
Buttermilk: Any full-fat buttermilk works, but I prefer the tangy bite of organic Valley or Horizon. Find these at Walmart, Target, or any Kroger-family store. If you’re in a pinch, you can make buttermilk by adding 1 tablespoon of white vinegar to 1 cup of whole milk and letting it sit for 10 minutes.
Flour: Bob’s Red Mill All-Purpose Unbleached gives consistent protein content (around 11%), which is ideal for frying. Their cornstarch is also superior for the starch component. Available at Trader Joe’s, Whole Foods, and most major grocery chains.
Hot Honey: Mike’s Hot Honey is the gold standard and widely available now at Target and Walmart. If you can’t find it, I’ll show you how to make your own using local honey and Calabrian chili paste (Trader Joe’s carries an excellent one).
Oil: For deep fryingHot Honey Chicken Tenders Recipe, peanut oil is king—high smoke point (450°F / 232°C) and neutral flavor. Planters or Golden Barrel brands are solid. If you’re air frying, a light spray of avocado oil (Chosen Foods brand) works best.Choosing the right oil is the first step in ensuring your Hot honey chicken tenders develop that signature deep-fried crust without absorbing excess grease.
Air Fryer Note: If you’re using an air fryer instead of traditional frying, the Cosori 5.8-quart or Ninja Foodi models give the most consistent results for chicken. The circulating heat mimics frying better than smaller basket models.
Butter: To get that rich, velvety finish in your glaze, I highly recommend using Kerrygold Pure Irish Butter. It has a higher fat content than standard American butters, which helps emulsify the hot honey into a glossy sauce that clings to the chicken without making it soggy. You can find this at Whole Foods, Kroger, or Trader Joe’s.
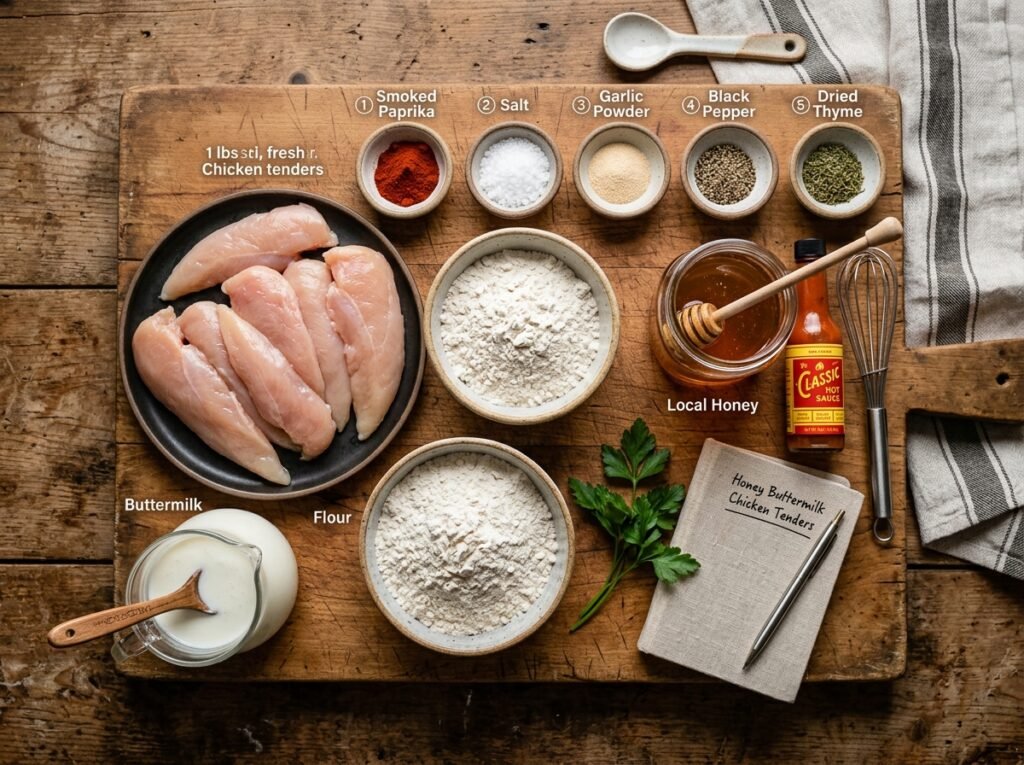
Ingredients: Hot Honey Chicken Tenders
For the Chicken & Brine
| Ingredient | US Customary | Metric |
|---|---|---|
| Chicken tenders (trimmed) | 2 lbs | 900g |
| Buttermilk | 2 cups | 480ml |
| Hot sauce (Frank’s RedHot) | 2 tablespoons | 30ml |
| Kosher salt | 1 tablespoon | 15g |
| Black pepper (freshly ground) | 1 teaspoon | 2g |
| Garlic powder | 1 teaspoon | 3g |
For the Breading Station
| Ingredient | US Customary | Metric |
|---|---|---|
| All-purpose flour | 2 cups | 240g |
| Cornstarch | ½ cup | 60g |
| Smoked paprika | 2 tablespoons | 14g |
| Cayenne pepper | 1 tablespoon | 7g |
| Onion powder | 1 tablespoon | 7g |
| Kosher salt | 2 teaspoons | 10g |
| Baking powder | 1 teaspoon | 5g |
For the Hot Honey Glaze
| Ingredient | US Customary | Metric |
|---|---|---|
| Honey (local or Mike’s Hot Honey) | ¾ cup | 180ml |
| Unsalted butter (Kerrygold preferred) | 4 tablespoons | 56g |
| Apple cider vinegar | 2 tablespoons | 30ml |
| Crushed red pepper flakes | 1–2 teaspoons | 2–4g |
| Cayenne pepper | ½ teaspoon | 1g |
For Frying
| Ingredient | US Customary | Metric |
|---|---|---|
| Peanut oil (for deep frying) | 8 cups | 1.9L |
| Or avocado oil spray (for air fryer) | As needed | As needed |
“Even experienced cooks can struggle with soggy breading, but avoiding these common pitfalls will guarantee perfect Hot honey chicken tenders every single time.”
Common Mistakes & How to Avoid Them
| The Mistake | What Actually Happens | The Fix |
|---|---|---|
| Using cold buttermilk straight from fridge | Chicken surface temp drops, extending fry time and absorbing more oil | Let buttermilk brine sit at room temp for 20 minutes before frying |
| Skipping the rest after first dredge | Coating doesn’t adhere; flour slides off in the oil creating a greasy mess | Let dredged chicken rest on a wire rack for 10 minutes to set the coating |
| Crowding the pan or air fryer basket | Temperature plummets, steam can’t escape, coating steams instead of crisps | Fry in batches—never more than 4-5 tenders at once |
| Glazing immediately after frying | Steam trapped under the glaze softens the crust instantly | Let chicken rest uncovered on a wire rack for 2 minutes before glazing |
| Oil temperature too low (below 325°F) | Breading absorbs oil instead of searing, resulting in greasy, pale chicken | Maintain strict 350°F (177°C); use a thermometer, not guesswork |
| Using pre-made hot honey without adjusting viscosity | Store-bought hot honey is often too thin and slides right off | Reduce honey glaze in a pan with butter until it coats the back of a spoon |
The Method: Building Layers of Flavor and Texture
Step 1: Prepare the Buttermilk Brine
Start by trimming any connective tissue or uneven edges from your chicken tenders. You want uniform pieces for even cooking. In a large bowl or zip-top bag, combine the buttermilk, hot sauce, kosher salt, black pepper, and garlic powder. Whisk until the salt dissolves completely.
Submerge the chicken tenders in this mixture, making sure every piece is fully coated. Cover and refrigerate for at least 4 hours, though overnight is ideal. This extended brine time allows the lactic acid to fully penetrate and tenderize the meat while the seasonings infuse deeply.
The buttermilk acts as both a flavor carrier and a tenderizer. That acidic environment I mentioned earlier? It’s actively breaking down tough protein bonds right now, guaranteeing juicy chicken even if you slightly overcook.
Step 2: Set Up Your Breading Station
About 30 minutes before you’re ready to fry, pull the chicken from the refrigerator. In a wide, shallow dish, whisk together the flour, cornstarch, smoked paprika, cayenne, onion powder, salt, and baking powder.
That small amount of baking powder is critical—it creates tiny air pockets in the coating that expand during frying, contributing to an airier, crunchier texture. The cornstarch serves a different purpose: it stays crispier longer because it absorbs less oil than wheat flours.
Keep the buttermilk brine in a separate bowl nearby. You’ll be going back and forth between wet and dry, building up those craggy layers.

Step 3: The Double Dredge Technique
Pull a chicken tender from the buttermilk, letting excess drip off but keeping it thoroughly coated. Press it into the flour mixture, turning and pressing gently so the flour adheres to every surface. Don’t just dip—press and pack.
Now here’s the crucial part: dip that floured tender back into the buttermilk for just two seconds, then immediately back into the flour mixture for a second dredging. Press down firmly to create those textured peaks. You’ll see rough, uneven surfaces forming—that’s exactly what you want.
Place the double-dredged tender on a wire rack set over a baking sheet. Repeat with remaining chicken. Let them rest for 10 minutes. This rest allows the coating to hydrate slightly and bond to the chicken, preventing it from sliding off during frying.
Step 4: Heat Your Oil to Precision Temperature
If you’re deep frying: Pour peanut oil into a heavy-bottomed Dutch oven or deep skillet until it reaches about 3 inches deep. Clip a thermometer to the side and heat over medium-high until it hits exactly 350°F (177°C).
If you’re air frying: Preheat your air fryer to 400°F (204°C) for 5 minutes. Spray the basket lightly with avocado oil, then spray each breaded tender lightly as well. The air fryer method won’t be quite as crunchy as deep frying, but it’s remarkably close if you don’t overcrowd.
Temperature consistency is everything. Too hot and the outside burns before the inside cooks. Too cool and you get oil-logged, pale chicken.
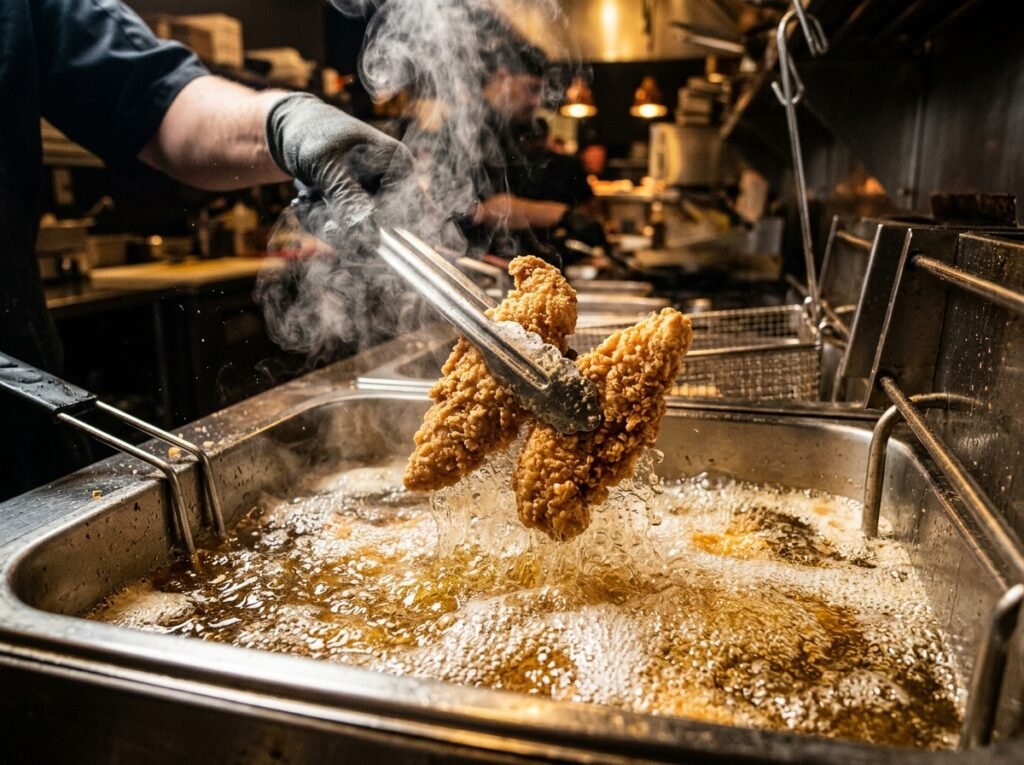
Step 5: Fry to Golden Perfection
For deep frying: Gently lower 4-5 tenders into the hot oil. Don’t drop them—slide them in to avoid splashing. The temperature will drop to around 325°F initially; that’s normal. Adjust heat to bring it back to 340–350°F.
Fry for 6-7 minutes, flipping halfway through, until the coating is deep golden brown and the internal temperature reaches 165°F (74°C). Use tongs to transfer to a wire rack—never paper towels, which trap steam and soften the crust.
For air frying: Arrange tenders in a single layer with space between each piece. Cook at 400°F for 10 minutes, flip, then cook another 8-10 minutes until golden and crispy. Check internal temp with an instant-read thermometer.
Let the fried chicken rest on the rack, uncovered, for exactly 2 minutes before glazing. This allows surface moisture to evaporate and the crust to set fully.
Step 6: Make the Hot Honey Glaze
While the chicken rests, prepare your glaze. In a small saucepan over medium heat, melt the butter completely. Add the honey, apple cider vinegar, crushed red pepper flakes, and cayenne.
Bring to a gentle simmer and cook for 3-4 minutes, stirring frequently, until the mixture reduces slightly and becomes glossy. You’re looking for a consistency that coats the back of a spoon but isn’t thick like caramel—more like warm maple syrup.
The butter adds richness and helps the honey adhere better. The vinegar cuts through the sweetness and echoes the tanginess from the buttermilk brine. The heat level is adjustable—start with 1 teaspoon of red pepper flakes and taste. You can always add more.
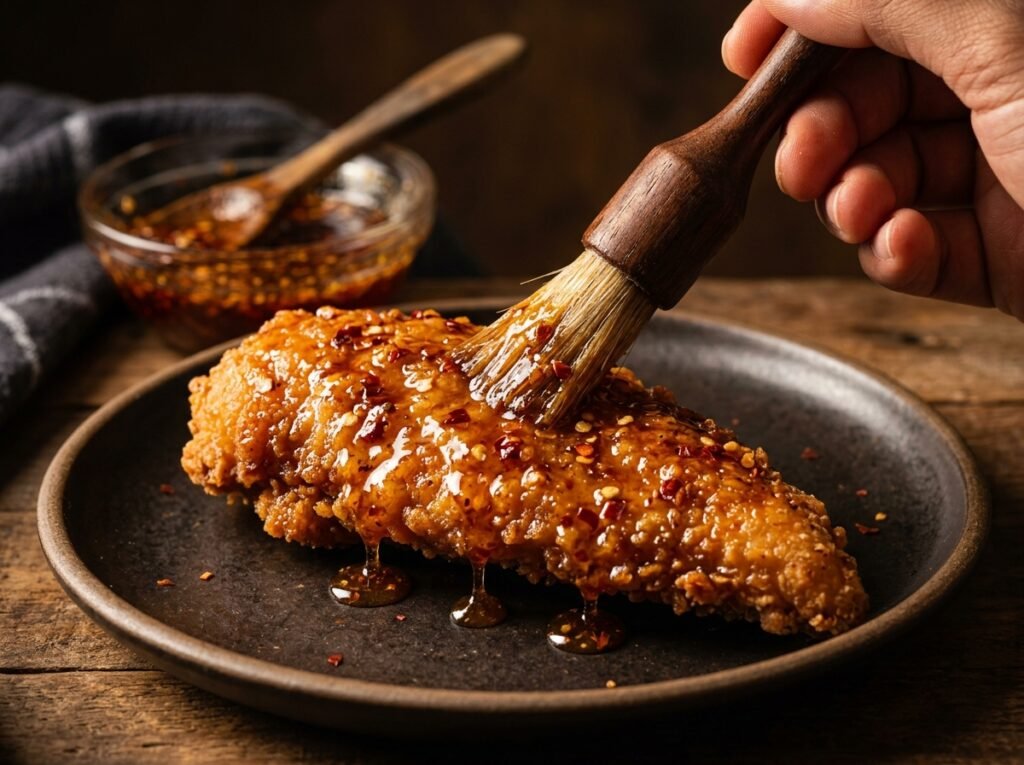
Step 7: The Glaze Application Technique
Here’s where most people mess up. Don’t dunk the chicken into the glaze and don’t pour it over top. Instead, use a silicone brush to paint a thin layer on each tender while it’s still warm.
The residual heat from the chicken will slightly thin the glaze on contact, allowing it to seep into those textured crevices without saturating the crust. Brush on one light coat, wait 30 seconds, then apply a second coat if you want more intensity.
The coating stays crisp because you’re not flooding it—you’re strategically placing sauce in a way that maximizes flavor while preserving texture. This is the difference between restaurant-quality and soggy homemade.
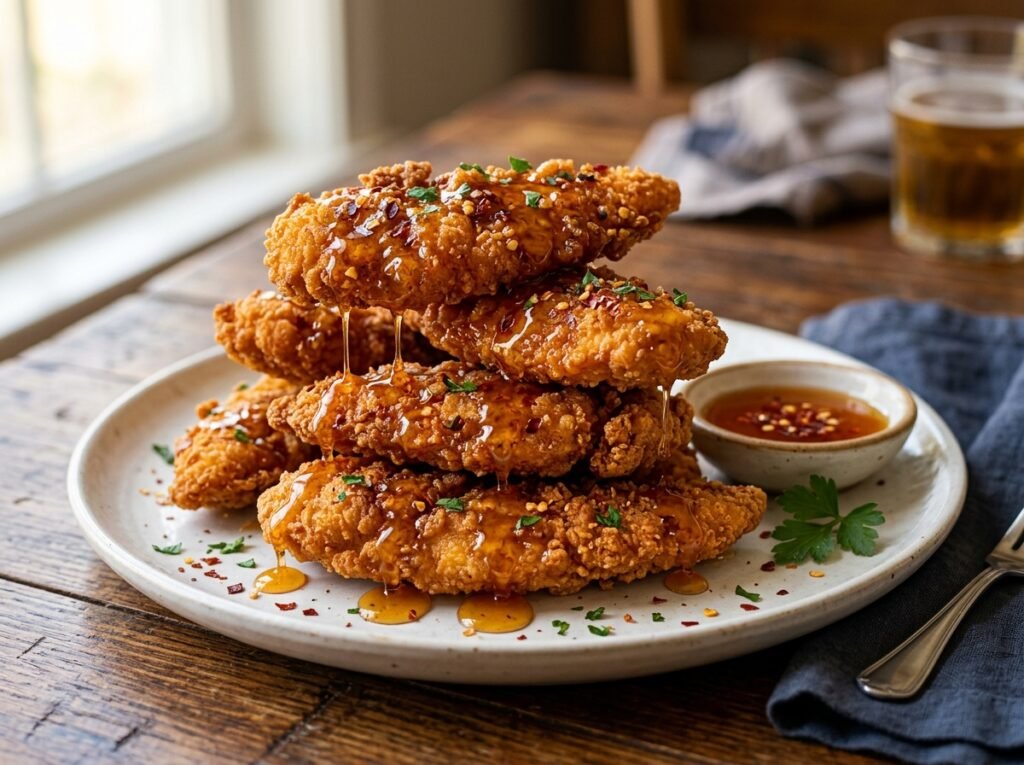
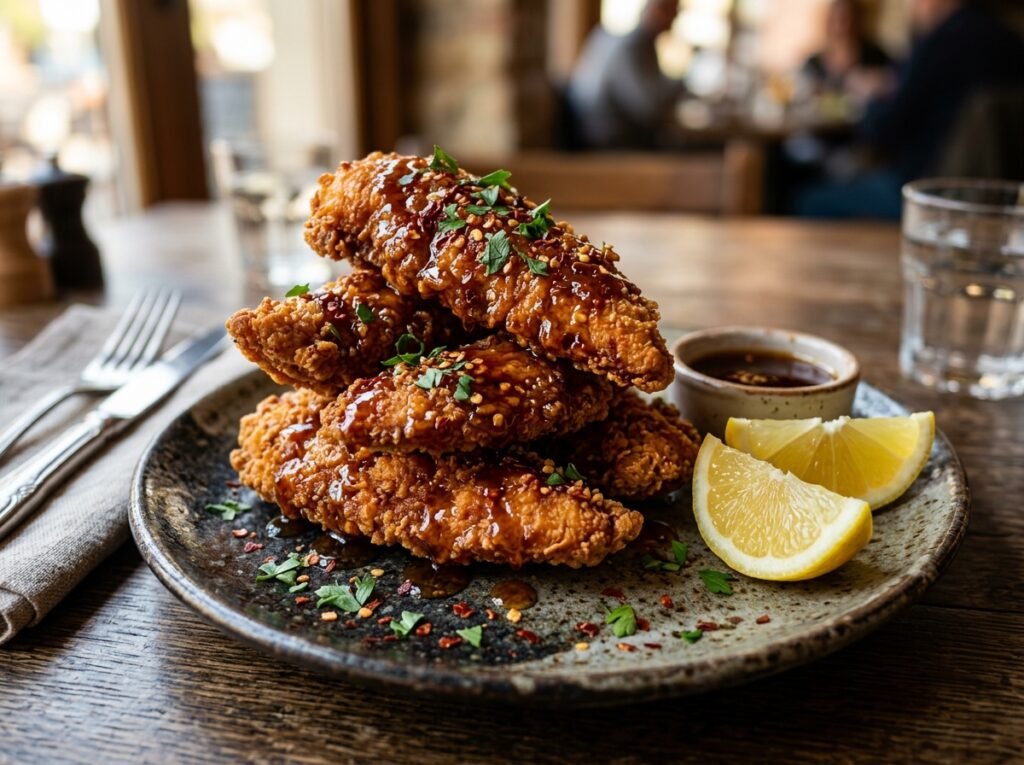
Step 8: Garnish and Serve Immediately
Transfer glazed tenders to a serving platter. Sprinkle with additional crushed red pepper flakes and a small pinch of flaky sea salt (Maldon is perfect here). The flaky salt adds textural contrast and a clean salinity that balances the sweet heat.
Serve immediately while the contrast between the crispy exterior and juicy interior is at its peak. These are best eaten within 15 minutes of glazing, though the structural integrity of the crust holds up better than traditional fried chicken due to the starch content.
Pair with ranch, blue cheese dressing, or my personal favorite—a simple squeeze of fresh lemon to brighten the richness.
Hot Honey Chicken Tenders Recipe – Crispy Better Than Takeout
Ingredients
Equipment
Method
- Submerge your chicken tenderloins in the seasoned buttermilk mixture. This isn’t just for flavor; the lactic acid initiates Protein Denaturation, breaking down the tough muscle fibers. Let this sit for at least 30 minutes.
- Whisk together your flour, cornstarch, and spices. The cornstarch is vital because it inhibits excessive gluten development, ensuring the Hot honey chicken tenders develop a brittle, crispy shell rather than a bready one. Press the chicken firmly into the flour to create “crags.”
- Heat your oil to exactly 350°F / 177°C. Carefully drop the tenders in, ensuring you do not crowd the pan. This maintains the temperature needed for the Maillard Reaction to occur efficiently, turning the crust a deep golden brown.
- Once the internal temperature hits 165°F / 74°C, move the chicken to a wire cooling rack. Do not use paper towels, as they trap steam and soften the bottom. Let them rest for 2 minutes to allow the crust to fully set.
- Whisk the hot honey, melted Kerrygold butter, and hot sauce together. Lightly brush the glaze over the tenders. By waiting for the rest period to end, the glaze sits on top of the “glass” crust rather than soaking into it.
Notes
- The Deep-Fry Thermometer: You cannot eyeball oil temperature. If the oil is at 325°F, your tenders will be greasy; at 375°F, the honey in the breading will burn before the chicken is cooked. I recommend the Taylor Precision Products classic dial or a ThermoPro Digital probe.
- Heavy-Bottomed Dutch Oven: Avoid thin aluminum pots. A Lodge Cast Iron Dutch Oven (available at Walmart or Target) holds heat much better, meaning the oil temperature won’t plummet when you drop the cold chicken in.
- The Wire Cooling Rack: This is non-negotiable. If you set fried chicken on paper towels, the bottom “sweats” and goes soggy. A stainless steel wire rack allows air to circulate 360 degrees around the Hot honey chicken tenders, locking in the crunch.
- Instant-Read Meat Thermometer: To ensure you hit that safe 165°F (74°C) without overcooking the meat into rubber, a Thermapen or a reliable Weber digital thermometer is a must-have for any food scientist.
- Air Fryer (Optional): If you are skipping the oil, use a basket-style air fryer like the Ninja Foodi or Instant Vortex. The rapid air circulation is the only way to mimic the Maillard reaction without deep frying.
Chef John’s Insight 💭
There’s something almost ritualistic about the process of frying chicken properly. The careful brine, the patient rest periods, the vigilant temperature monitoring—none of it is fast, and none of it should be. When I was learning this craft, an old line cook told me that great fried chicken is 80% patience and 20% heat. He was right. The hot honey glaze is a modern twist, but it respects the fundamentals. It doesn’t try to hide imperfections with sugar and spice—it amplifies what’s already excellent. The crunch, the juice, the heat, the sweet. Each element exists because you refused to rush. That’s the real recipe. Good cooking isn’t about shortcuts; it’s about knowing which steps you earn the right to skip—and this recipe has none.
— Chef John, The Flavor Bazaar
Nutrition Information (Per Serving)
Based on 6 servings (approximately 3-4 tenders per serving)
| Nutrient | Amount Per Serving |
|---|---|
| Calories | 485 kcal |
| Protein | 34g |
| Total Fat | 18g |
| Saturated Fat | 6g |
| Carbohydrates | 48g |
| Fiber | 1g |
| Sugars | 26g |
| Sodium | 680mg |
| Cholesterol | 105mg |
Note: Nutrition values are estimates and will vary based on specific brands and frying method. Deep frying will increase fat content compared to air frying.
USDA Food Safety Temperature Guide
| Food Item | USDA Minimum Safe Temp | Chef John’s Target |
|---|---|---|
| Chicken tenders (all poultry) | 165°F / 74°C | 165°F / 74°C |
| Frying oil (optimal) | N/A | 350°F / 177°C |
| Danger Zone (bacterial growth) | 40–140°F / 4–60°C | Keep chicken out of this range |
| Holding temp (if keeping warm) | 140°F / 60°C minimum | 150°F / 65°C in low oven |
Important: Use an instant-read thermometer inserted into the thickest part of the tender. If you’re frying from a brine, the chicken may appear slightly pink near the bone due to nitrate interaction—temperature, not color, determines doneness.
“When storing your Hot honey chicken tenders, make sure they are completely cool before sealing the container. This prevents condensation from ruining the crust of your Hot honey chicken tenders during refrigeration.”
Storage & Reheating Guide
| Storage Method | Duration | Best Reheating Method |
|---|---|---|
| Refrigerator (unglazed chicken) | 3-4 days in airtight container | Air fryer at 375°F for 5-6 minutes |
| Refrigerator (glazed chicken) | 2-3 days in airtight container | Oven at 400°F on wire rack for 8-10 minutes |
| Freezer (unglazed, recommended) | Up to 3 months | Thaw in fridge overnight, then air fry at 375°F for 8-10 minutes |
| Freezer (glazed, not recommended) | Up to 2 months | Texture degrades; glaze becomes sticky and separates |
Pro Tip: Always reheat on a wire rack, never in the microwave. The microwave creates steam that destroys the crispy coating. If reheating glazed chicken, expect some textural softening—it’s unavoidable but still delicious.
Frequently Asked Questions
Can I make these Hot honey chicken tenders in an air fryer?
Yes! While deep frying is traditional, you can get amazing results with an air fryer as long as you use an oil spray.”
Can I make this recipe gluten-free?
Yes, but with modifications. Replace the all-purpose flour with a gluten-free 1:1 baking blend (Bob’s Red Mill works well) and increase the cornstarch ratio to 60% starch, 40% GF flour. The texture will be slightly more delicate but still crispy. Ensure your baking powder is certified gluten-free.
What if I don’t have buttermilk?
Make your own by combining 2 cups whole milk with 2 tablespoons white vinegar or lemon juice. Let it sit for 10 minutes until it curdles. The acidity is what matters for tenderizing, and this substitute delivers that. I’ve tested both side-by-side with nearly identical results.
Can I bake these instead of frying?
You can, but expect a different texture. Bake at 425°F on a wire rack over a baking sheet for 20-25 minutes, flipping halfway. Spray generously with oil before and after flipping. It won’t achieve the same shatter-crisp crust as frying, but it’s a lighter option that’s still flavorful.
How spicy is the hot honey glaze?
Moderately spicy with the recipe as written—about a 6 out of 10. The honey balances the heat significantly. If you want Nashville-level fire, double the cayenne and add a teaspoon of ghost pepper flakes. For milder versions, reduce crushed red pepper to ½ teaspoon.
Can I use chicken breasts instead of tenders?
Absolutely. Slice boneless, skinless chicken breasts into strips about ¾-inch thick. The brine time becomes even more important with breasts since they’re leaner and more prone to drying out. Fry time may increase to 8-9 minutes depending on thickness.
Related Recipes You’ll Love
If you enjoyed these hot honey chicken tenders, explore these other crowd-pleasers from The Flavor Bazaar:
[7 Amazing Crispy Air Fryer Chicken Wings Recipe]
[Easy Mexican Street Corn Salad Recipe]